Class
Correspondence table
| Age | Grade |
|---|---|
| 7 years old | [1] grade |
| 8 years old | [1, 2] grades |
| 9 years old | [2, 3] grades |
| 10 years old | [3, 4] grades |
| 11 years old | [4, 5] grades |
| 12 years old | [5, 6] grades |
| 13 years old | [6] grade |
Description
The Class module is designed to manage and organize classes within the educational environment. It provides functionalities for scheduling, managing start dates, and defining essential class attributes. This module ensures that managers can efficiently handle class-related tasks within their designated space.
Structure
The Class module consists of several key components:
- Schedule: Defines the days on which classes are held.
- Start Date: Specifies the date from which the classes commence.
- Name: The name of the class.
- Grade: The grade level of the class.
- Class Type: The type of class (e.g., lecture, lab, seminar).
Permissions
Only managers of the current space have access to this module. Managers have full authority to create, modify, delete, and manage all aspects of the Classes module.
Managers can manage all fields of a class only when the class is in Draft status. If a class is in Active status, managers can only add students or teachers. To remove a student from a class, other mechanisms within the student's file must be used.
Capabilities
- Schedule Management: Allows managers to define and adjust the schedule for classes, specifying the days on which classes will occur.
- Start Date Configuration: Enables managers to set and modify the start date for classes.
- Class Attribute Definition: Provides the ability to set basic attributes such as name, grade, and class type for each class.
Get Started
Navigate to the Class Module
Click on the Classes button in the header to access the Class module.

Create a New Class
- Click on the Create School Class button to create a new class.
- Fill in the required fields, such as the class name, grade, type
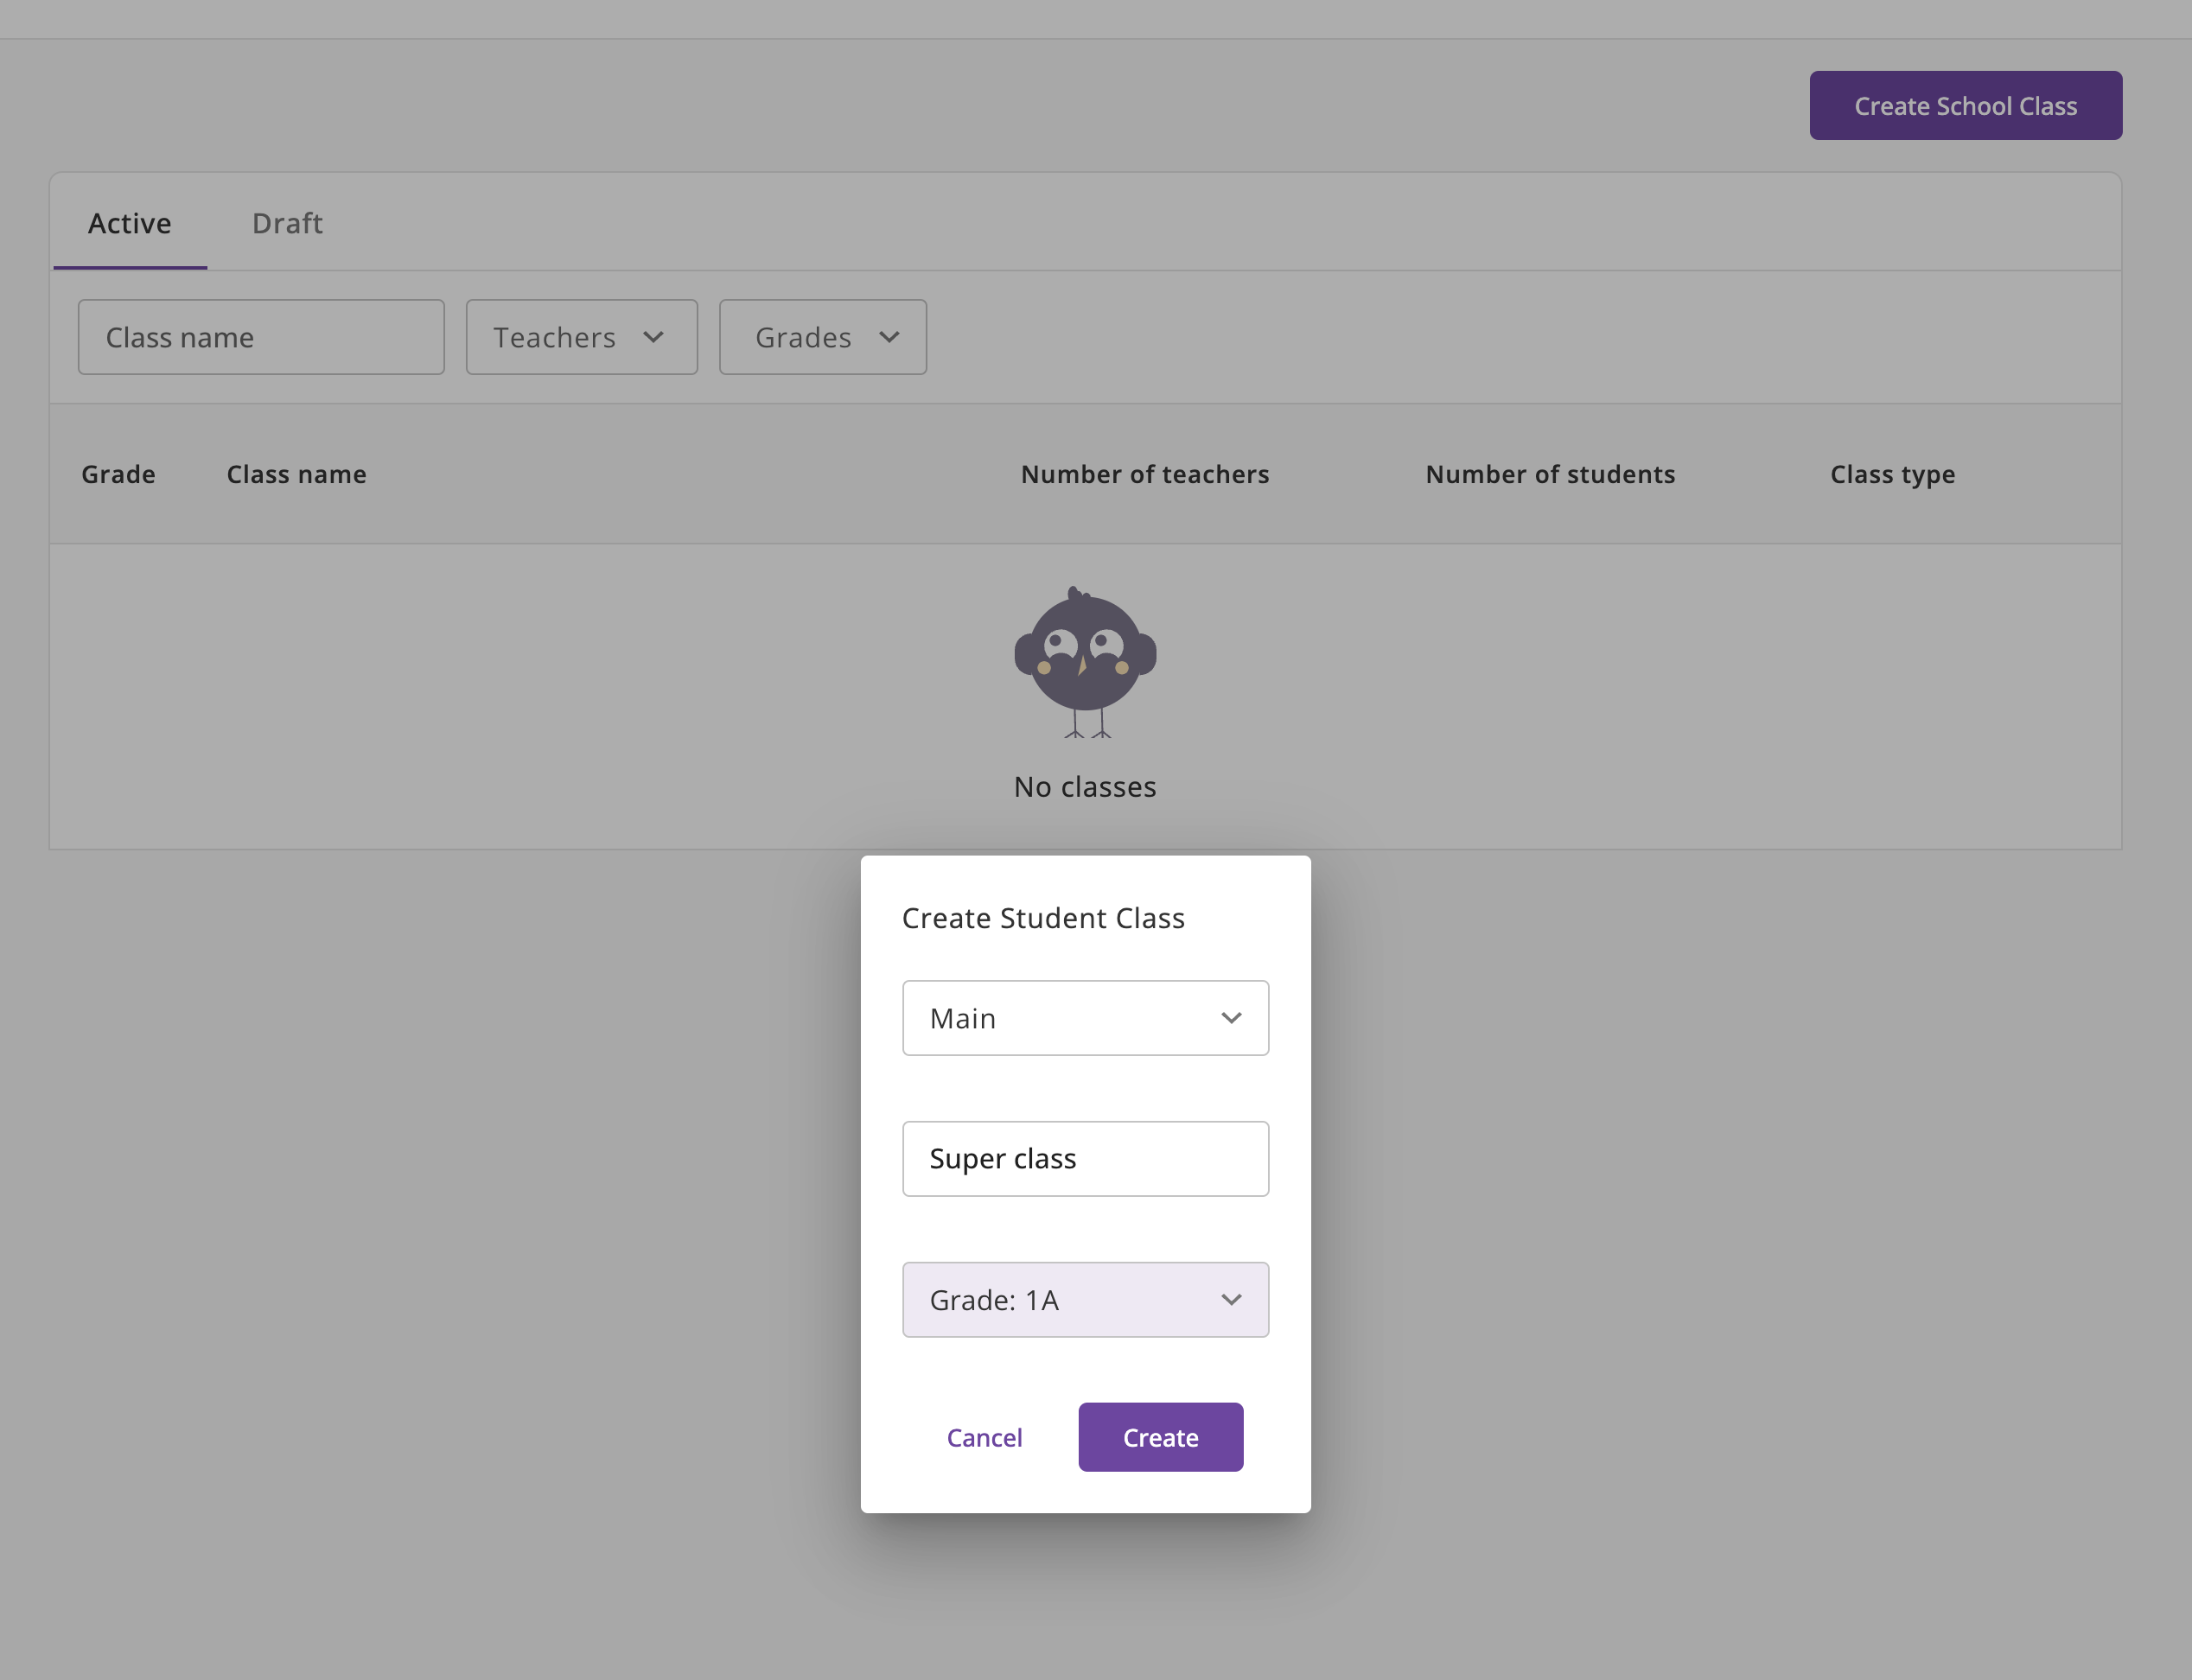
- Click Create to create the class.
- After creating the class, you can view and manage it in the Class module.
- Fill in the required fields, such as the class name, grade, type, schedule, and start date.
- Assign teachers and students to the class as needed.
- Add students to the class by selecting them from the list of available students.
- Click Save to save the changes.
Assign Teachers to a Class
- Open the class you want to assign teachers to in edit mode.
- Click on the Edit button.
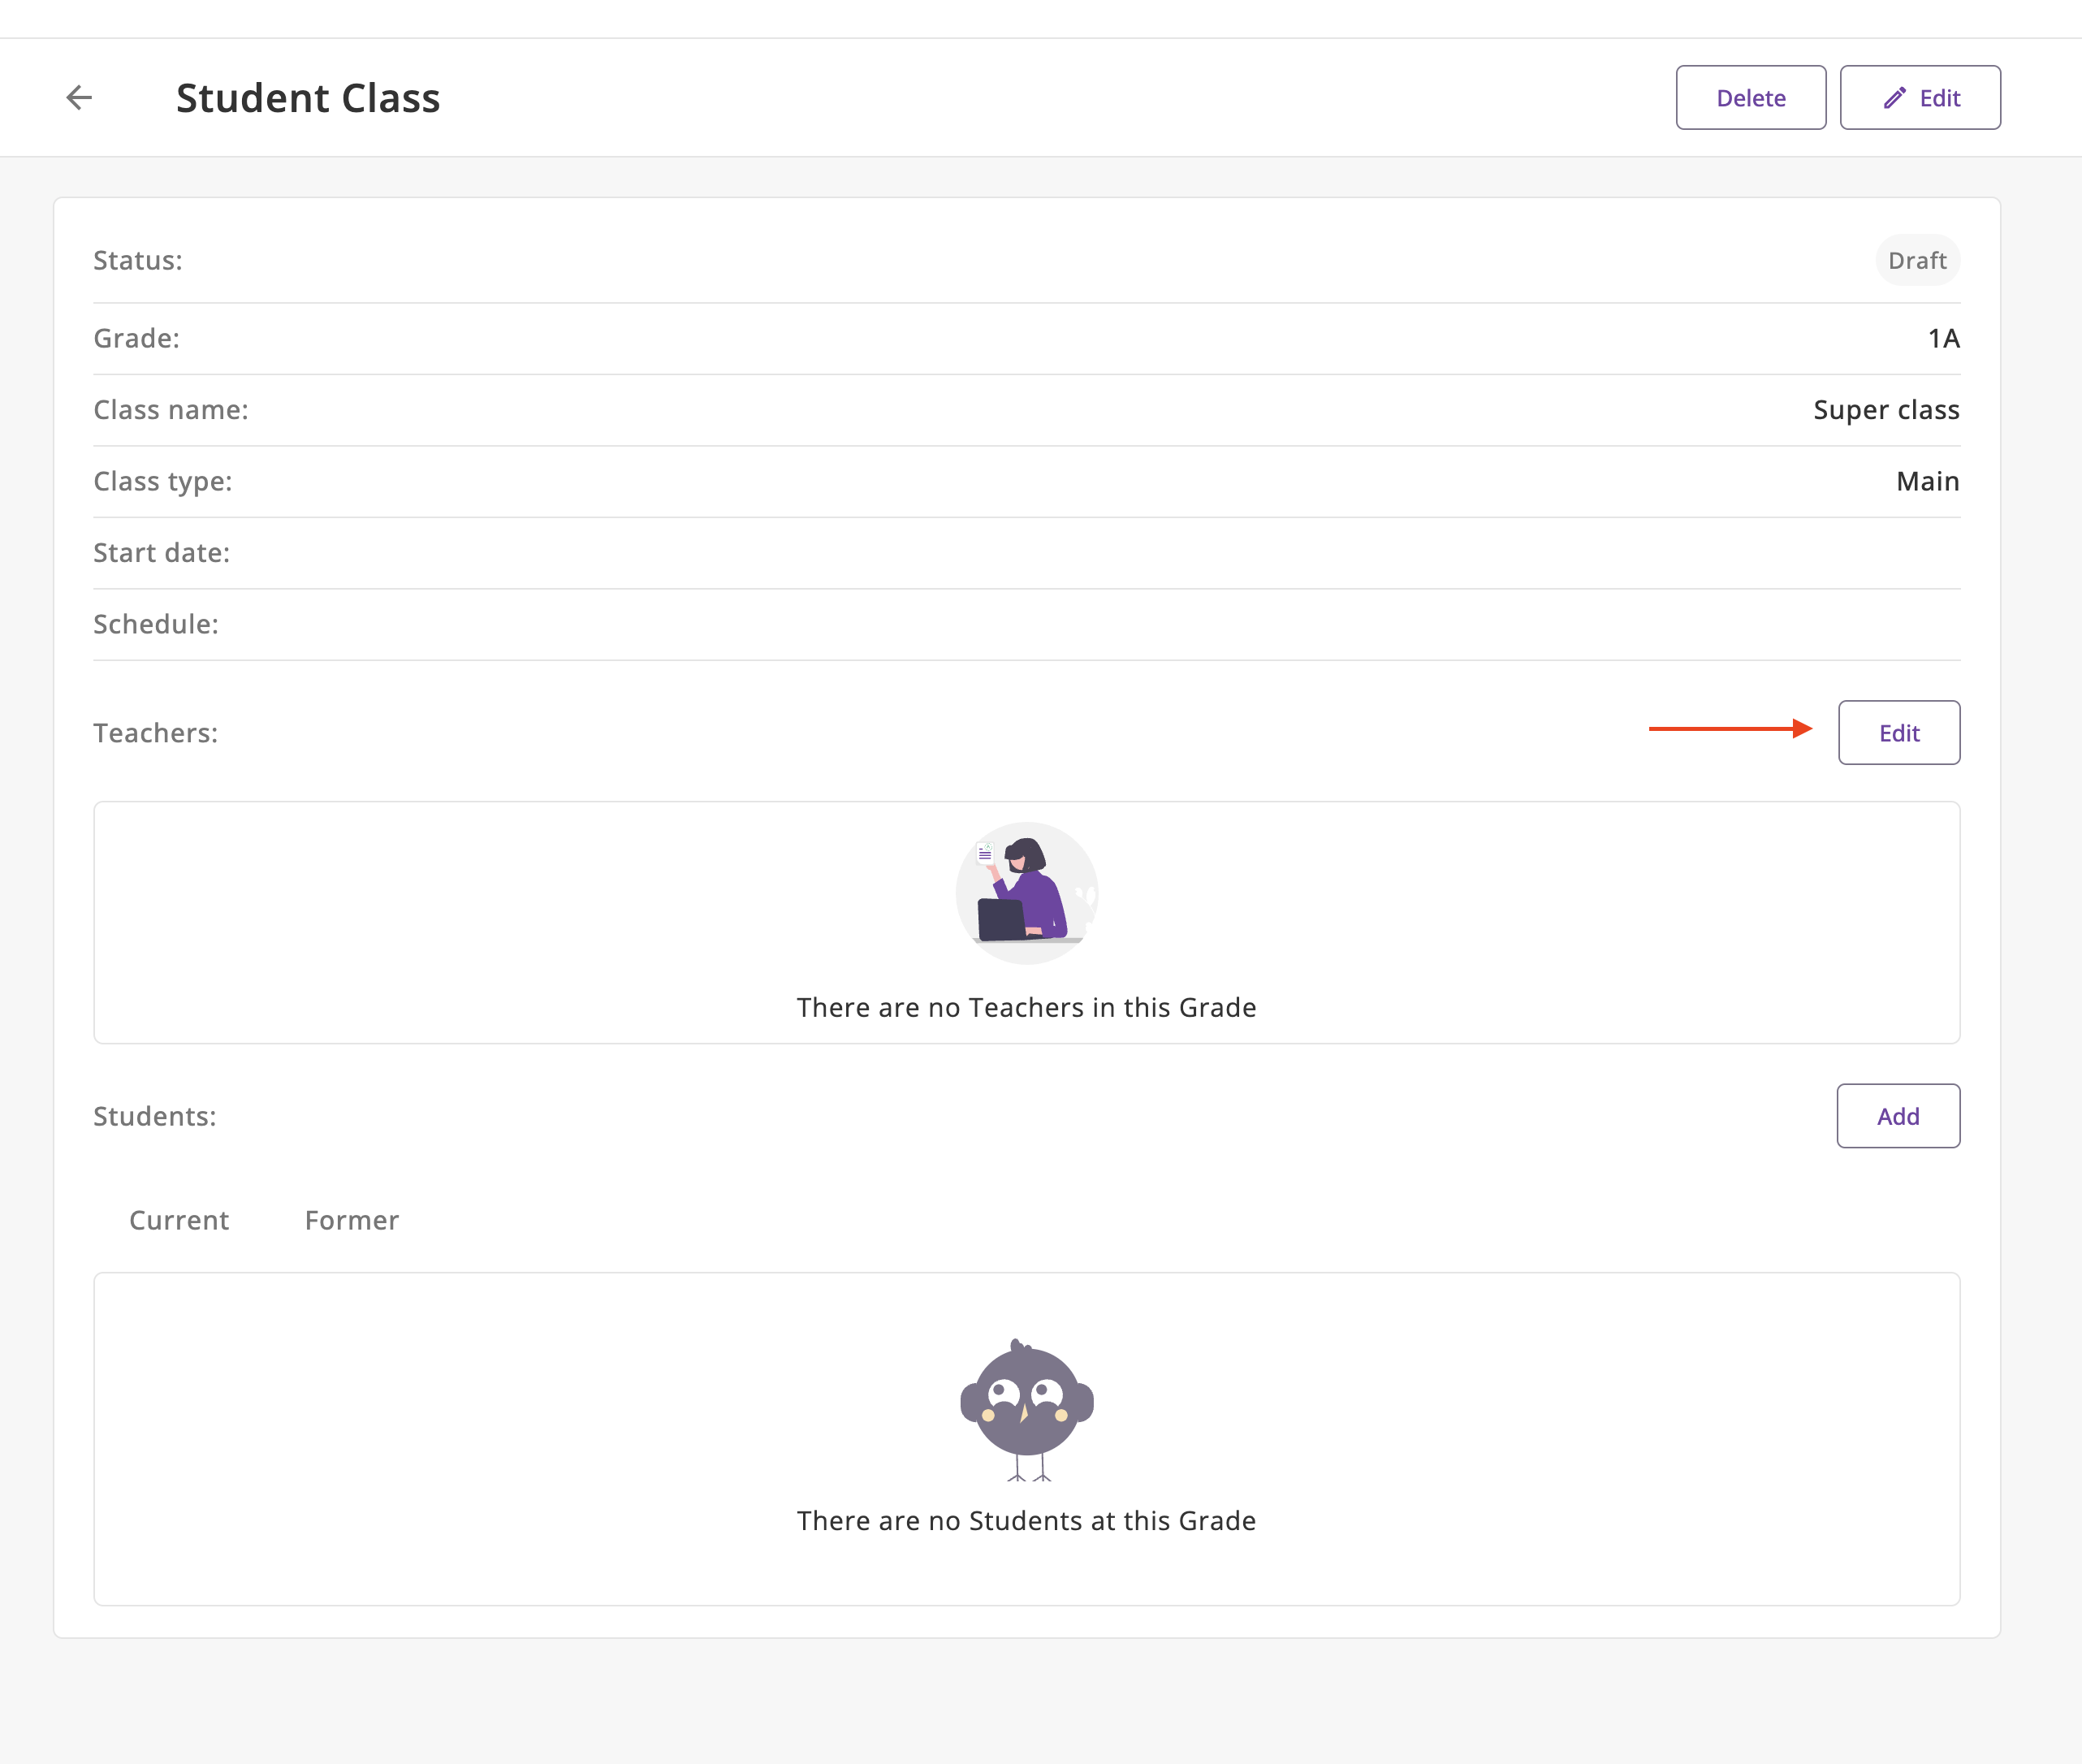
- Select the teachers you want to assign to the class.
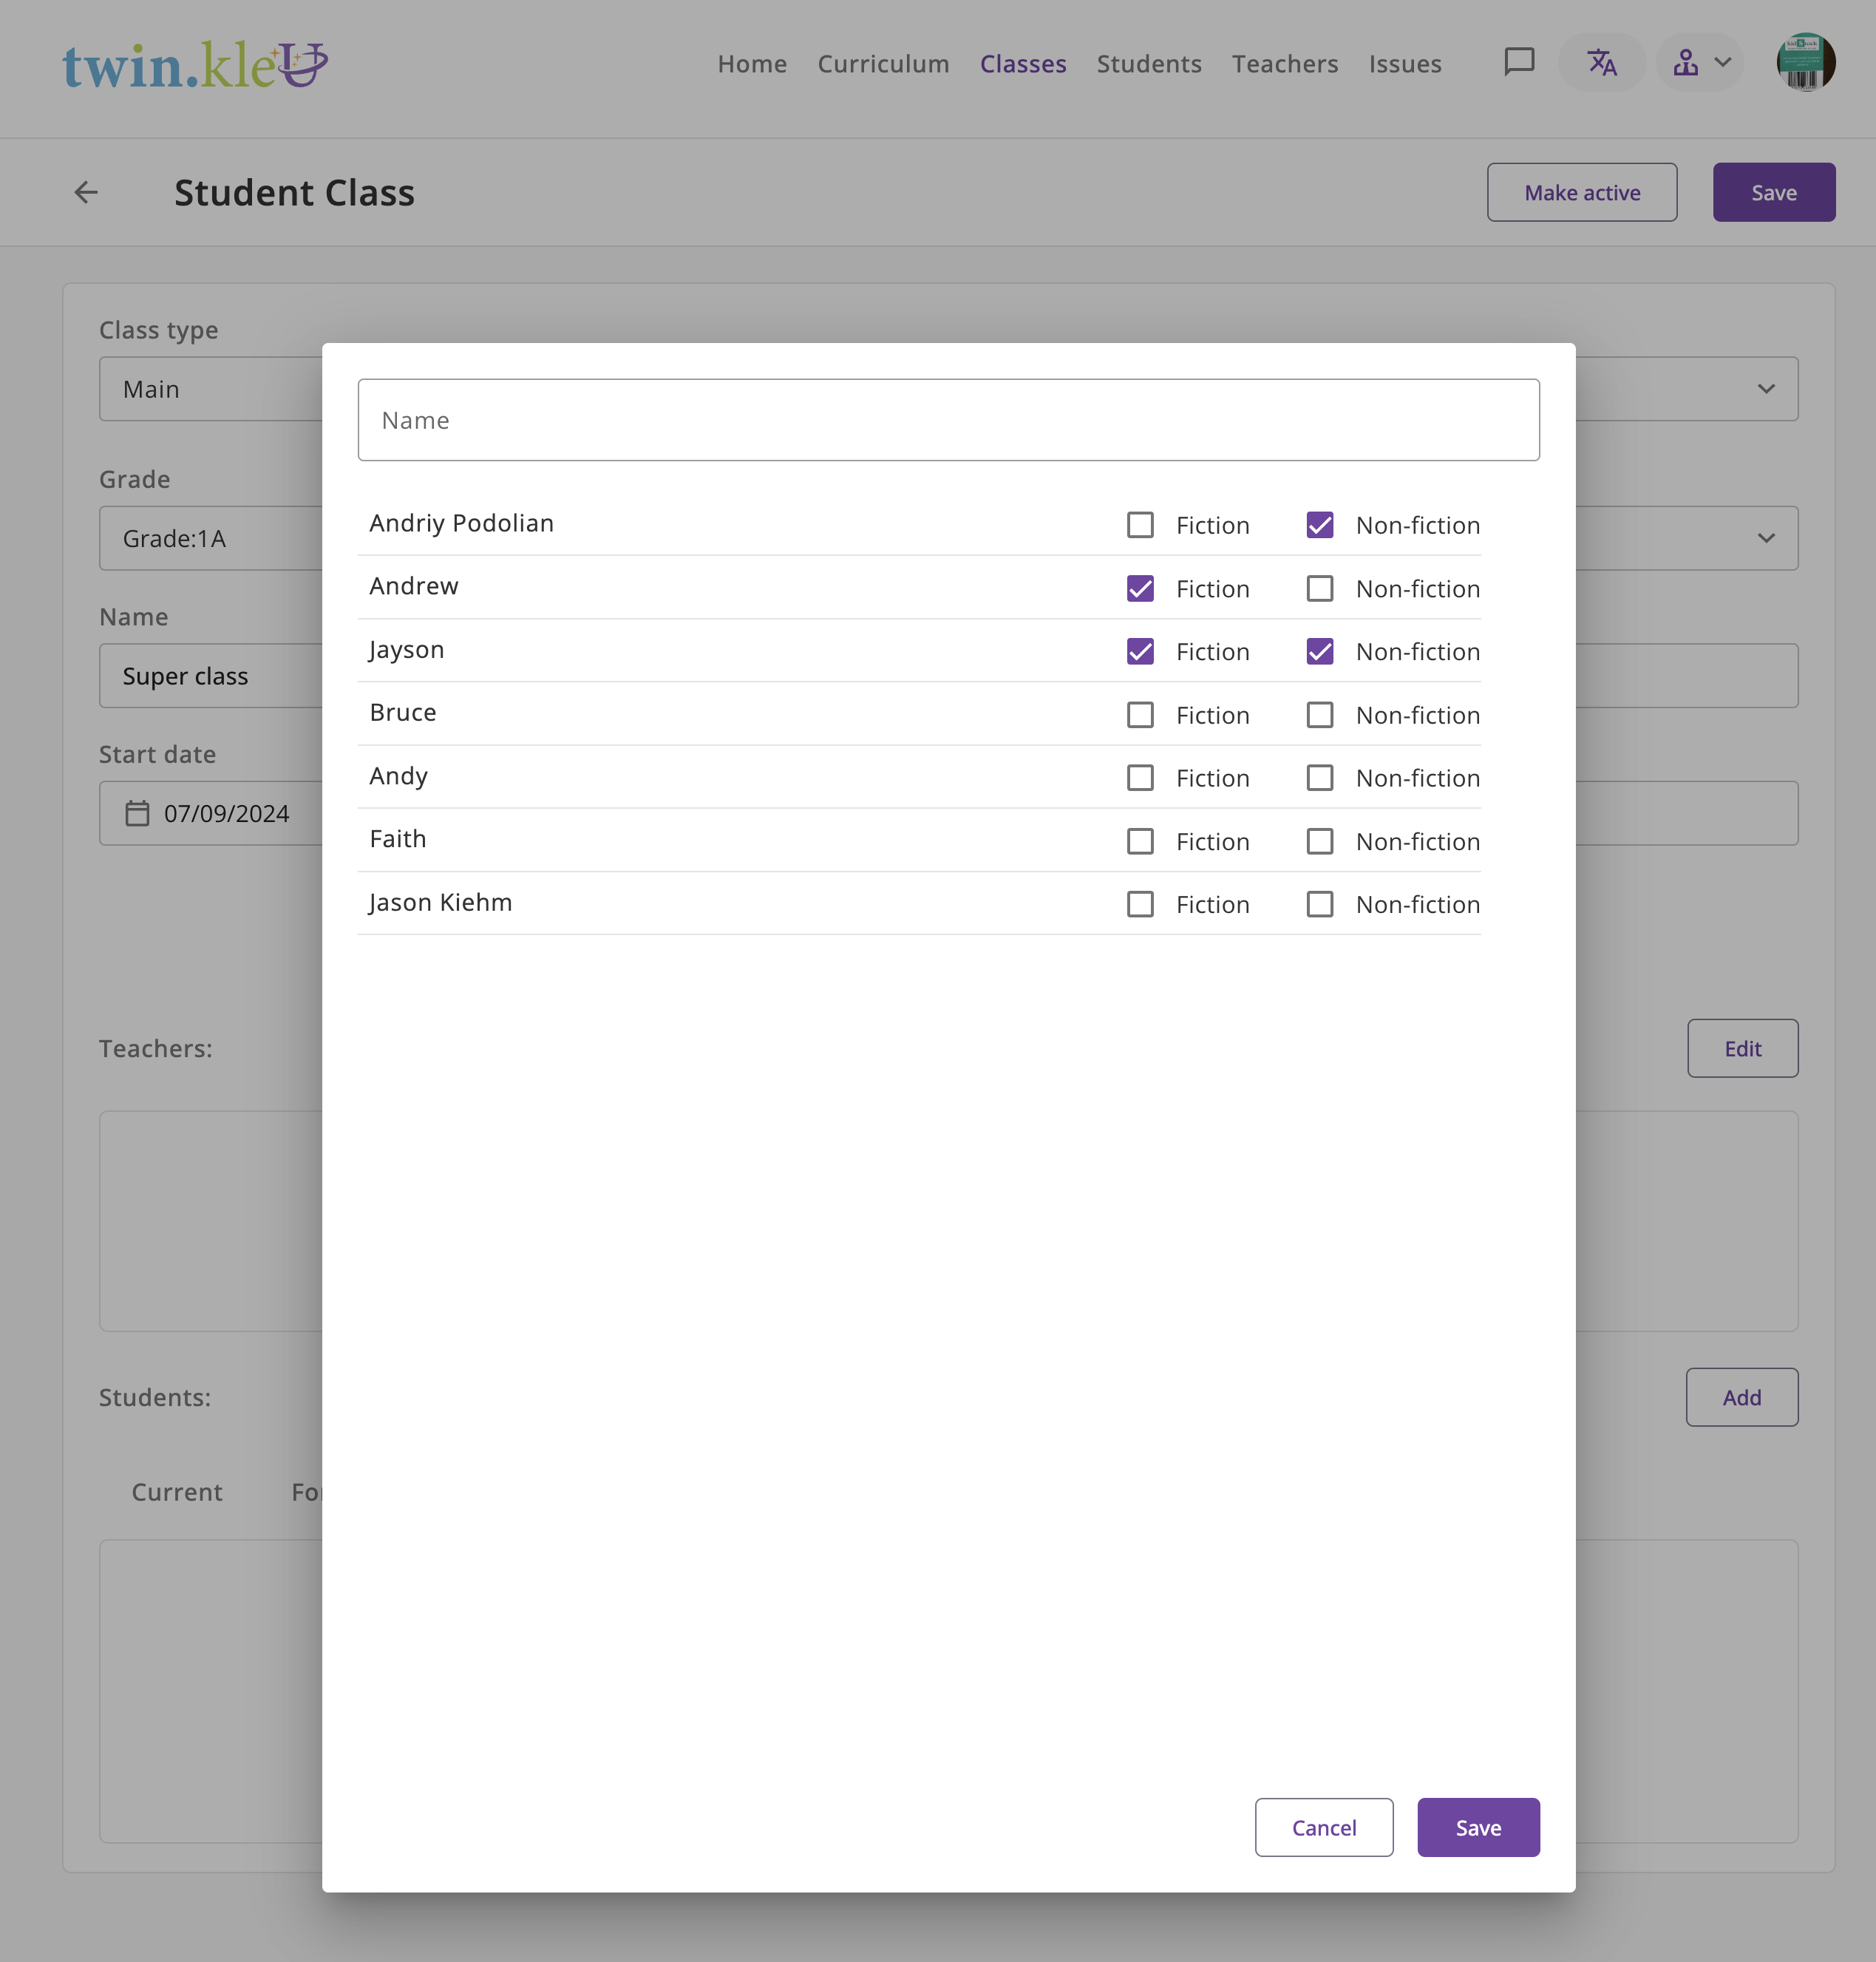
Assign Students to a Class
It is possible to appoint only those students who correspond to the grade level
You can watch the table above to see the correspondence between age and grade.
Also, the student must take the entrance test in the same space as the class and pass it.
- Open the class you want to assign students to in edit mode.
- Click on the Add button.