Lesson plan
About
The Lessonplan is a detailed educational planning tool. It provides a comprehensive schedule of lessons linked to class events in the calendar. Each lesson includes descriptions of the materials to be used and assigns a teacher to each session (calendar event).
Structure Description
The Lessonplan is structured to integrate seamlessly with the calendar system, ensuring that each educational session is properly planned and documented. The structure includes:
- Lesson Schedule: A timeline of all planned lessons with specific dates and times.
- Materials: Detailed descriptions of the materials required for each lesson.
- Teacher Assignment: Information on which teacher is assigned to each lesson.
Permissions Description
The permissions within the Lessonplan are as follows:
- Managers: Can create lesson plans and edit only those plans that are based on their own bookplan. Additionally, a manager can edit and create a lesson plan if they have been designated as the editor.
- Teachers: Has view-only access to the lesson plans assigned to them.
Capabilities
The Lessonplan offers the following capabilities:
- Lesson Planning: Allows administrators to create detailed lesson plans with specific dates and times.
- Material Management: Enables the addition and organization of educational materials for each lesson.
- Teacher Assignment: Facilitates the assignment of teachers to specific lessons, ensuring that each session is led by the appropriate educator.
- Calendar Integration: Synchronizes lesson plans with the calendar to provide a cohesive schedule for students and teachers.
Explanation
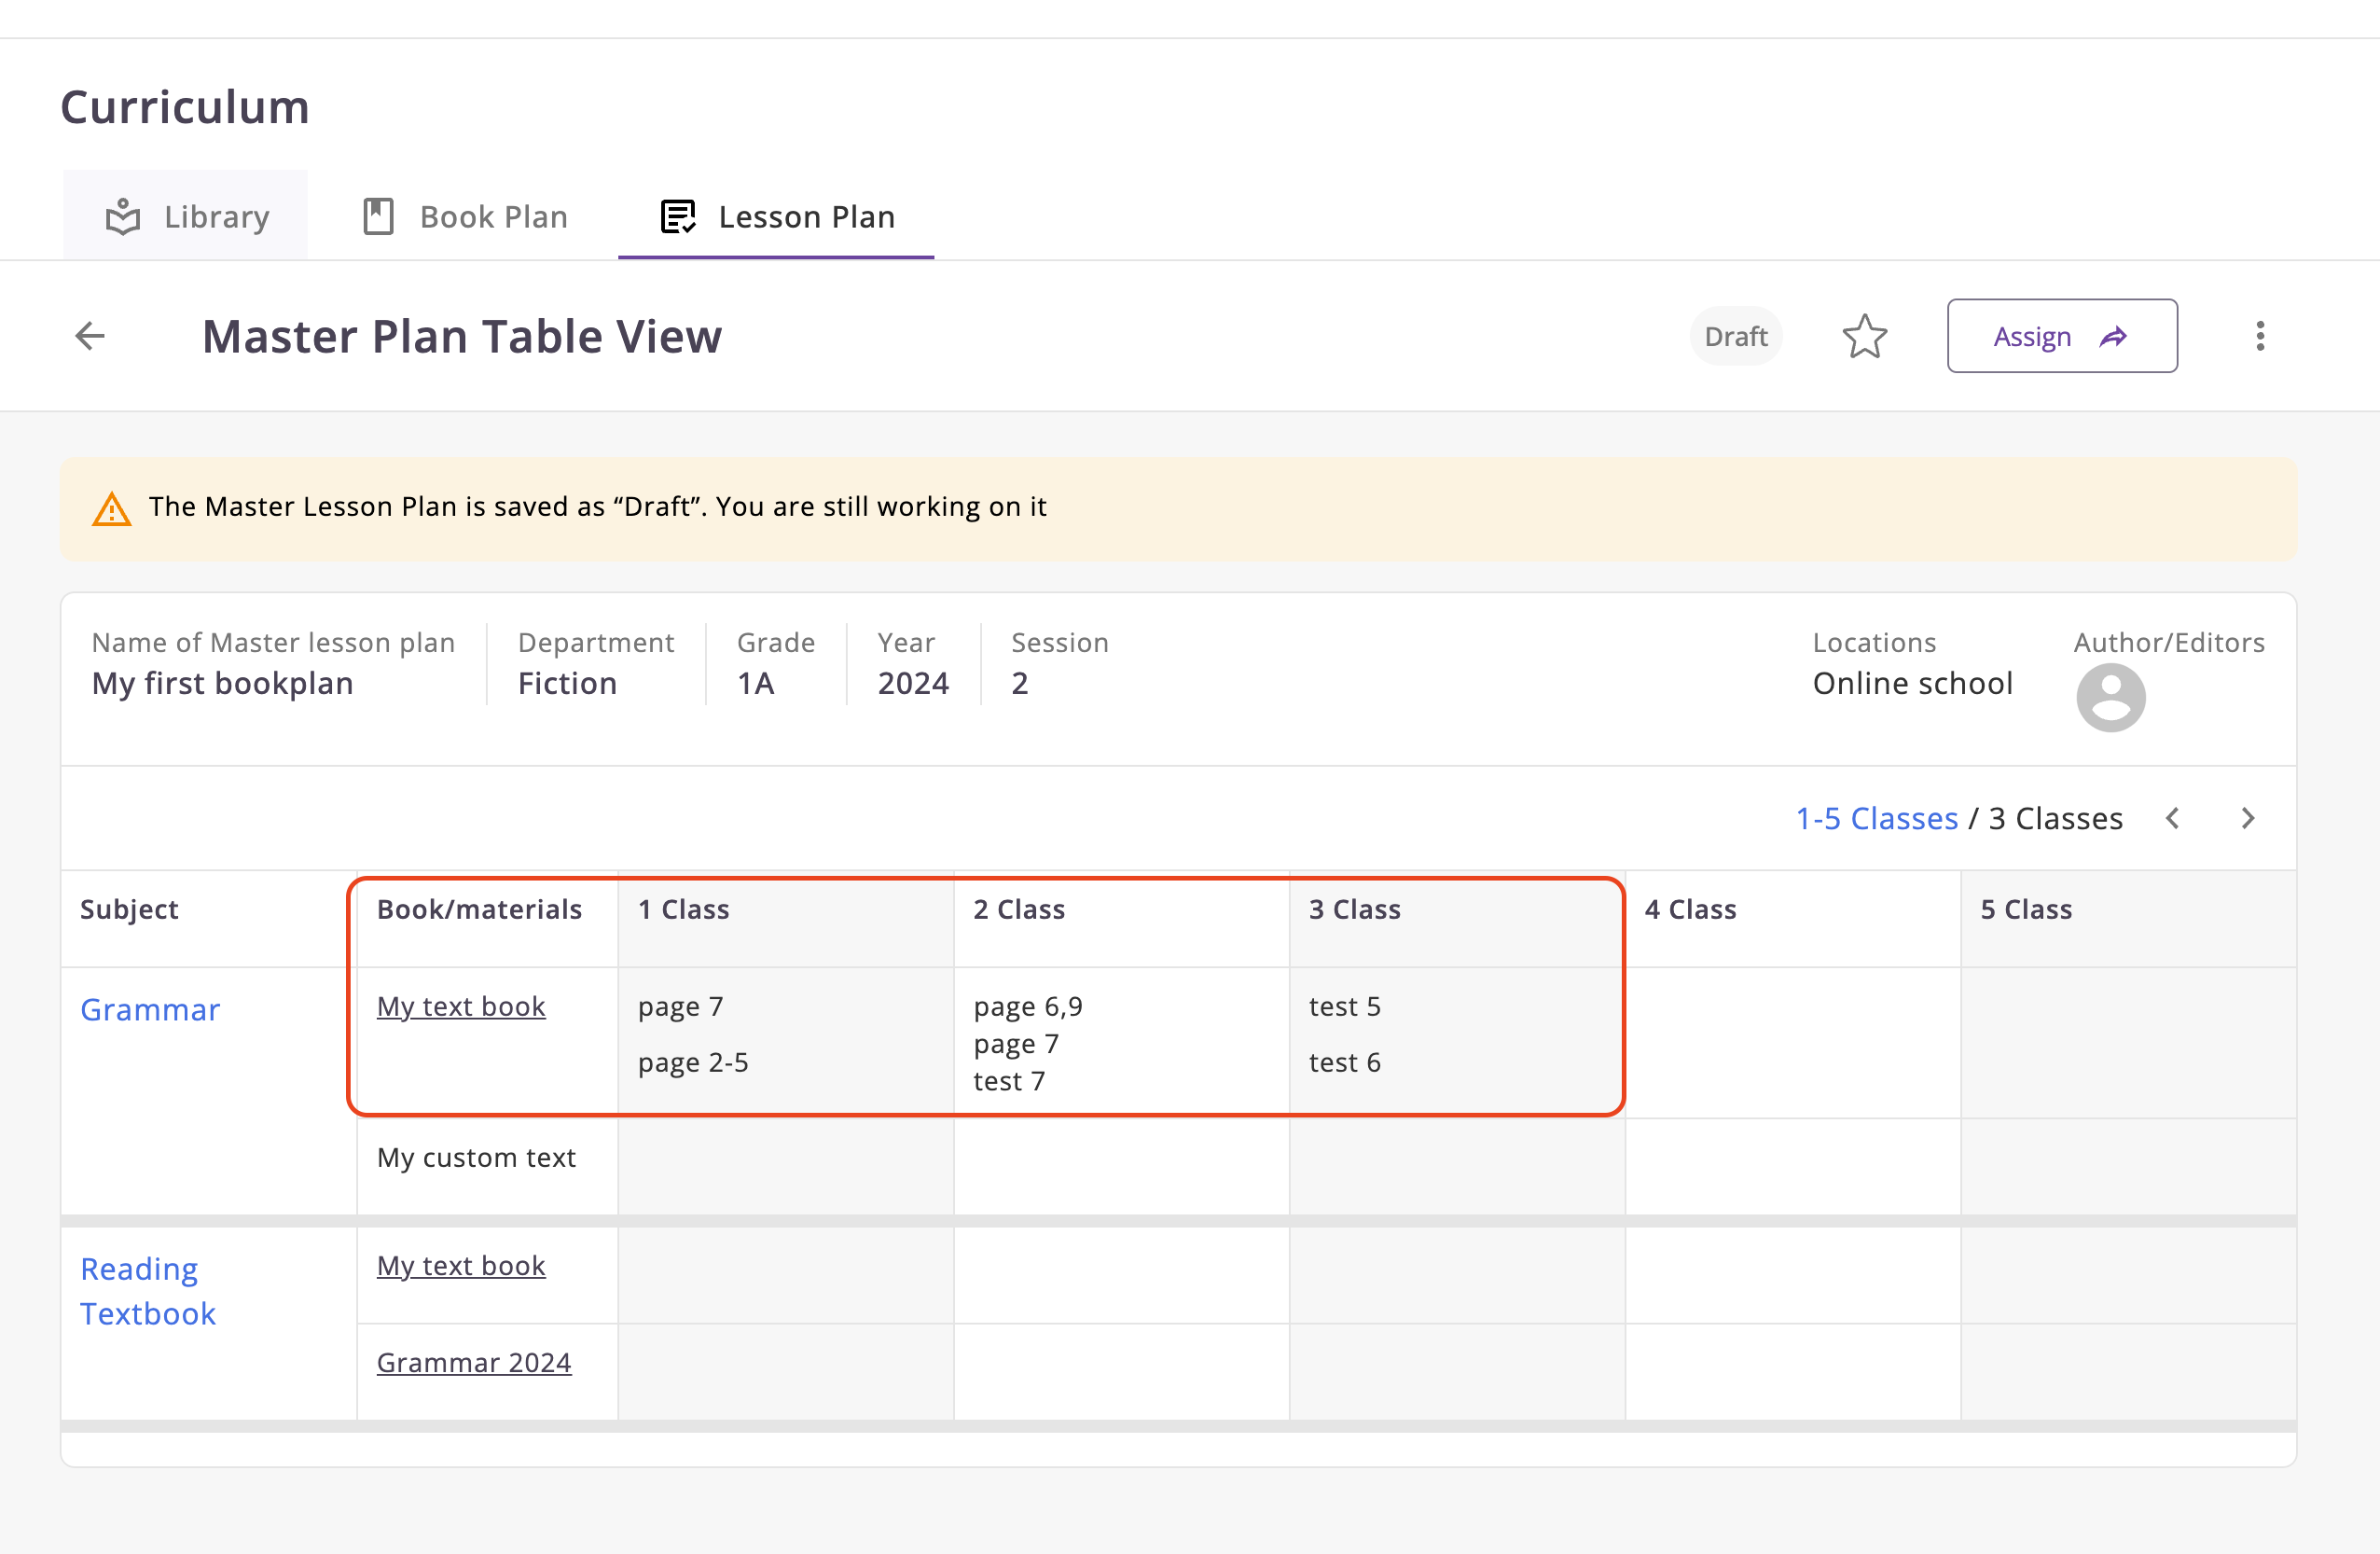
Master Lesson Plan
- If this item was added into some class, but not this.
- If this item was added into this class.
Please note that the identity is checked purely as the tape,
for example, if Lesson 1 = page 1, and you change page 1 to page 7 in class 1, then Lesson 7
will automatically be highlighted
Number of Classes
The counter of classes is calculated based on the number of classes in the book plan.
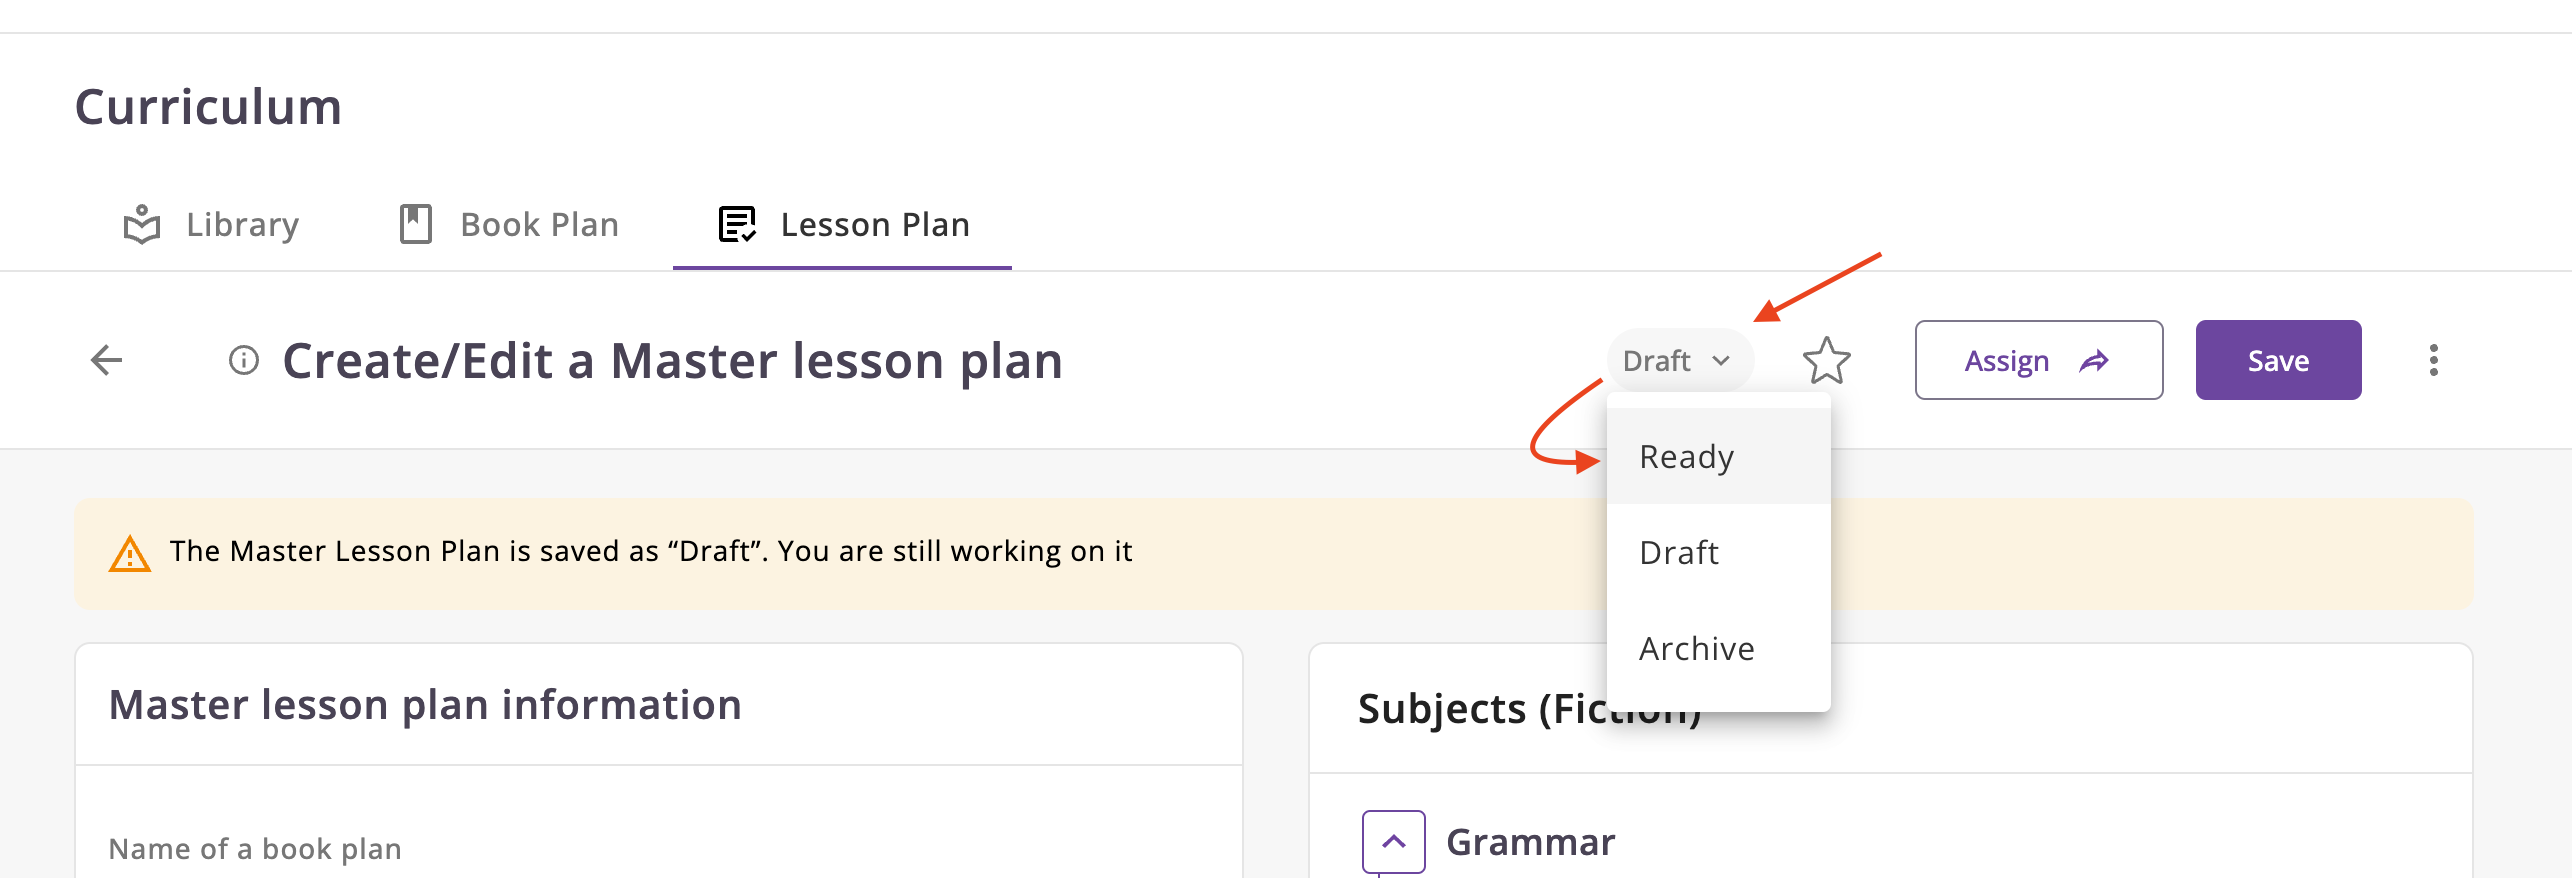
Statuses
- Draft - The lesson plan is in the process of being created and is not yet ready for use.
- Ready - The lesson plan is complete and ready for use.
- Archived - The lesson plan is no longer in use and has been archived.
How to Use
Creating a Lesson Plan
- As noted above, lesson plans can only be created based on a book plan. Therefore, you must first create a book plan and then proceed to it in edit mode to create a lesson plan.
- Set the status of the lesson plan to Active.
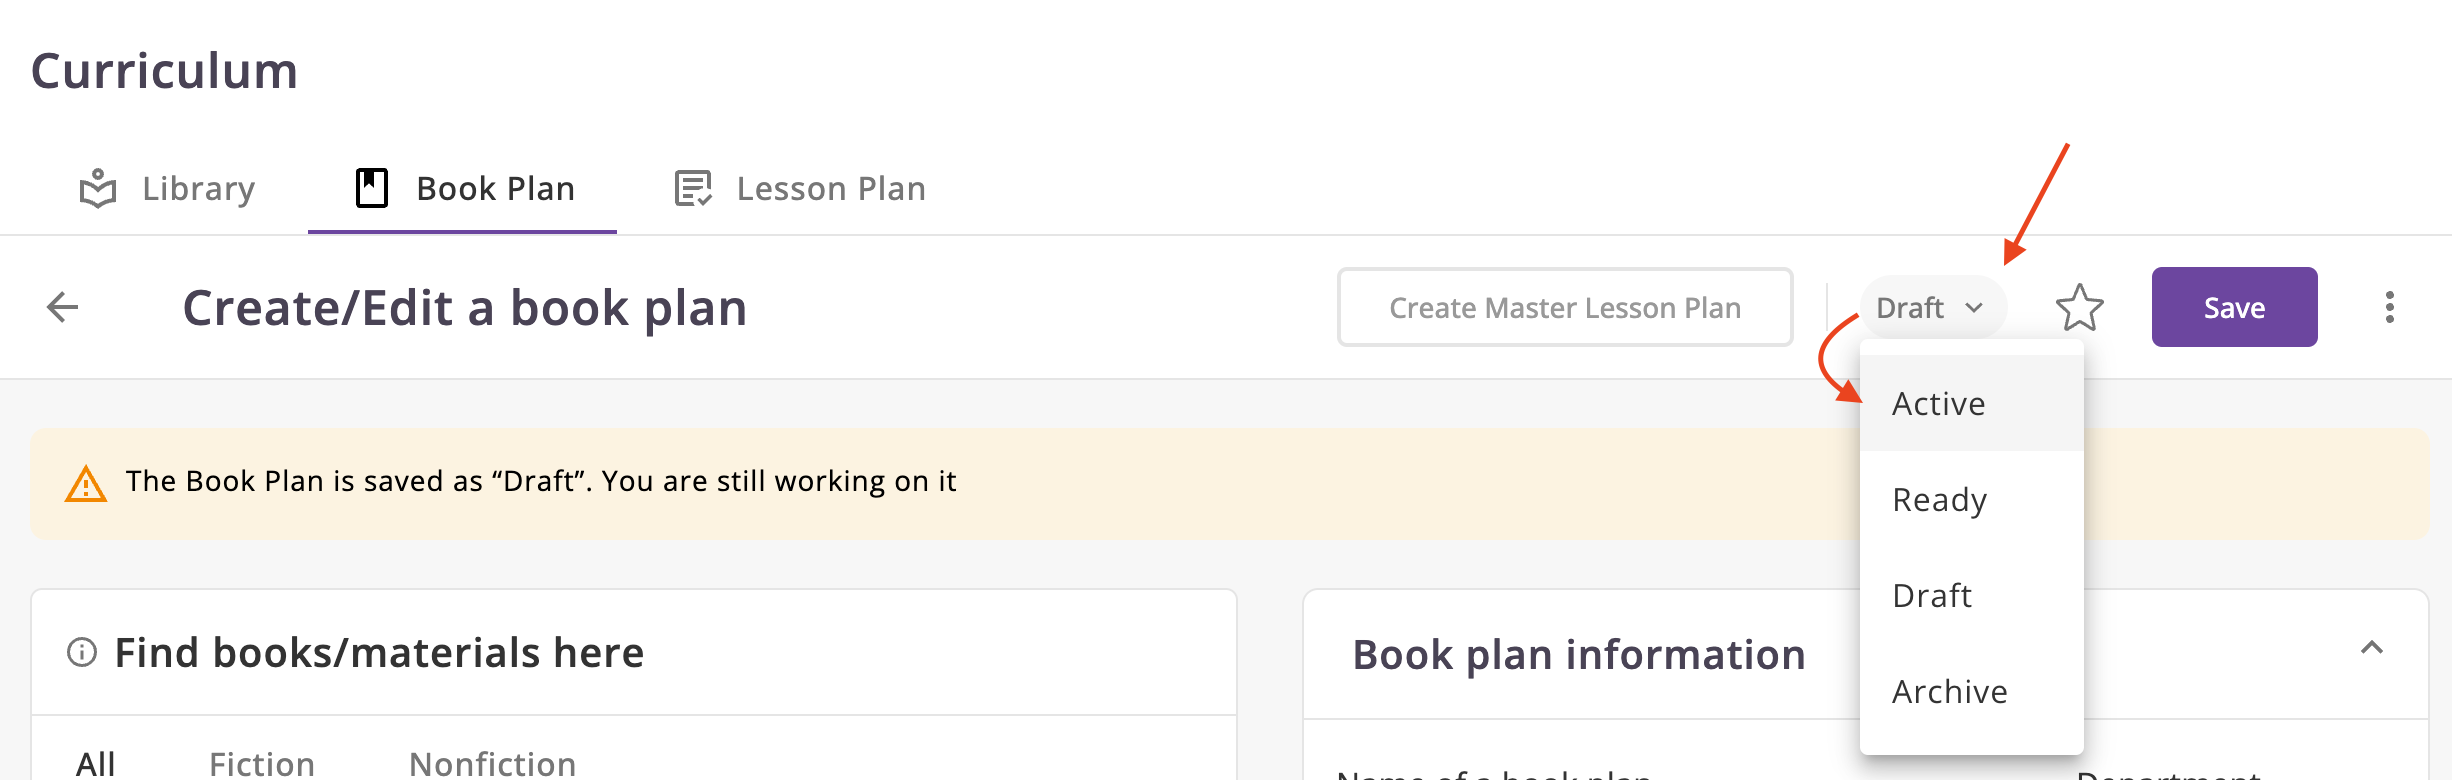
- Click on the Save button to save the changes.
- Click on the Create Lesson Plan button to create a new lesson plan.

- After that, you will see Open Master Lesson Plan button. Also, you can find the lesson plan in the list
of lesson plans.
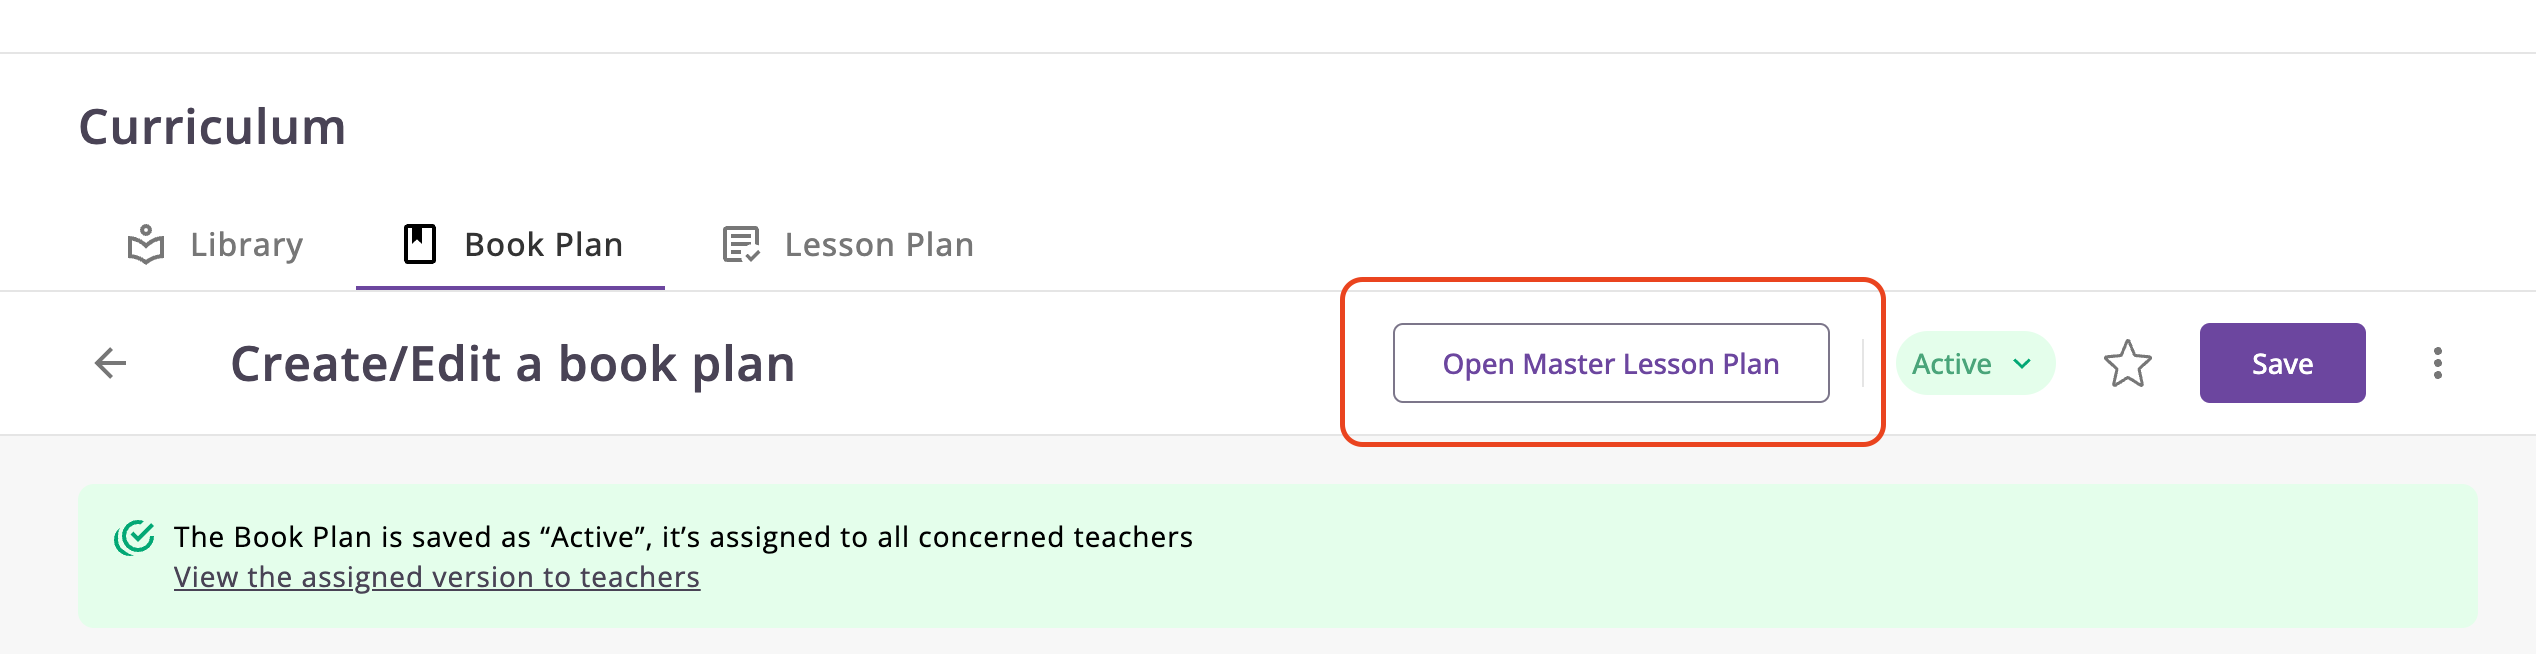
At this stage, the lesson plan has already been created, but it is not yet complete. Let's make it complete.
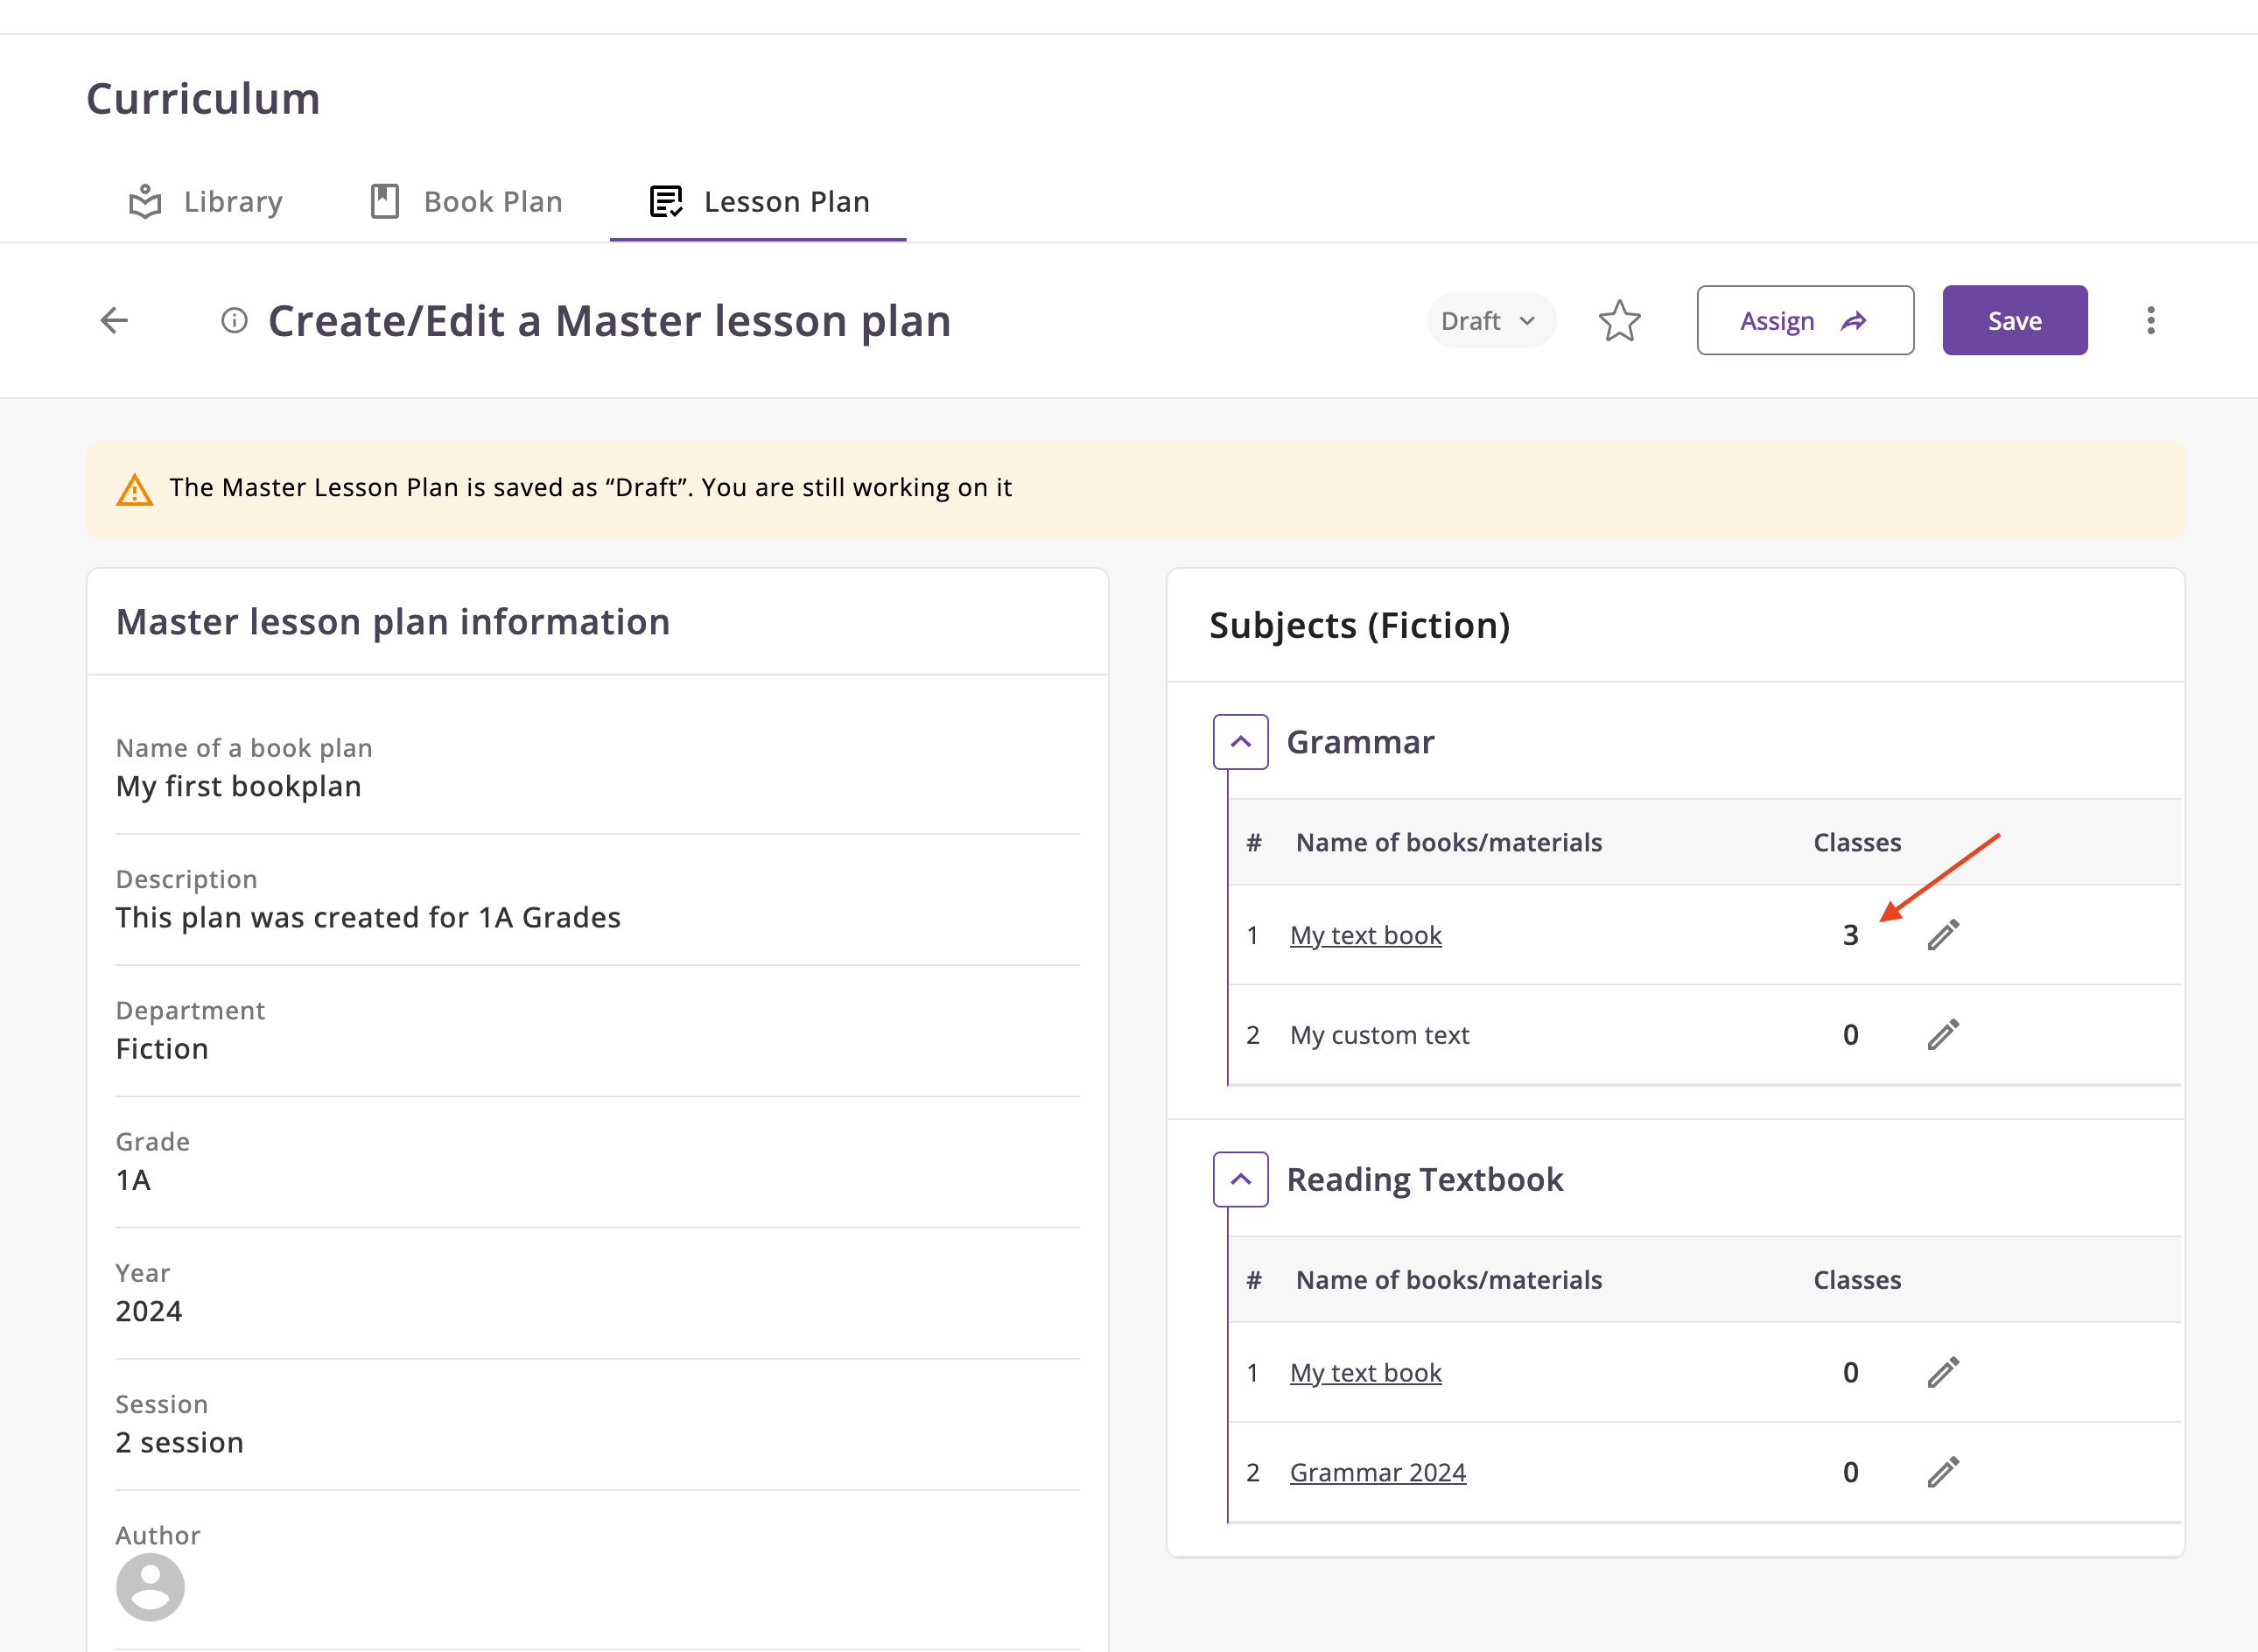
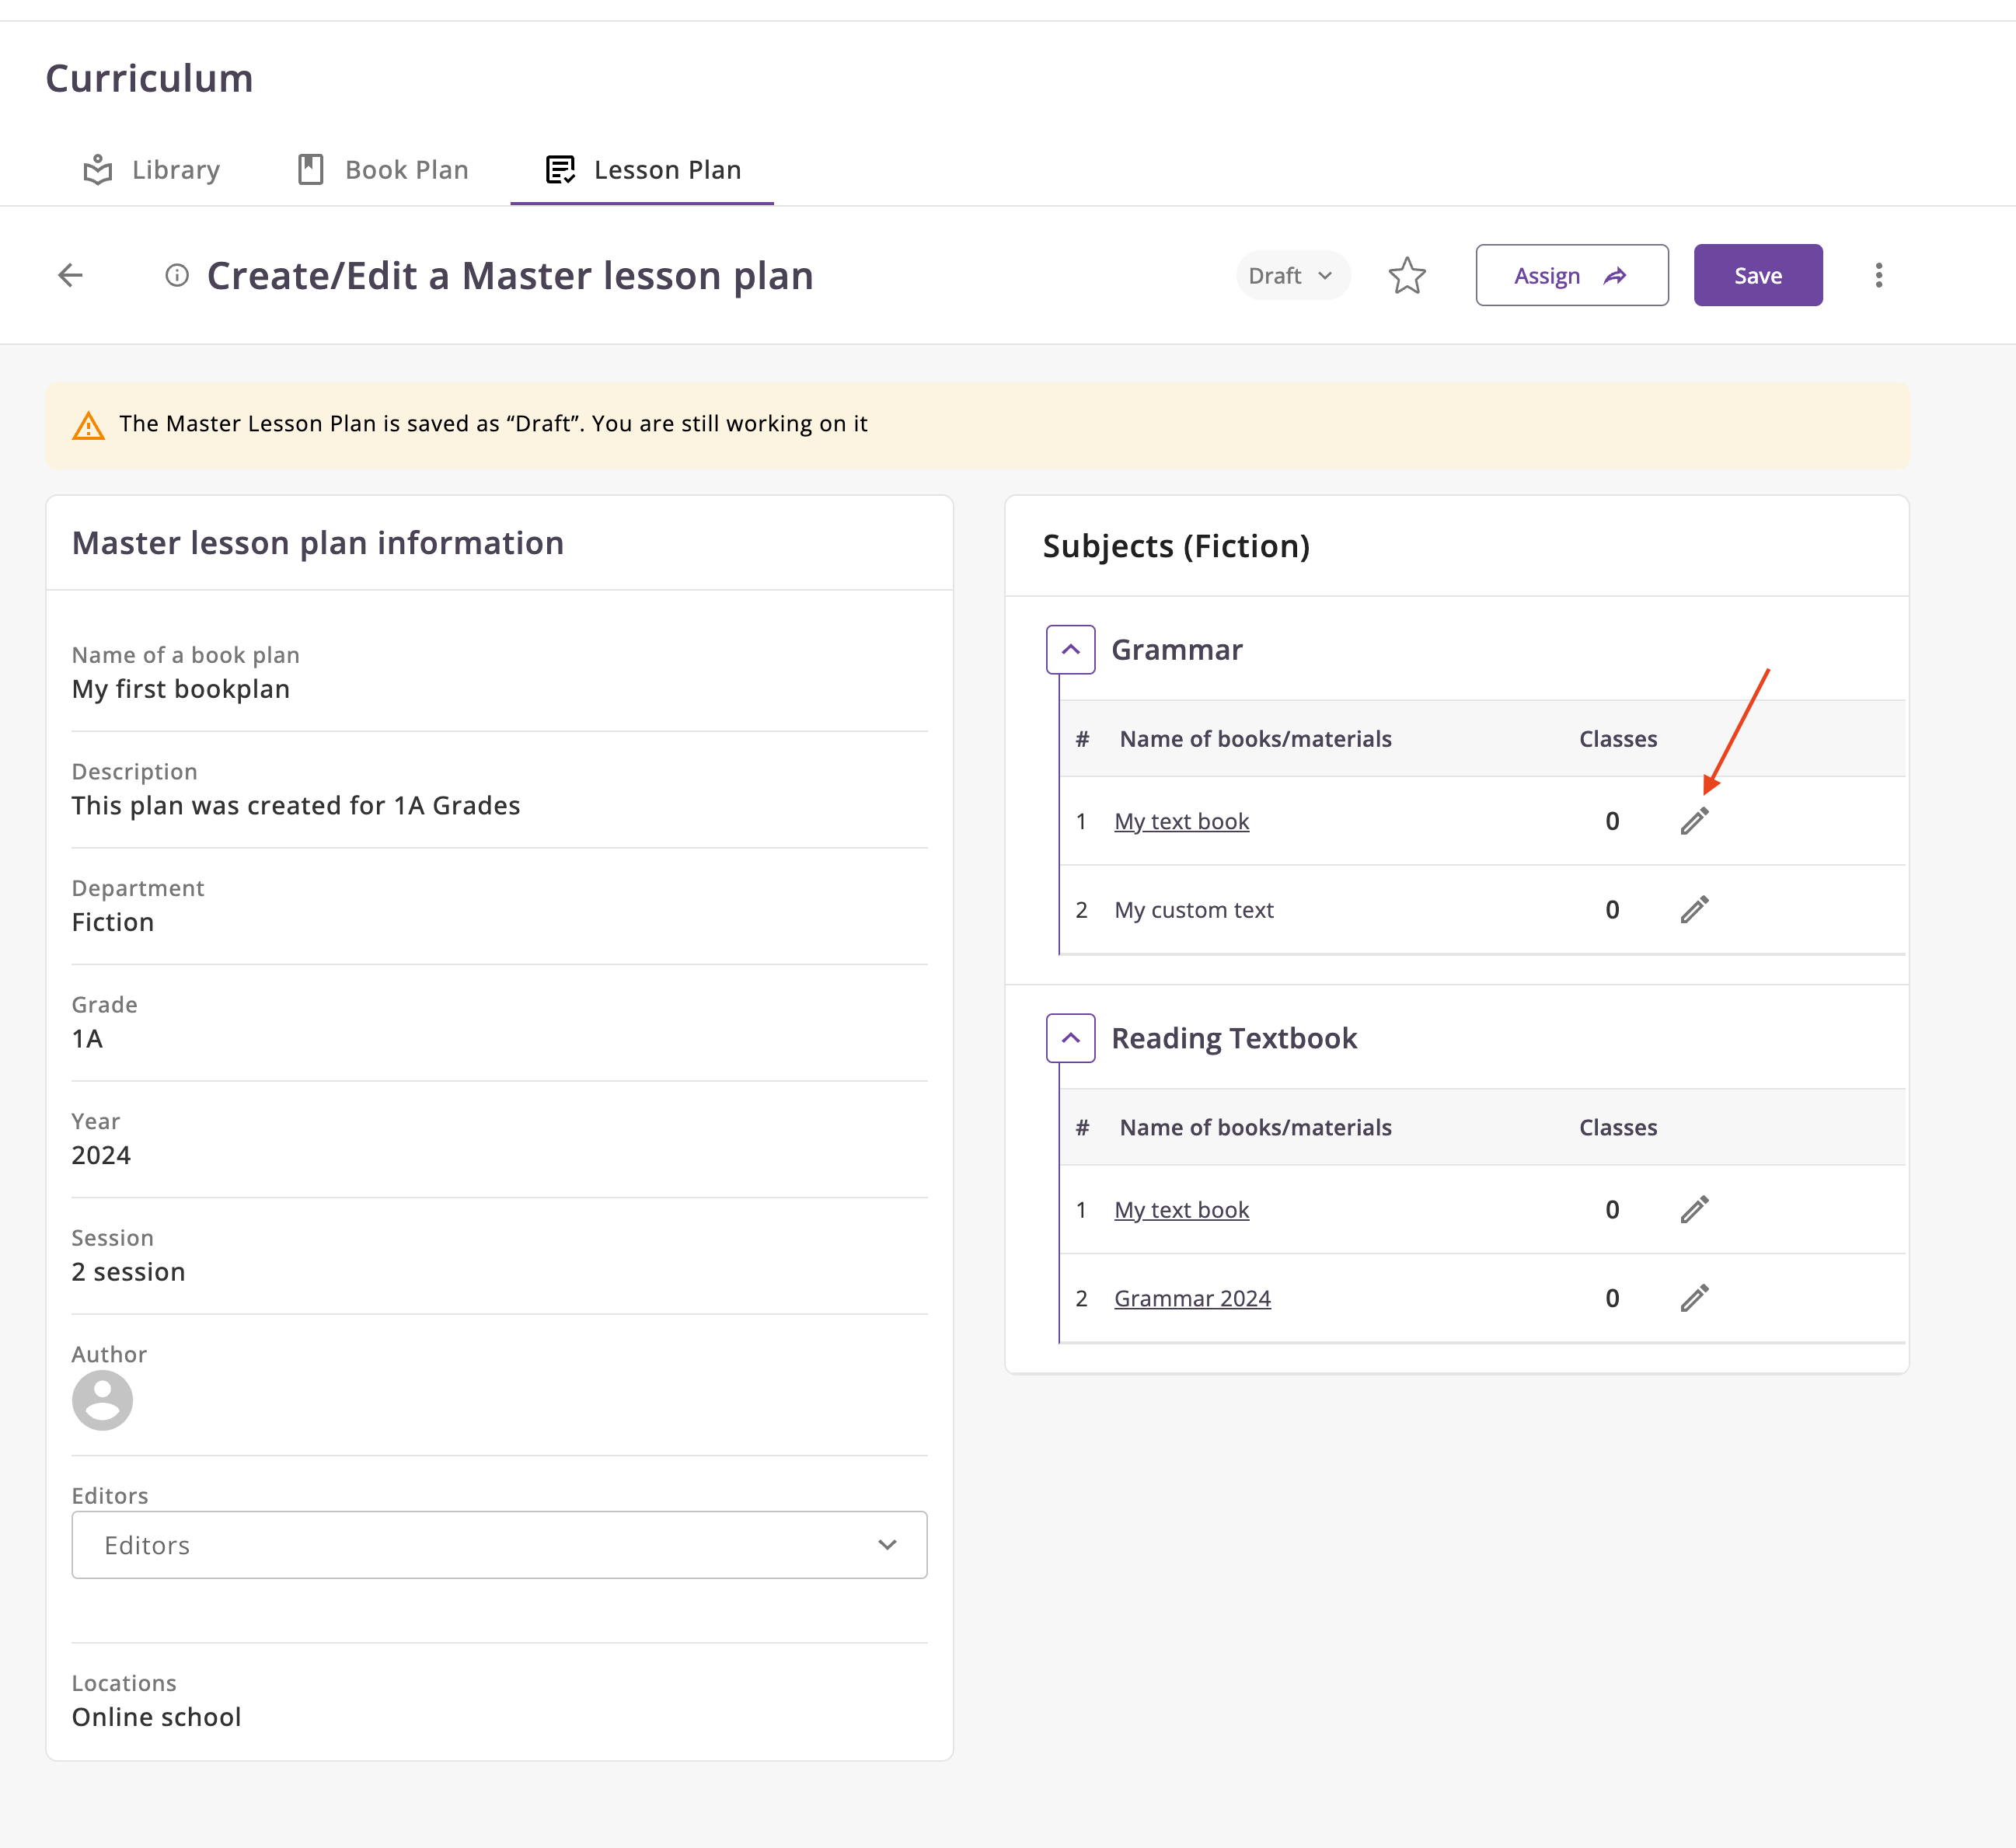
Editing a Lesson Plan
- Open the lesson plan you want to edit and select edit mode.
Inside the plan, you can see a list of subjects and their materials. For each material, you can set the number of classes and add specific comments.
- Click on the edit icon to change the number of classes or add comments.
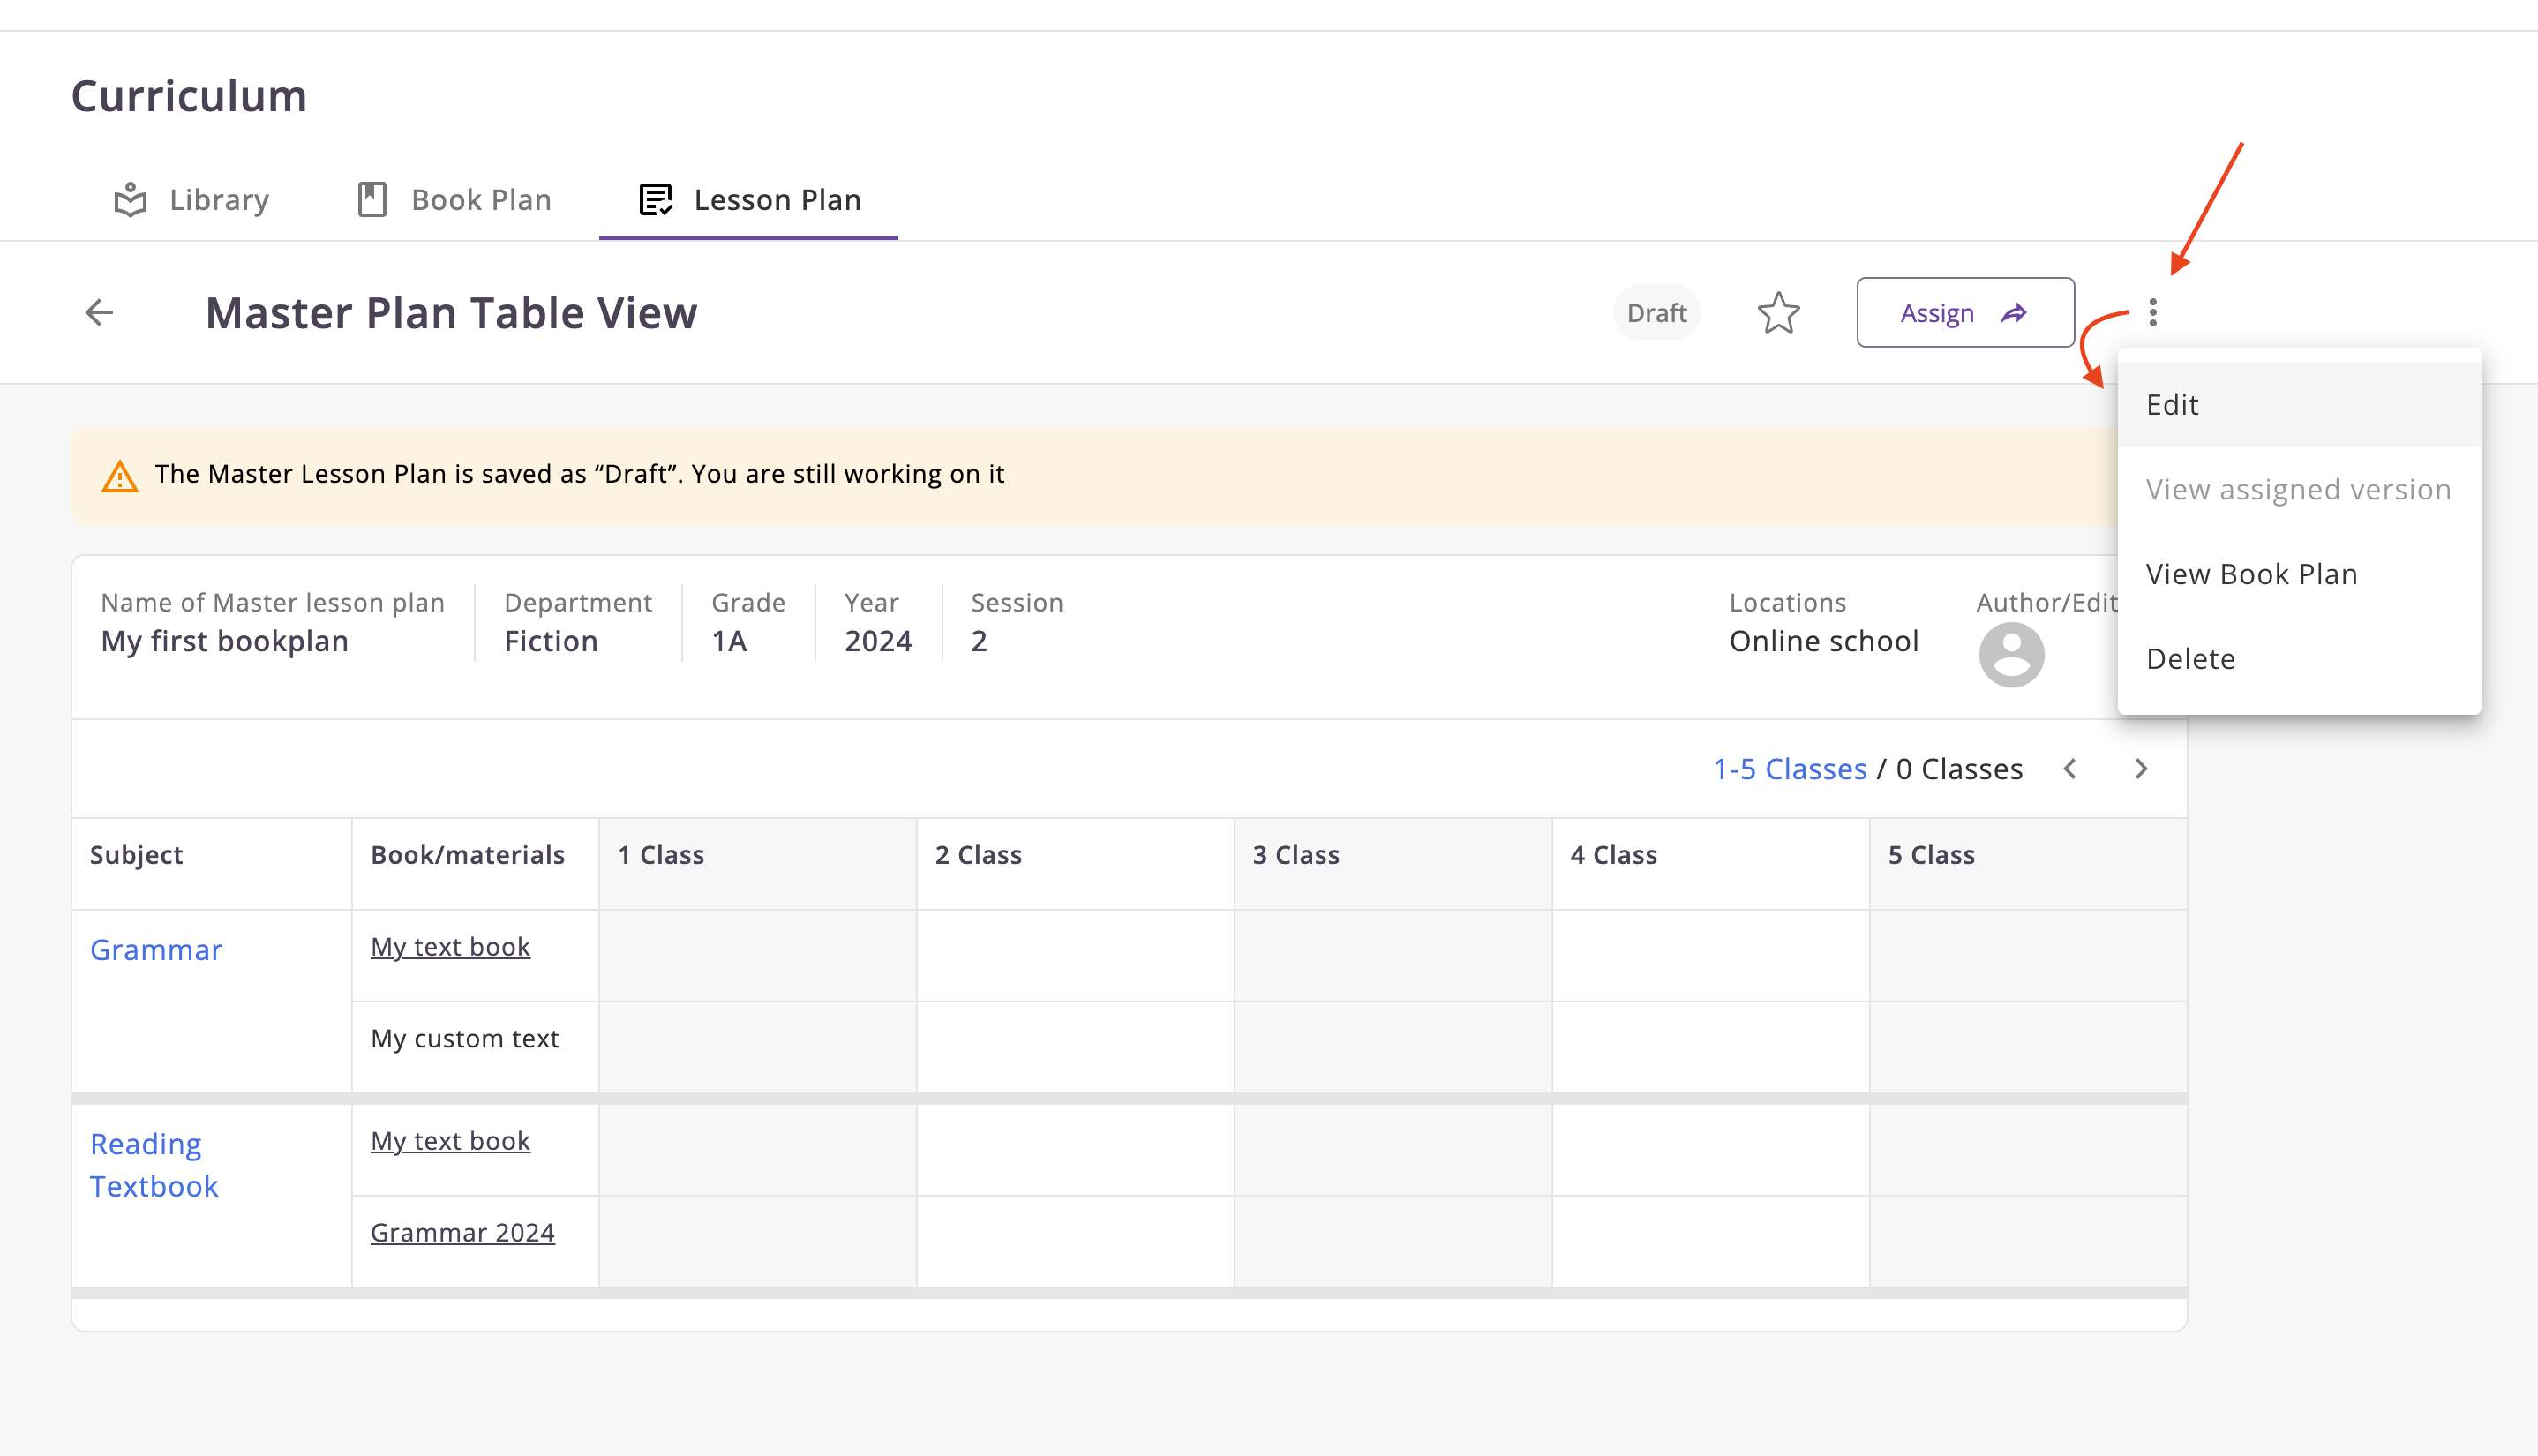
Editing a Lesson Plan from Table view
You can also change the lesson plan in table mode, this is convenient as it does not require additional steps.
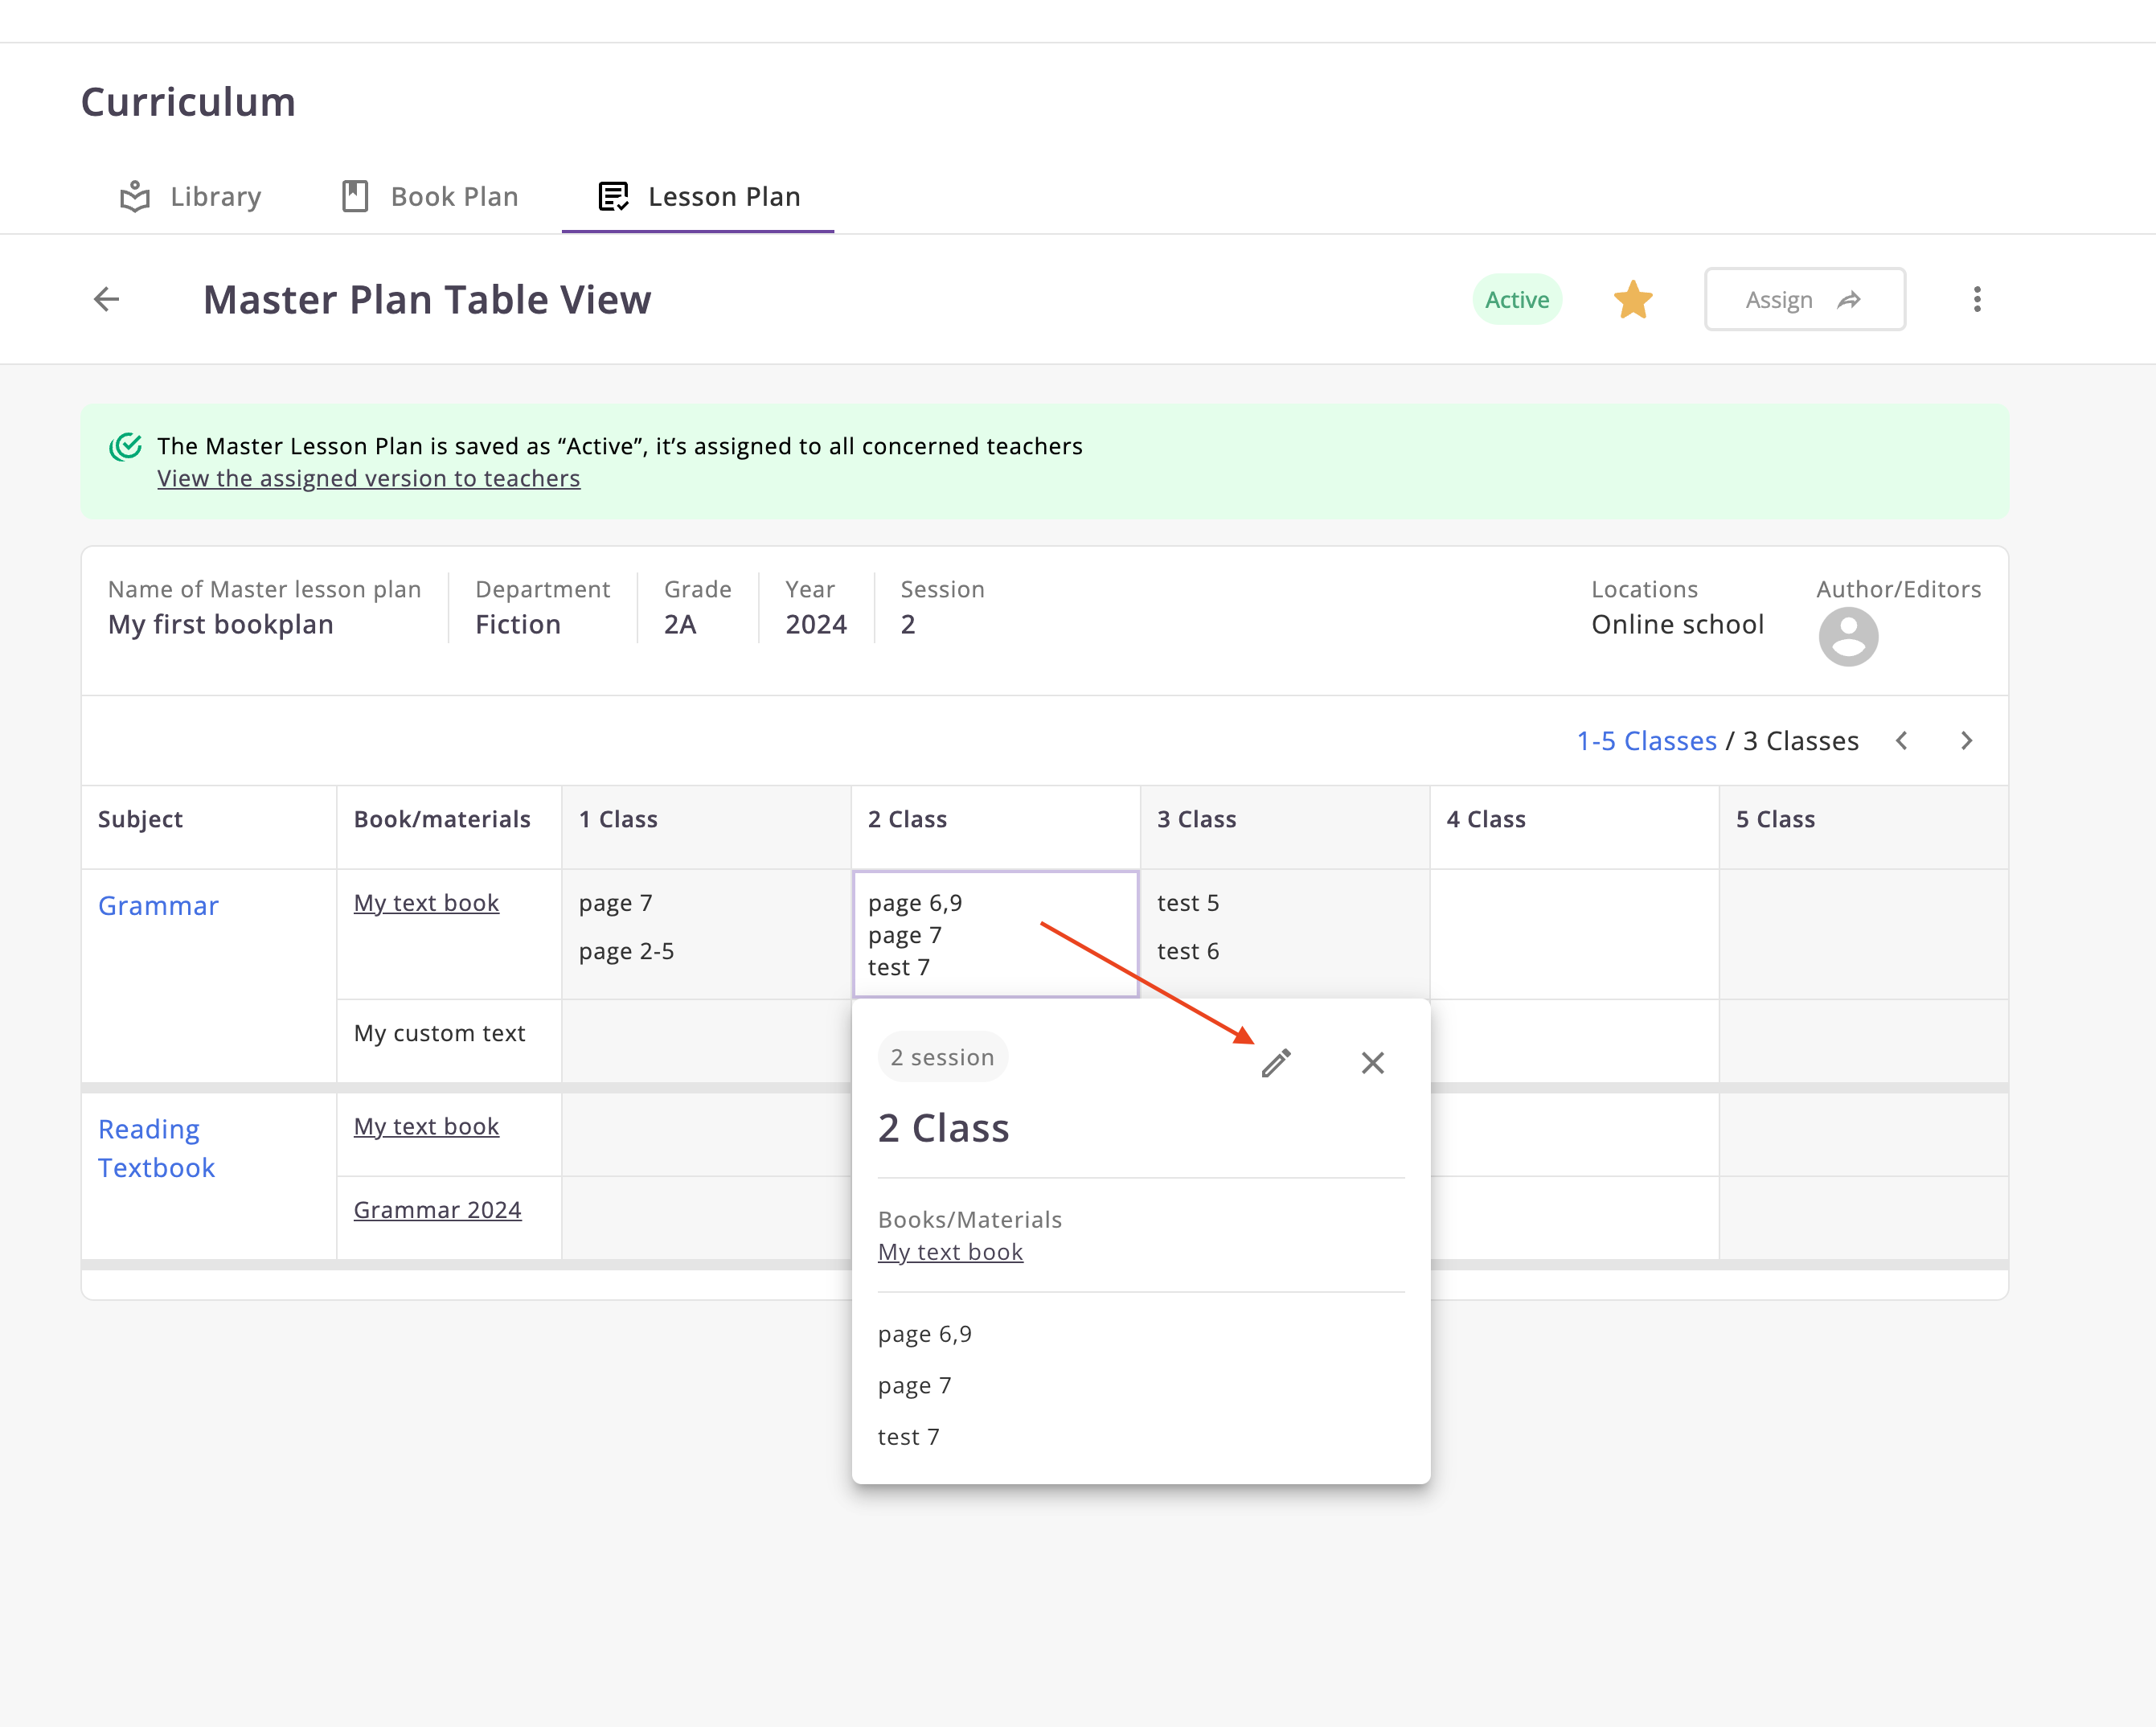
![]()
Now, you can assign the number of classes for each material and add comments if necessary.
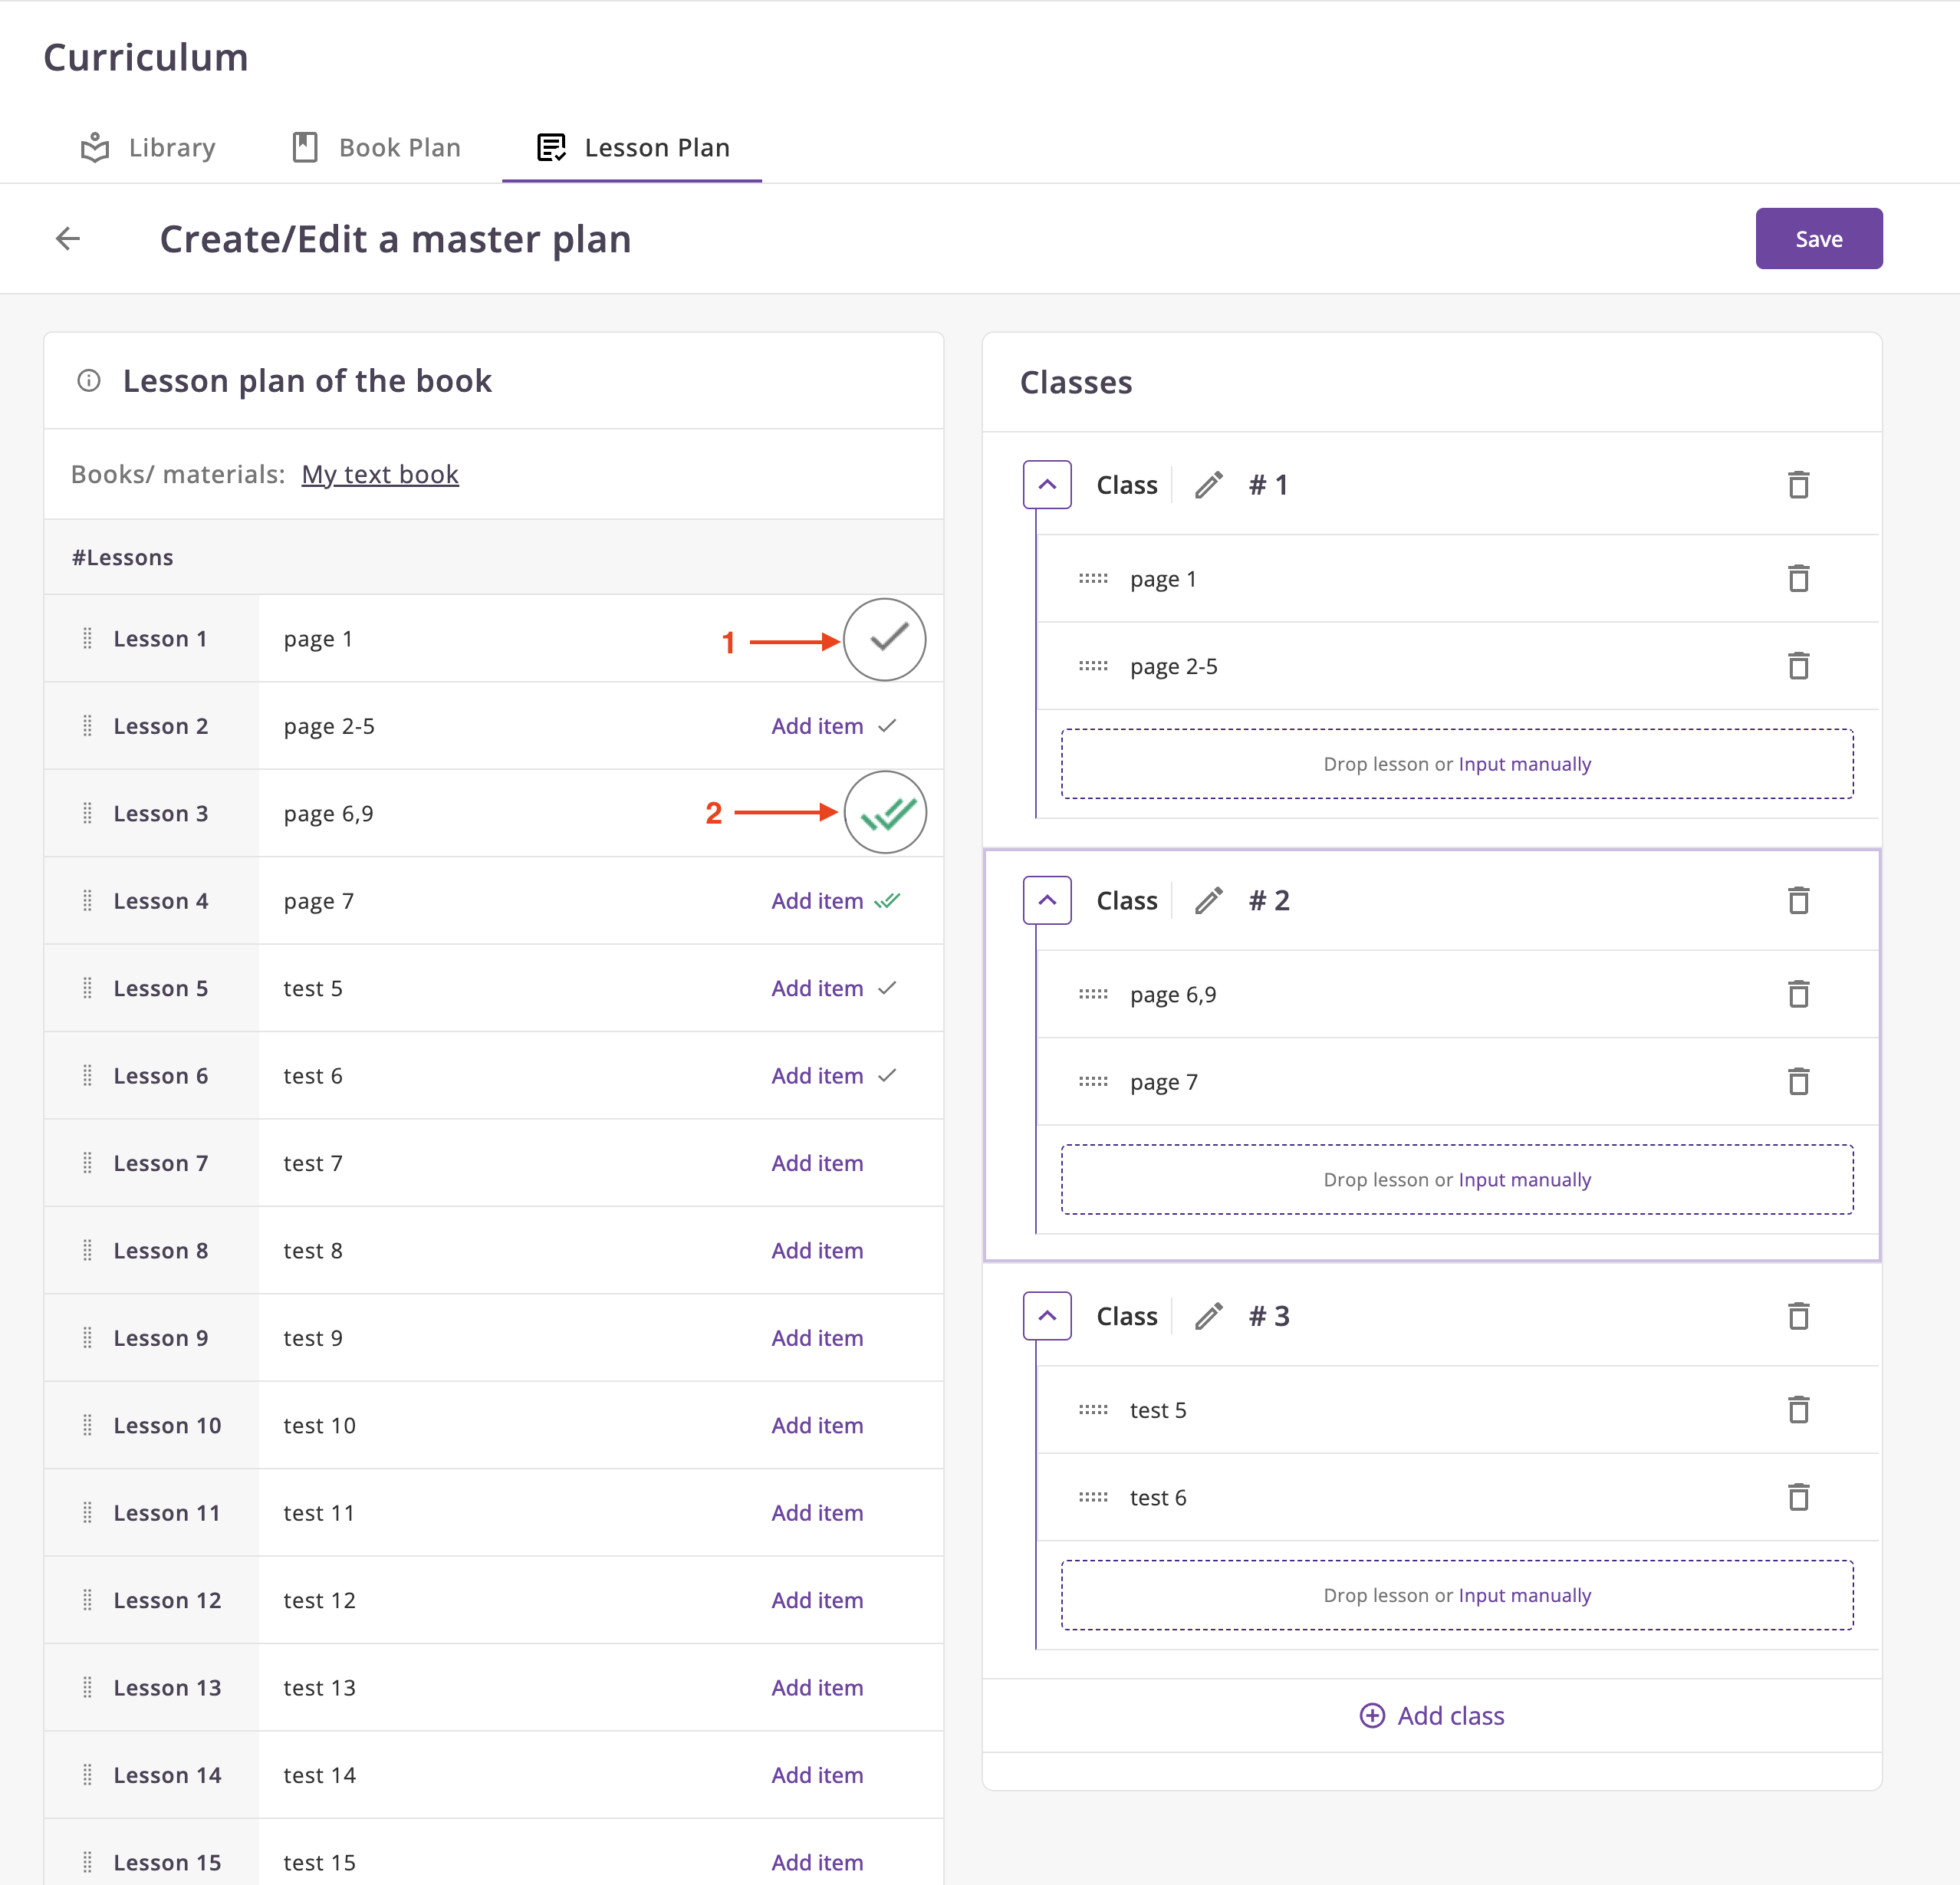
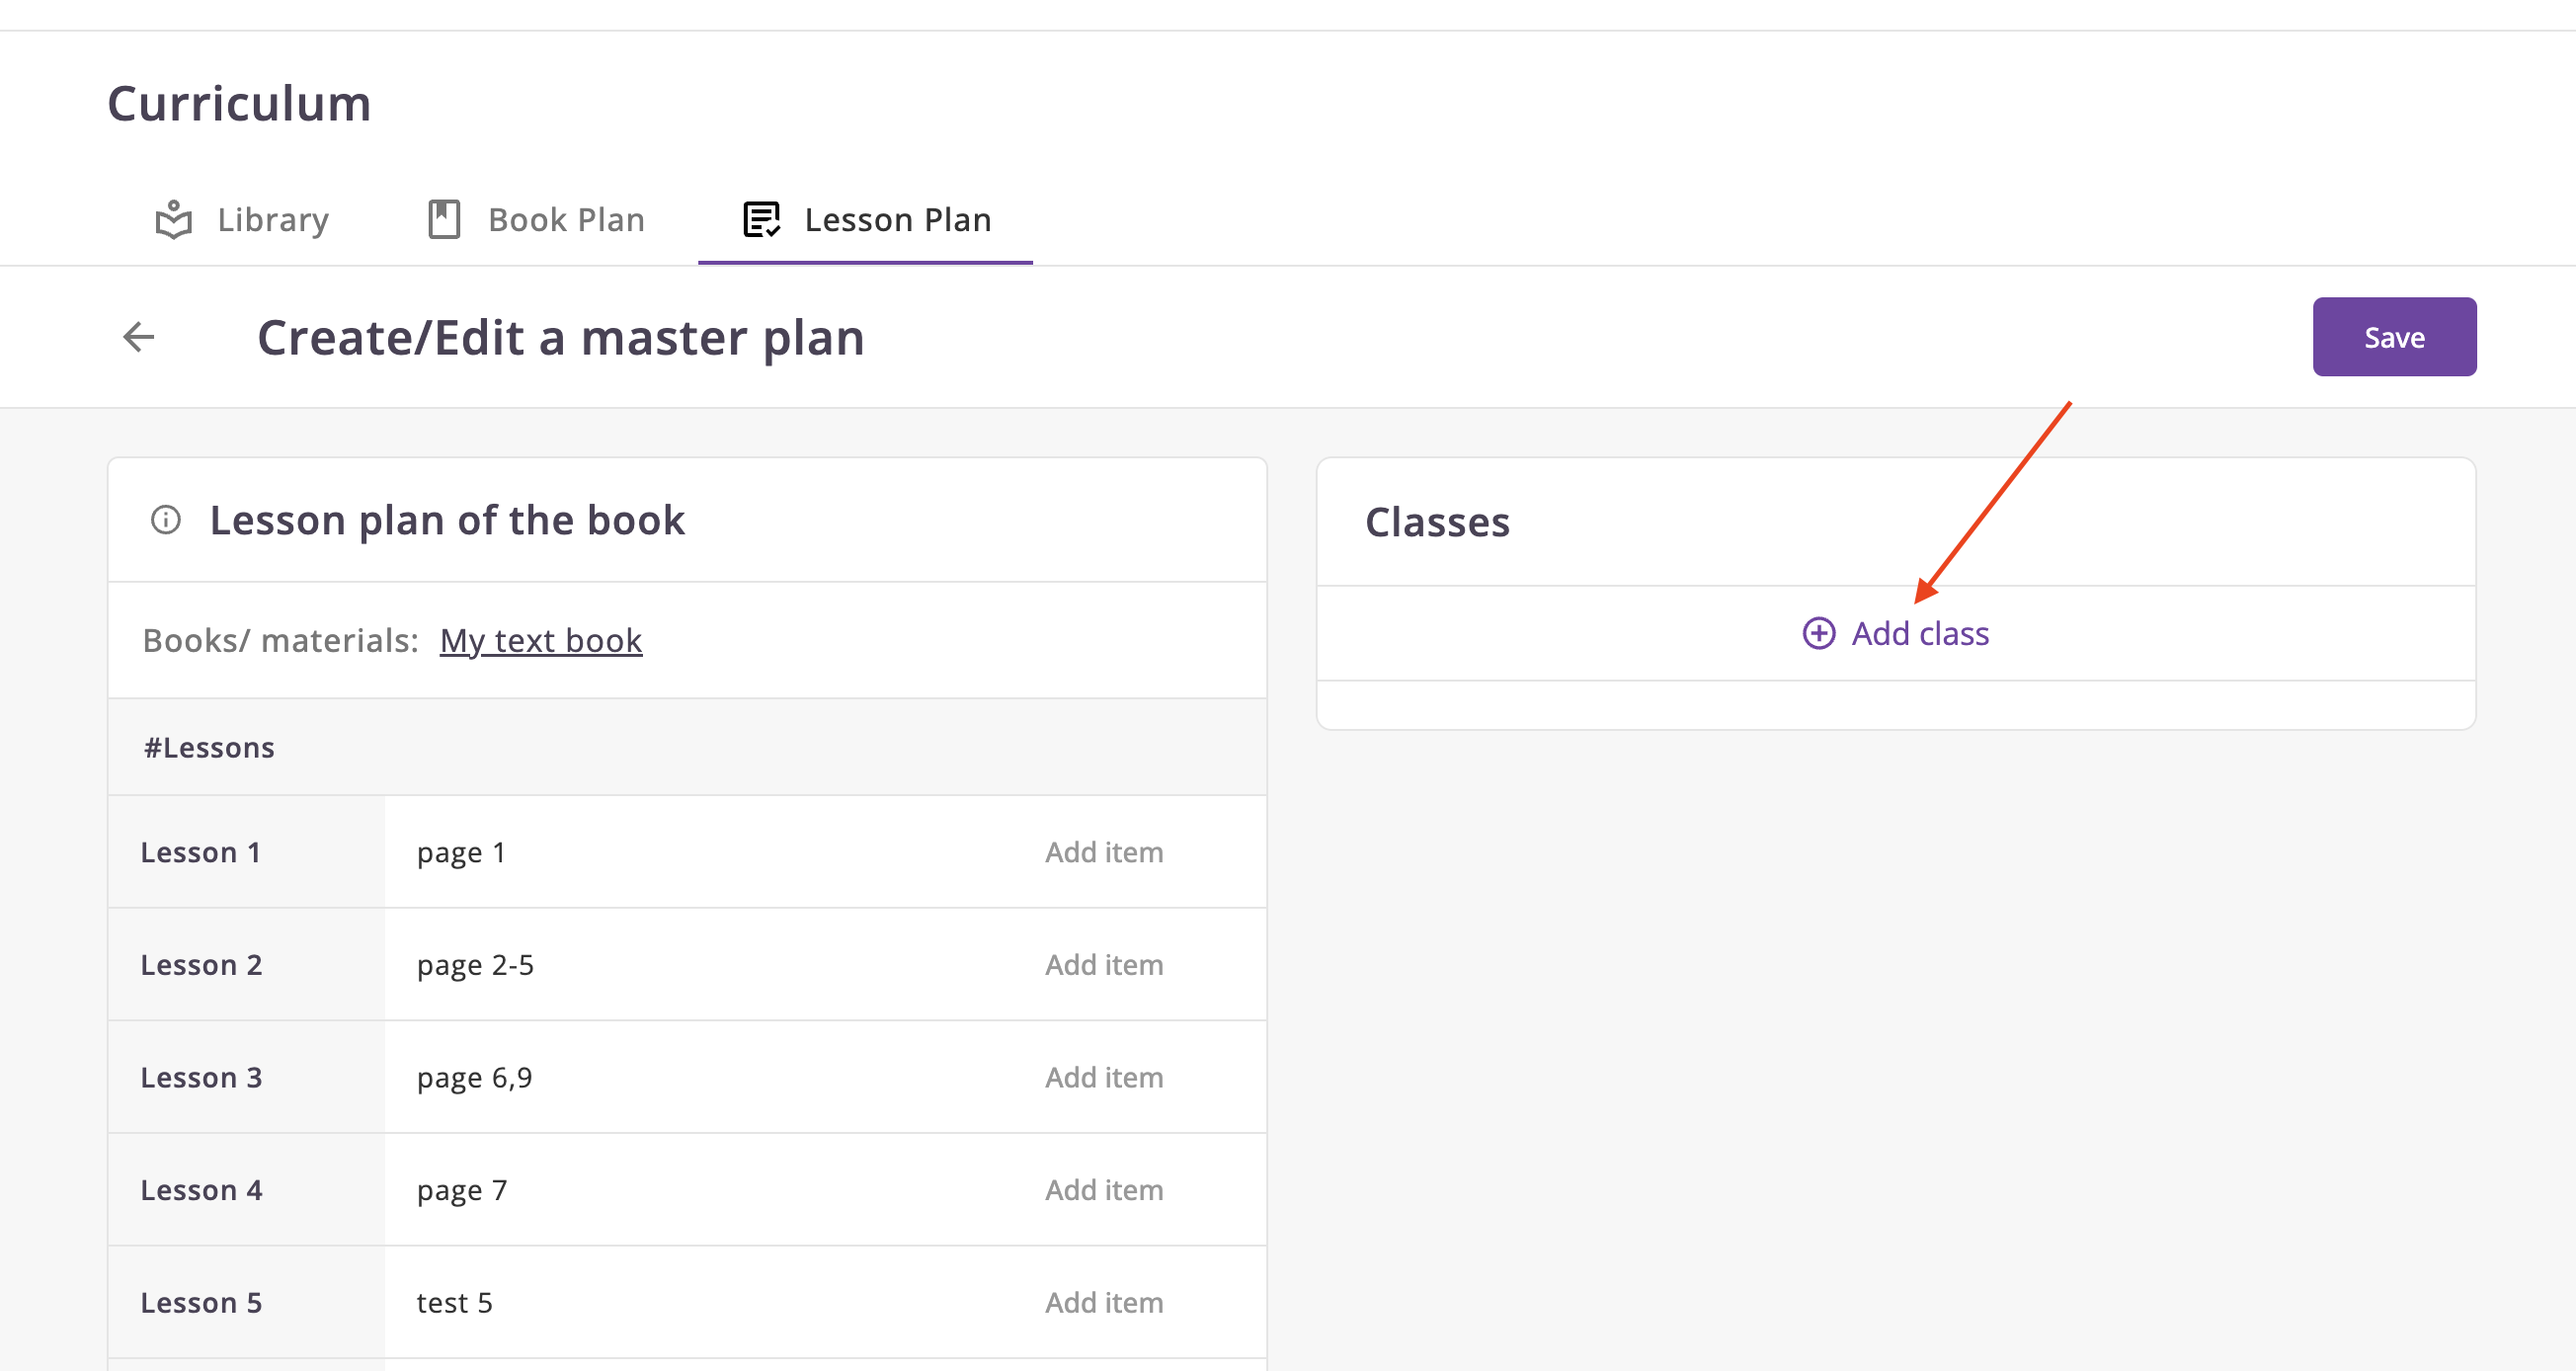
Assigning lessons
We need assign lessons for each material into subjects
- Click on the edit icon to assign lessons. So, for begin, click on the Add class button.
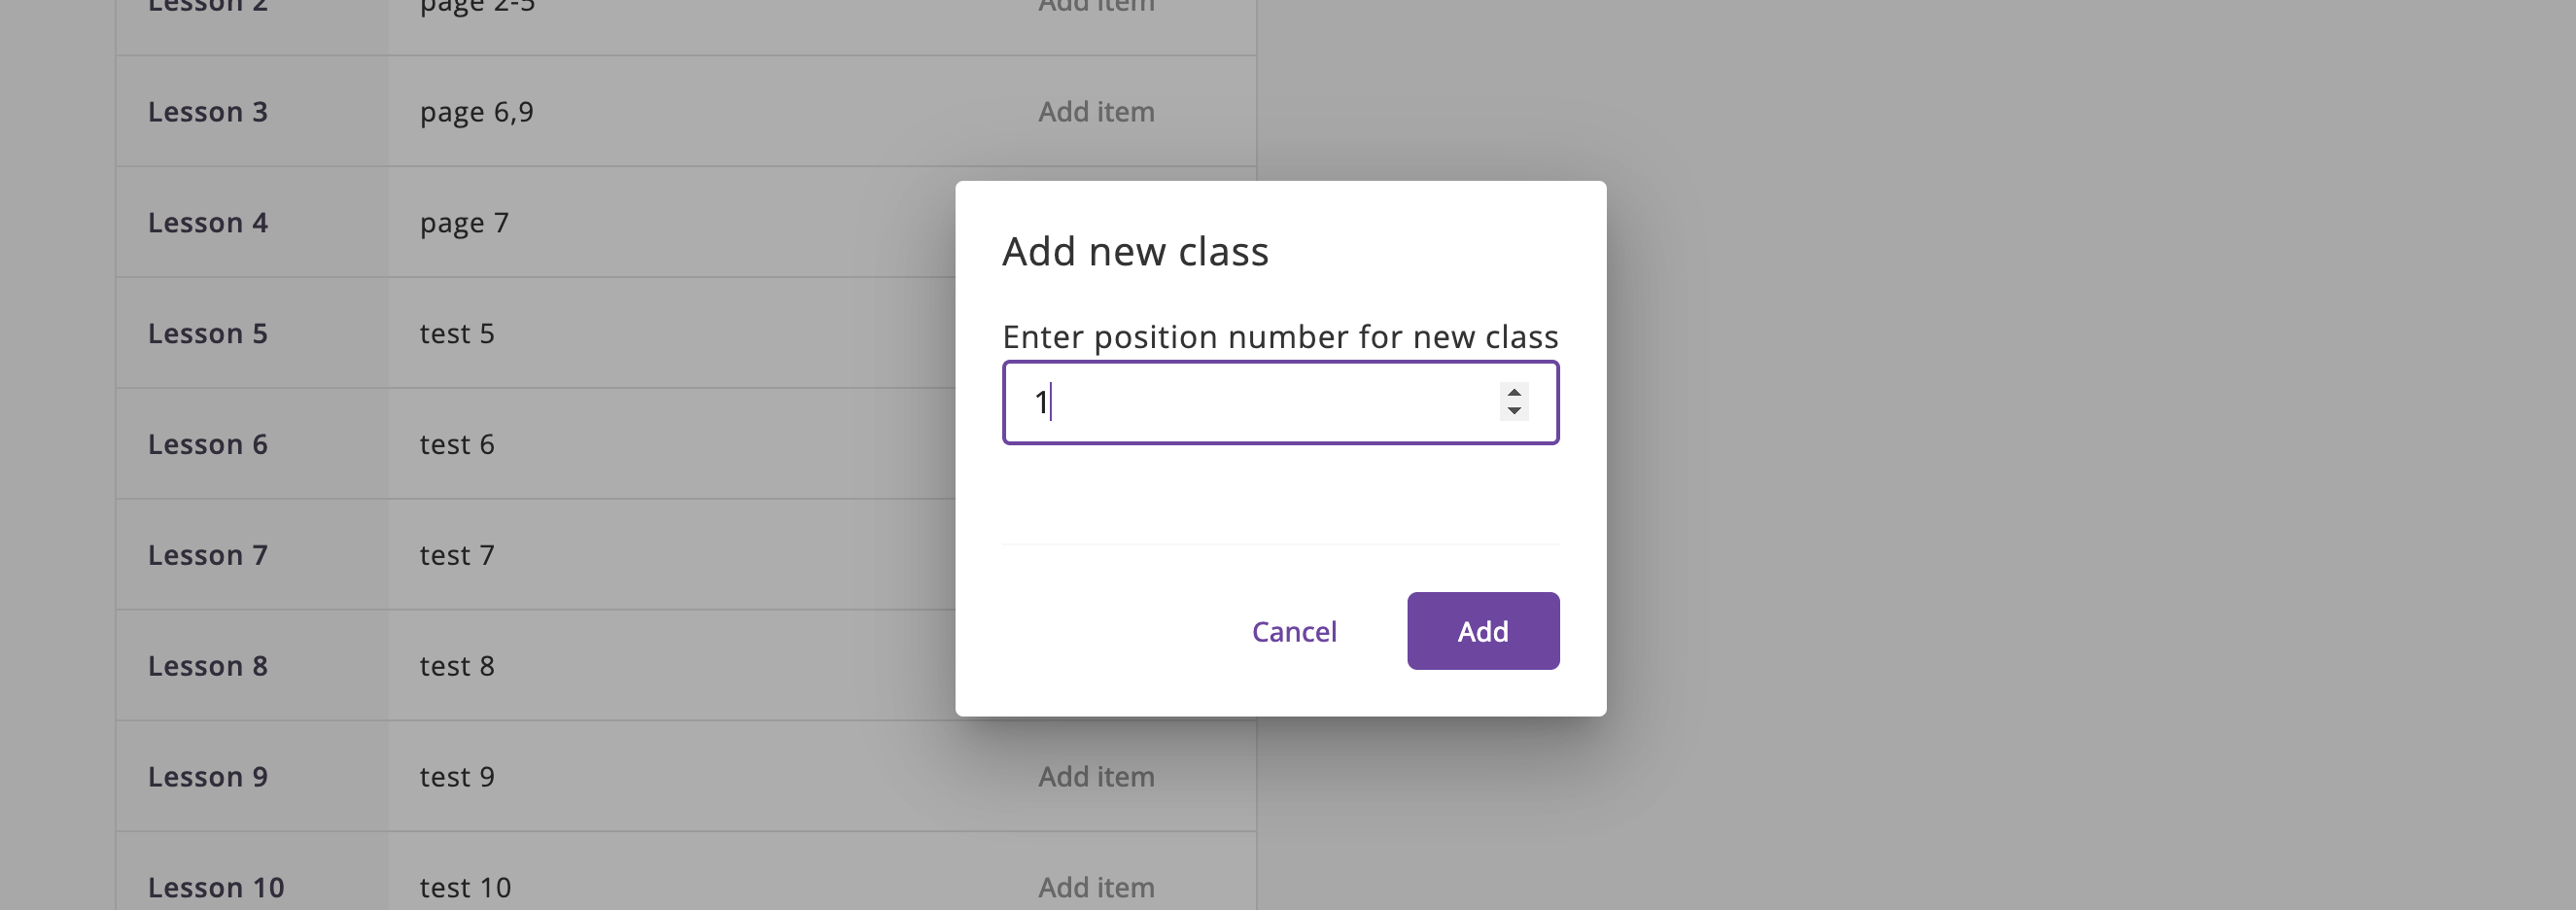
- After that you will see the modal window where you can select lesson number.
Let's add a few at once
- In order to add a schedule for a material, we need to select and activate the desired class for editing.
The selected class will have an indication in the form of a frame as shown below.
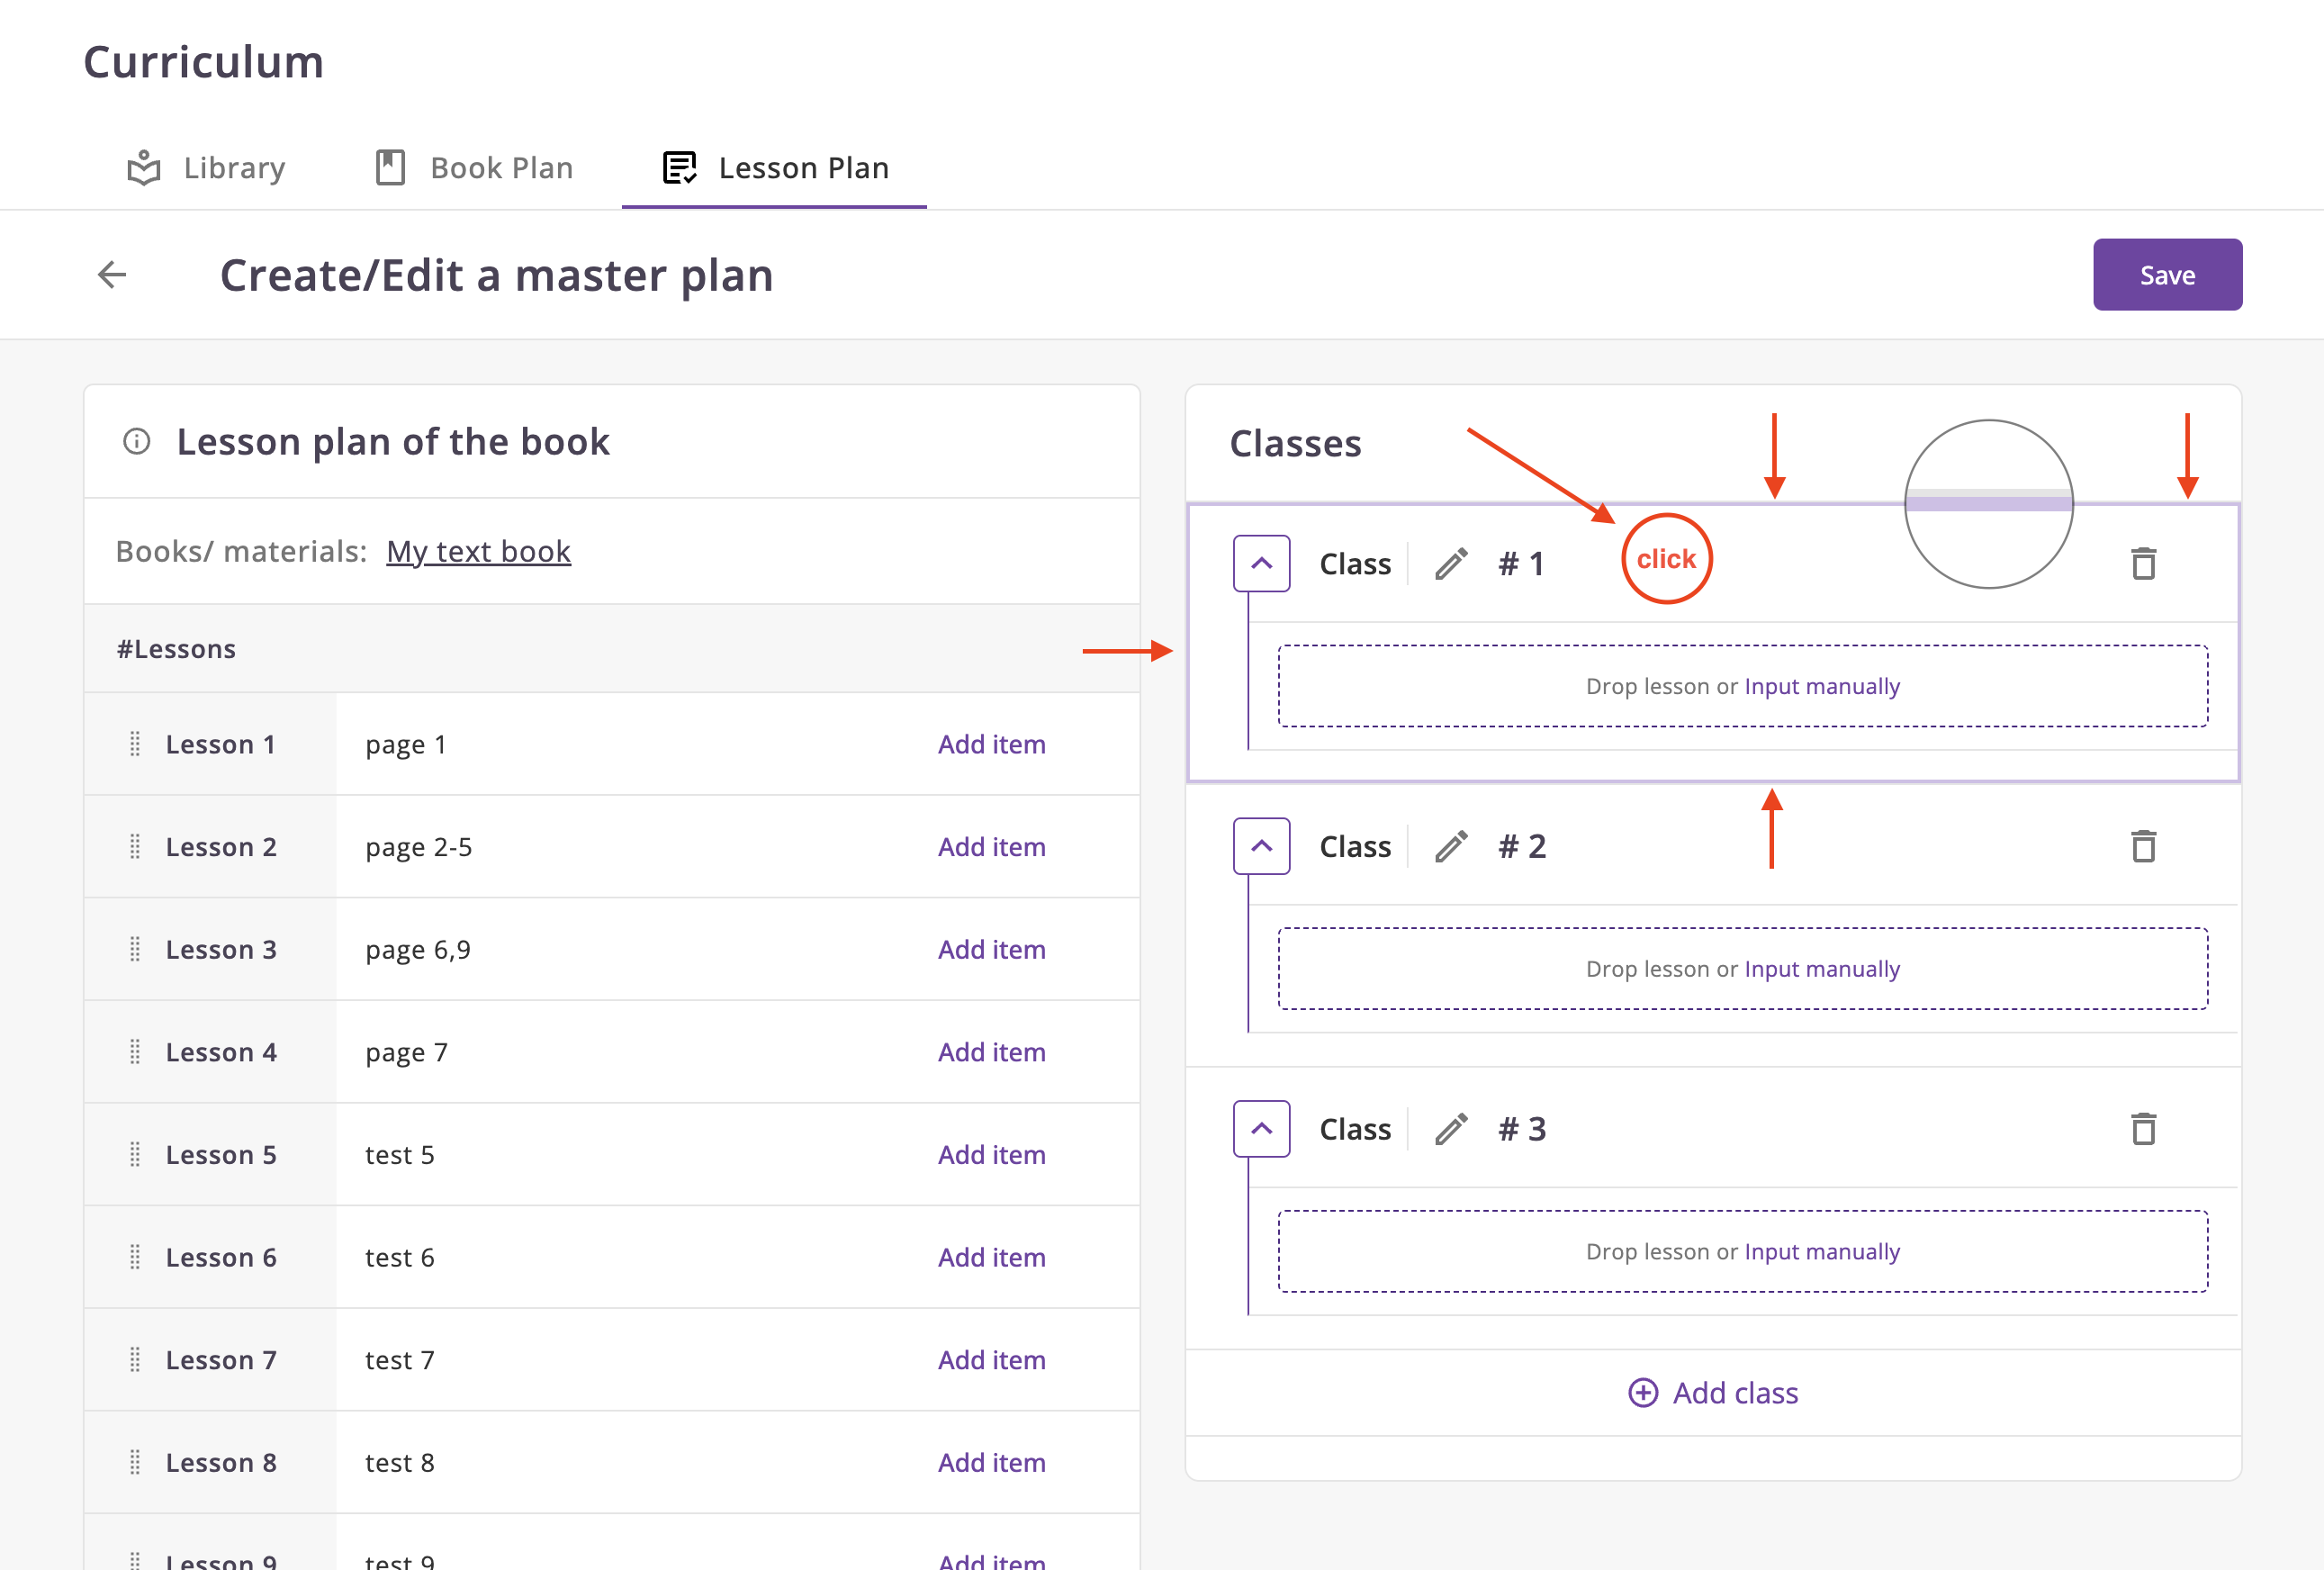
- Click Add item to add the desired lesson to the class
Explanation
- If this item was added into some class, but not this.
- If this item was added into this class.
You can also use an alternative method
-
If you have finished, you need to save changes. Click on the Save button for it.
-
After that, you can see the number of classes for each material.
Lesson Plan Table
Have you can see, how the lesson plan table looks like.
Set Active Status
You cannot directly set the status to active, in order to do this, you need to take several steps.
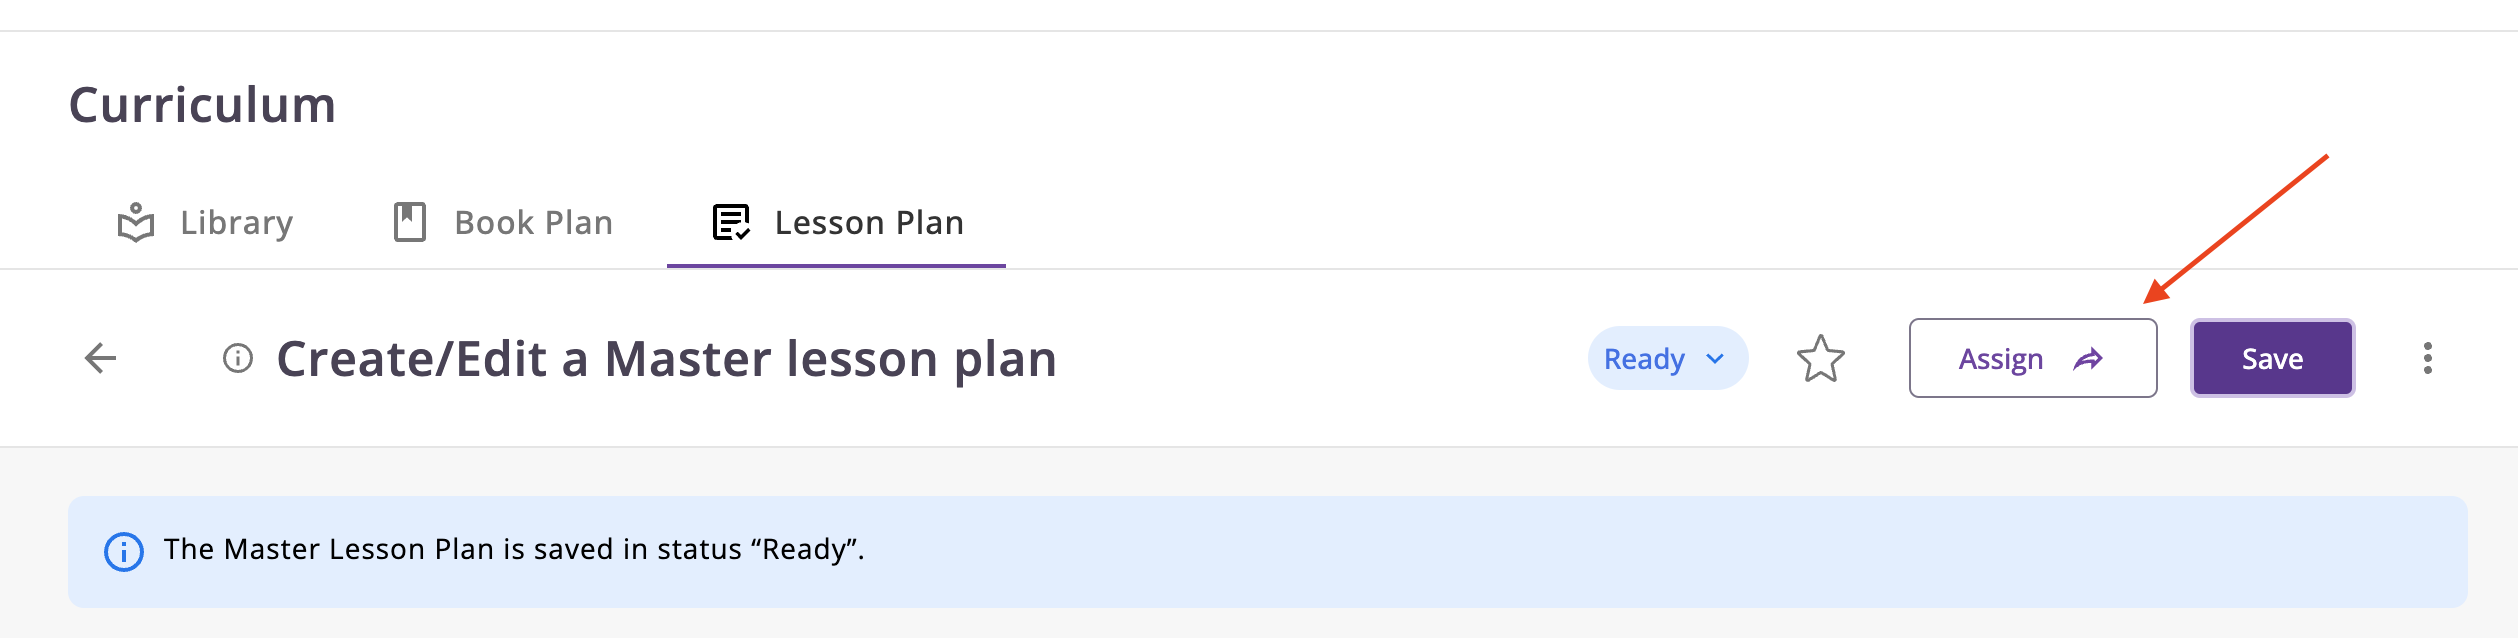
- In order to assign events, the lesson plan must have an ready status and save changes.
- This can be done both in editing mode and in viewing mode
-
After that, you can see the Assign button. Click on it.
-
You will see the modal for confirmation. Click on the Confirm button.
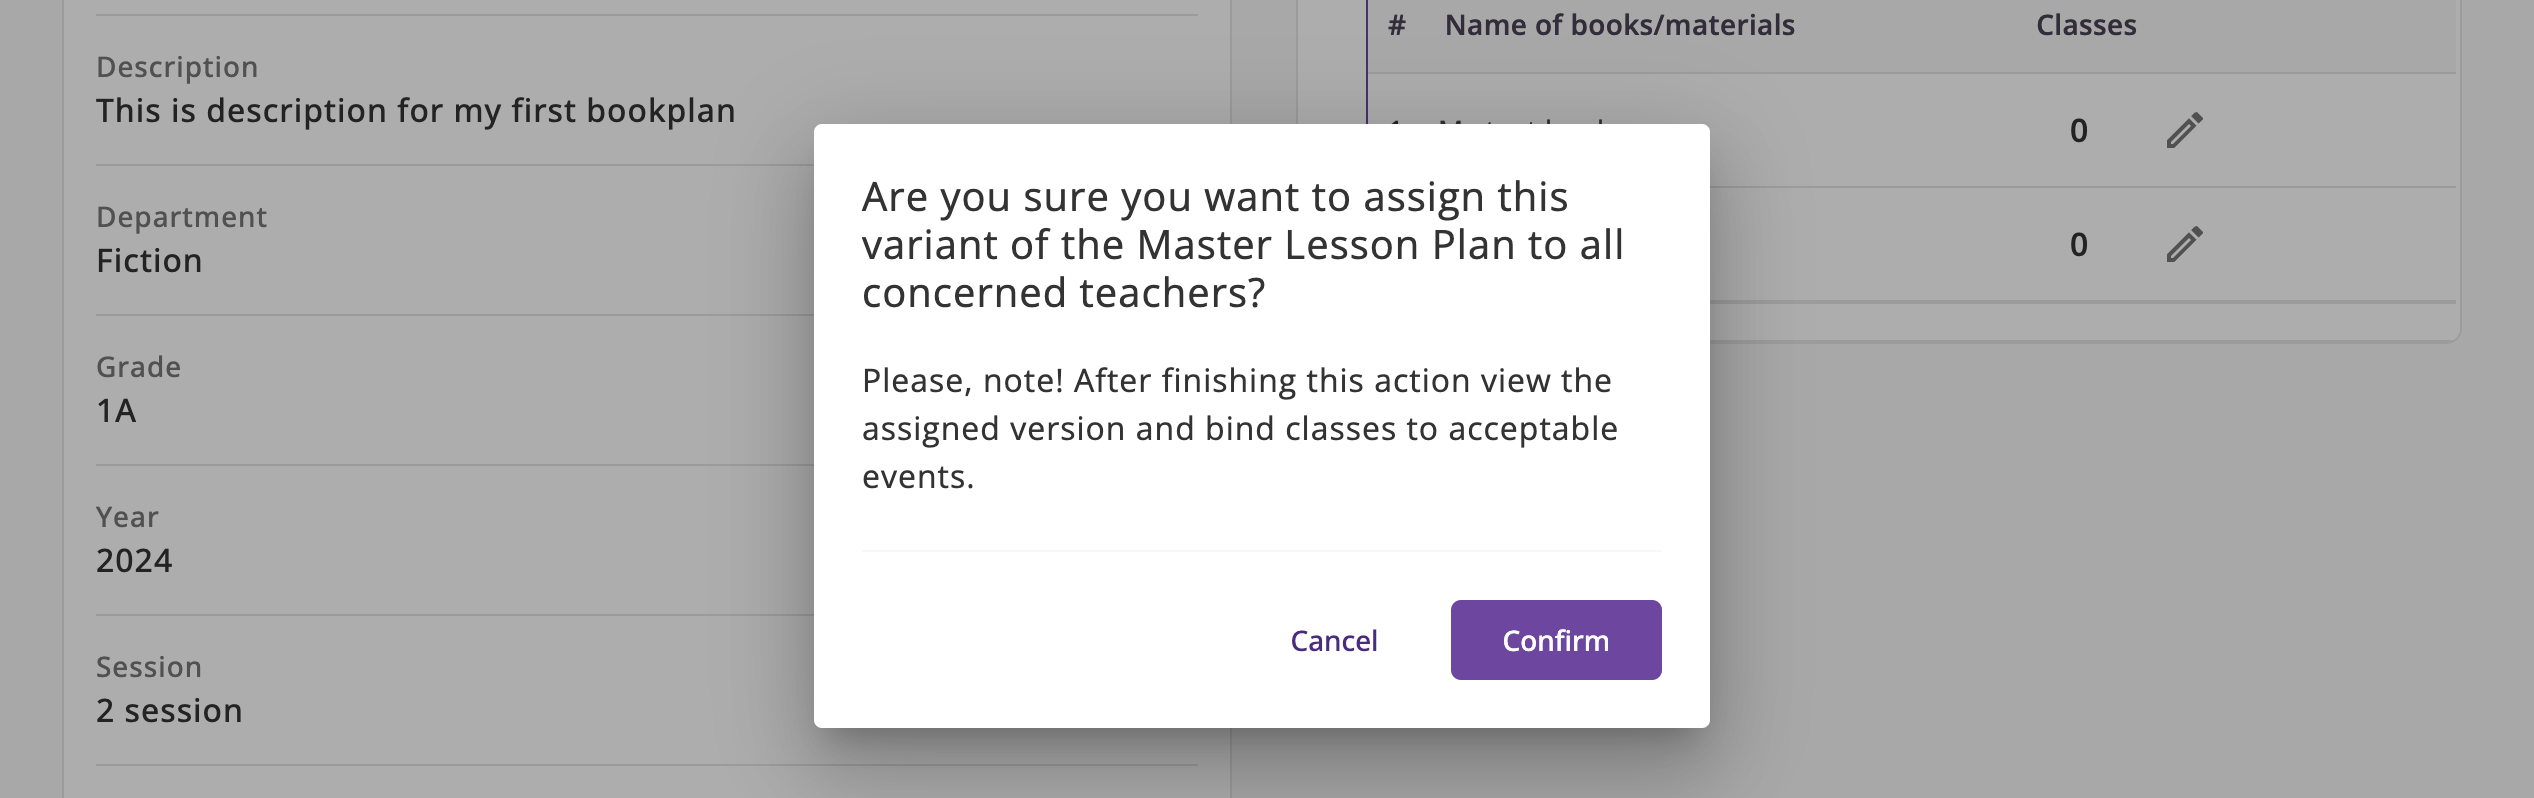
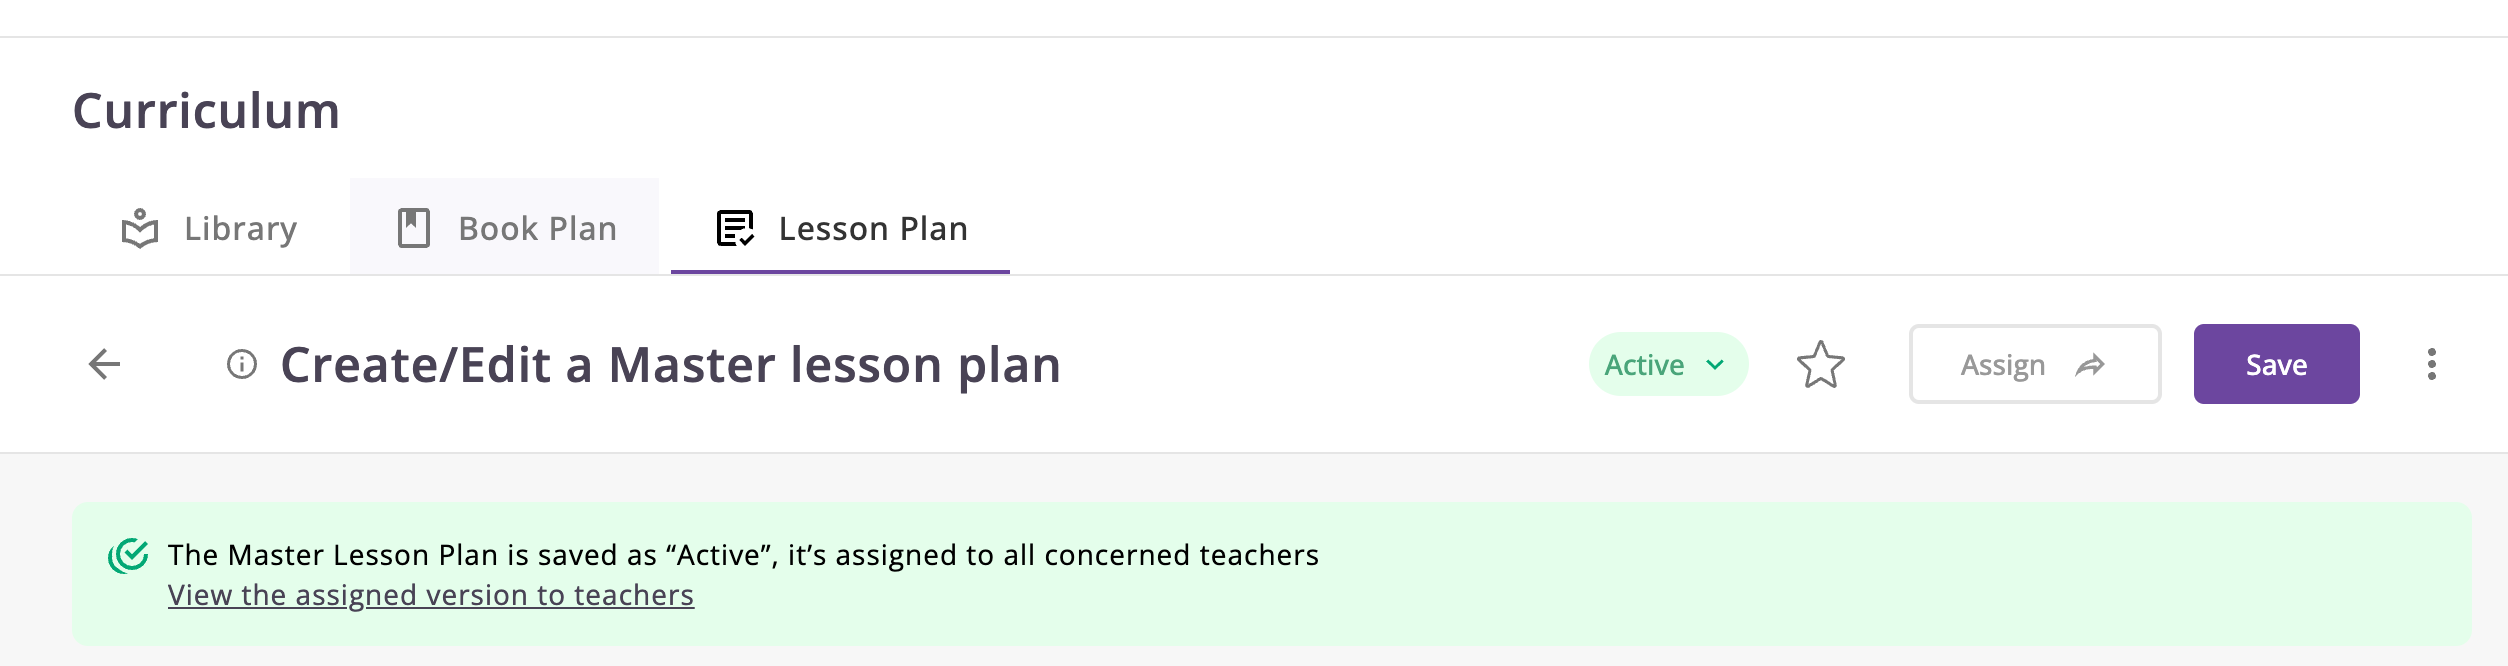
After that, you can see the Active status.
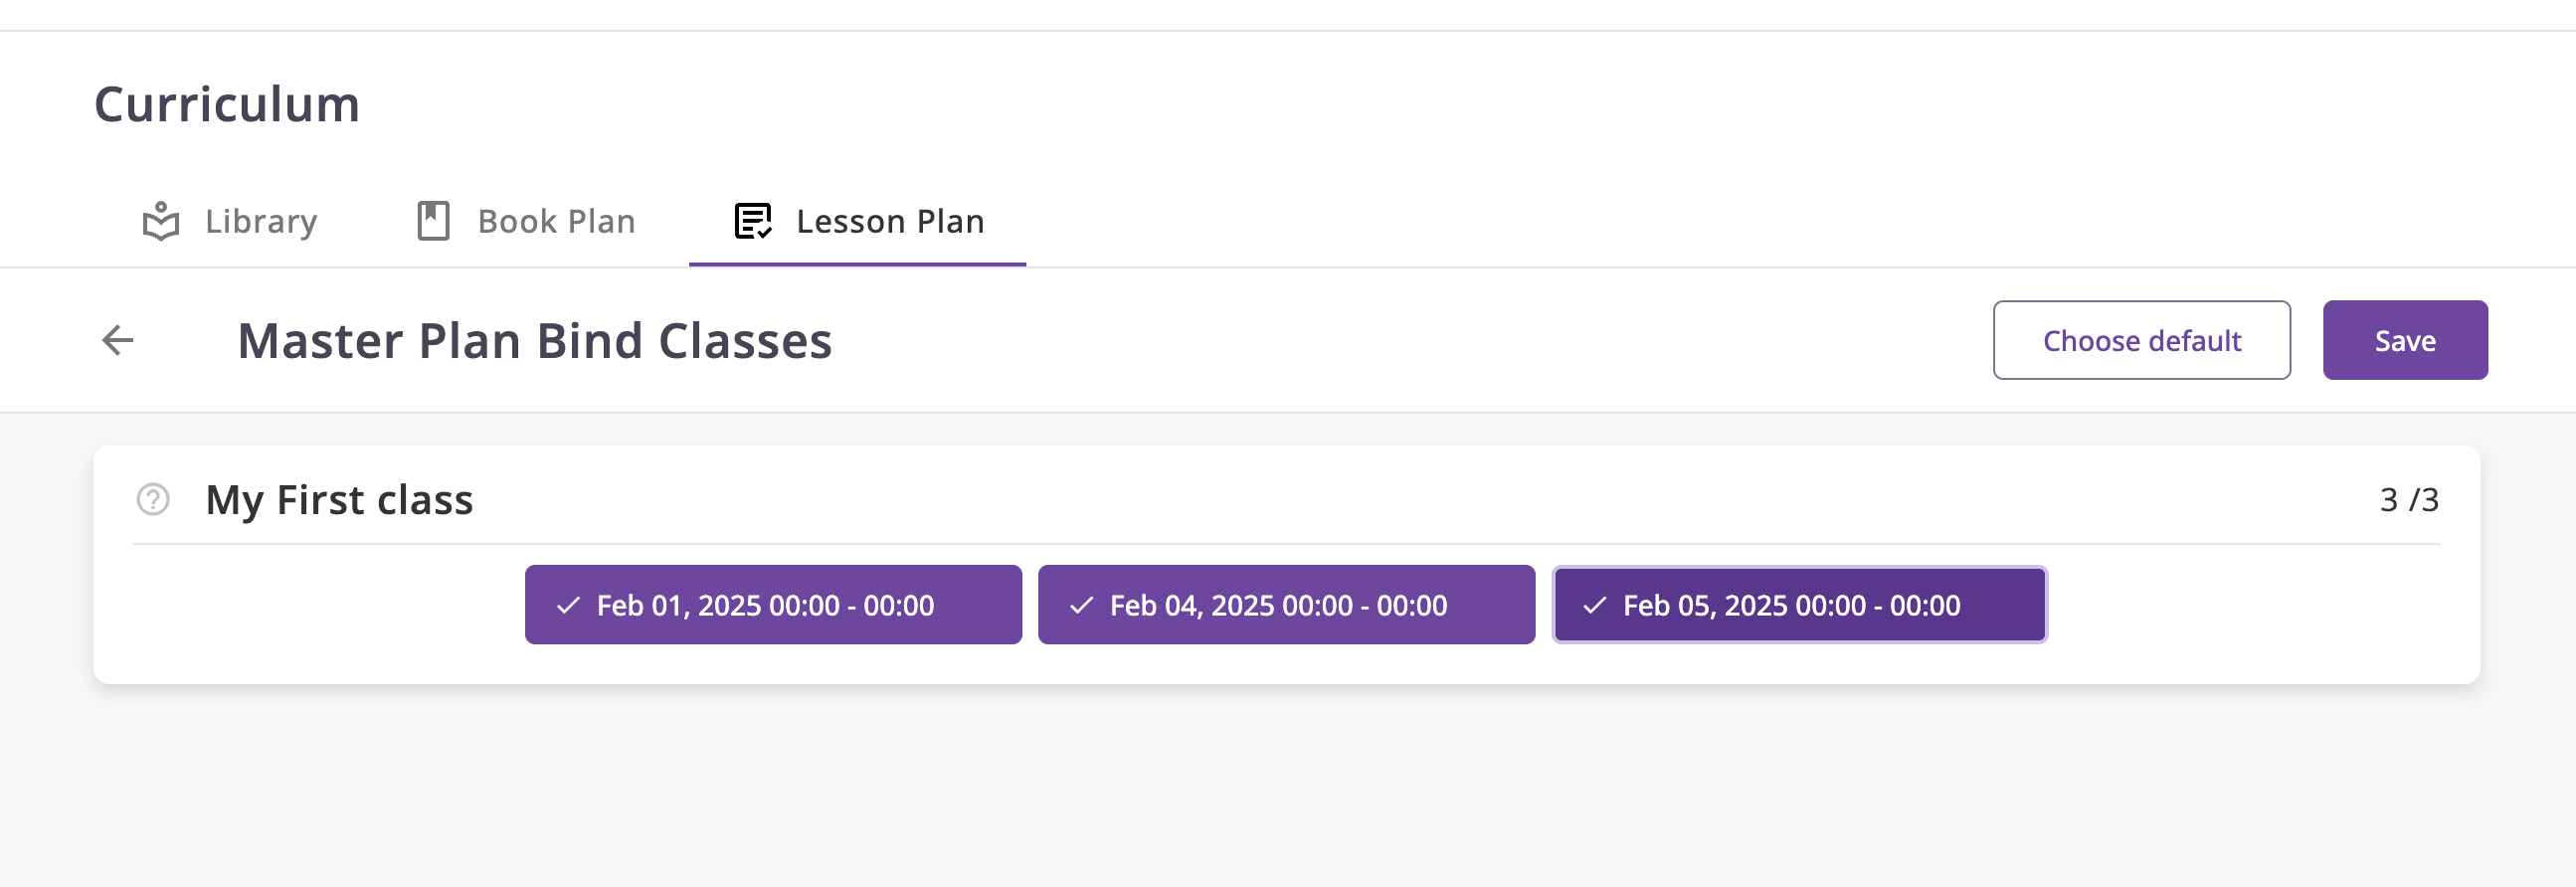
Assigning Lessons to the Calendar (Bind classes)
- Above we created a lesson plan that only describes 3 lessons in total, so we need to create 3 events in the Class
calendar.
- Navigate to the Calendar.
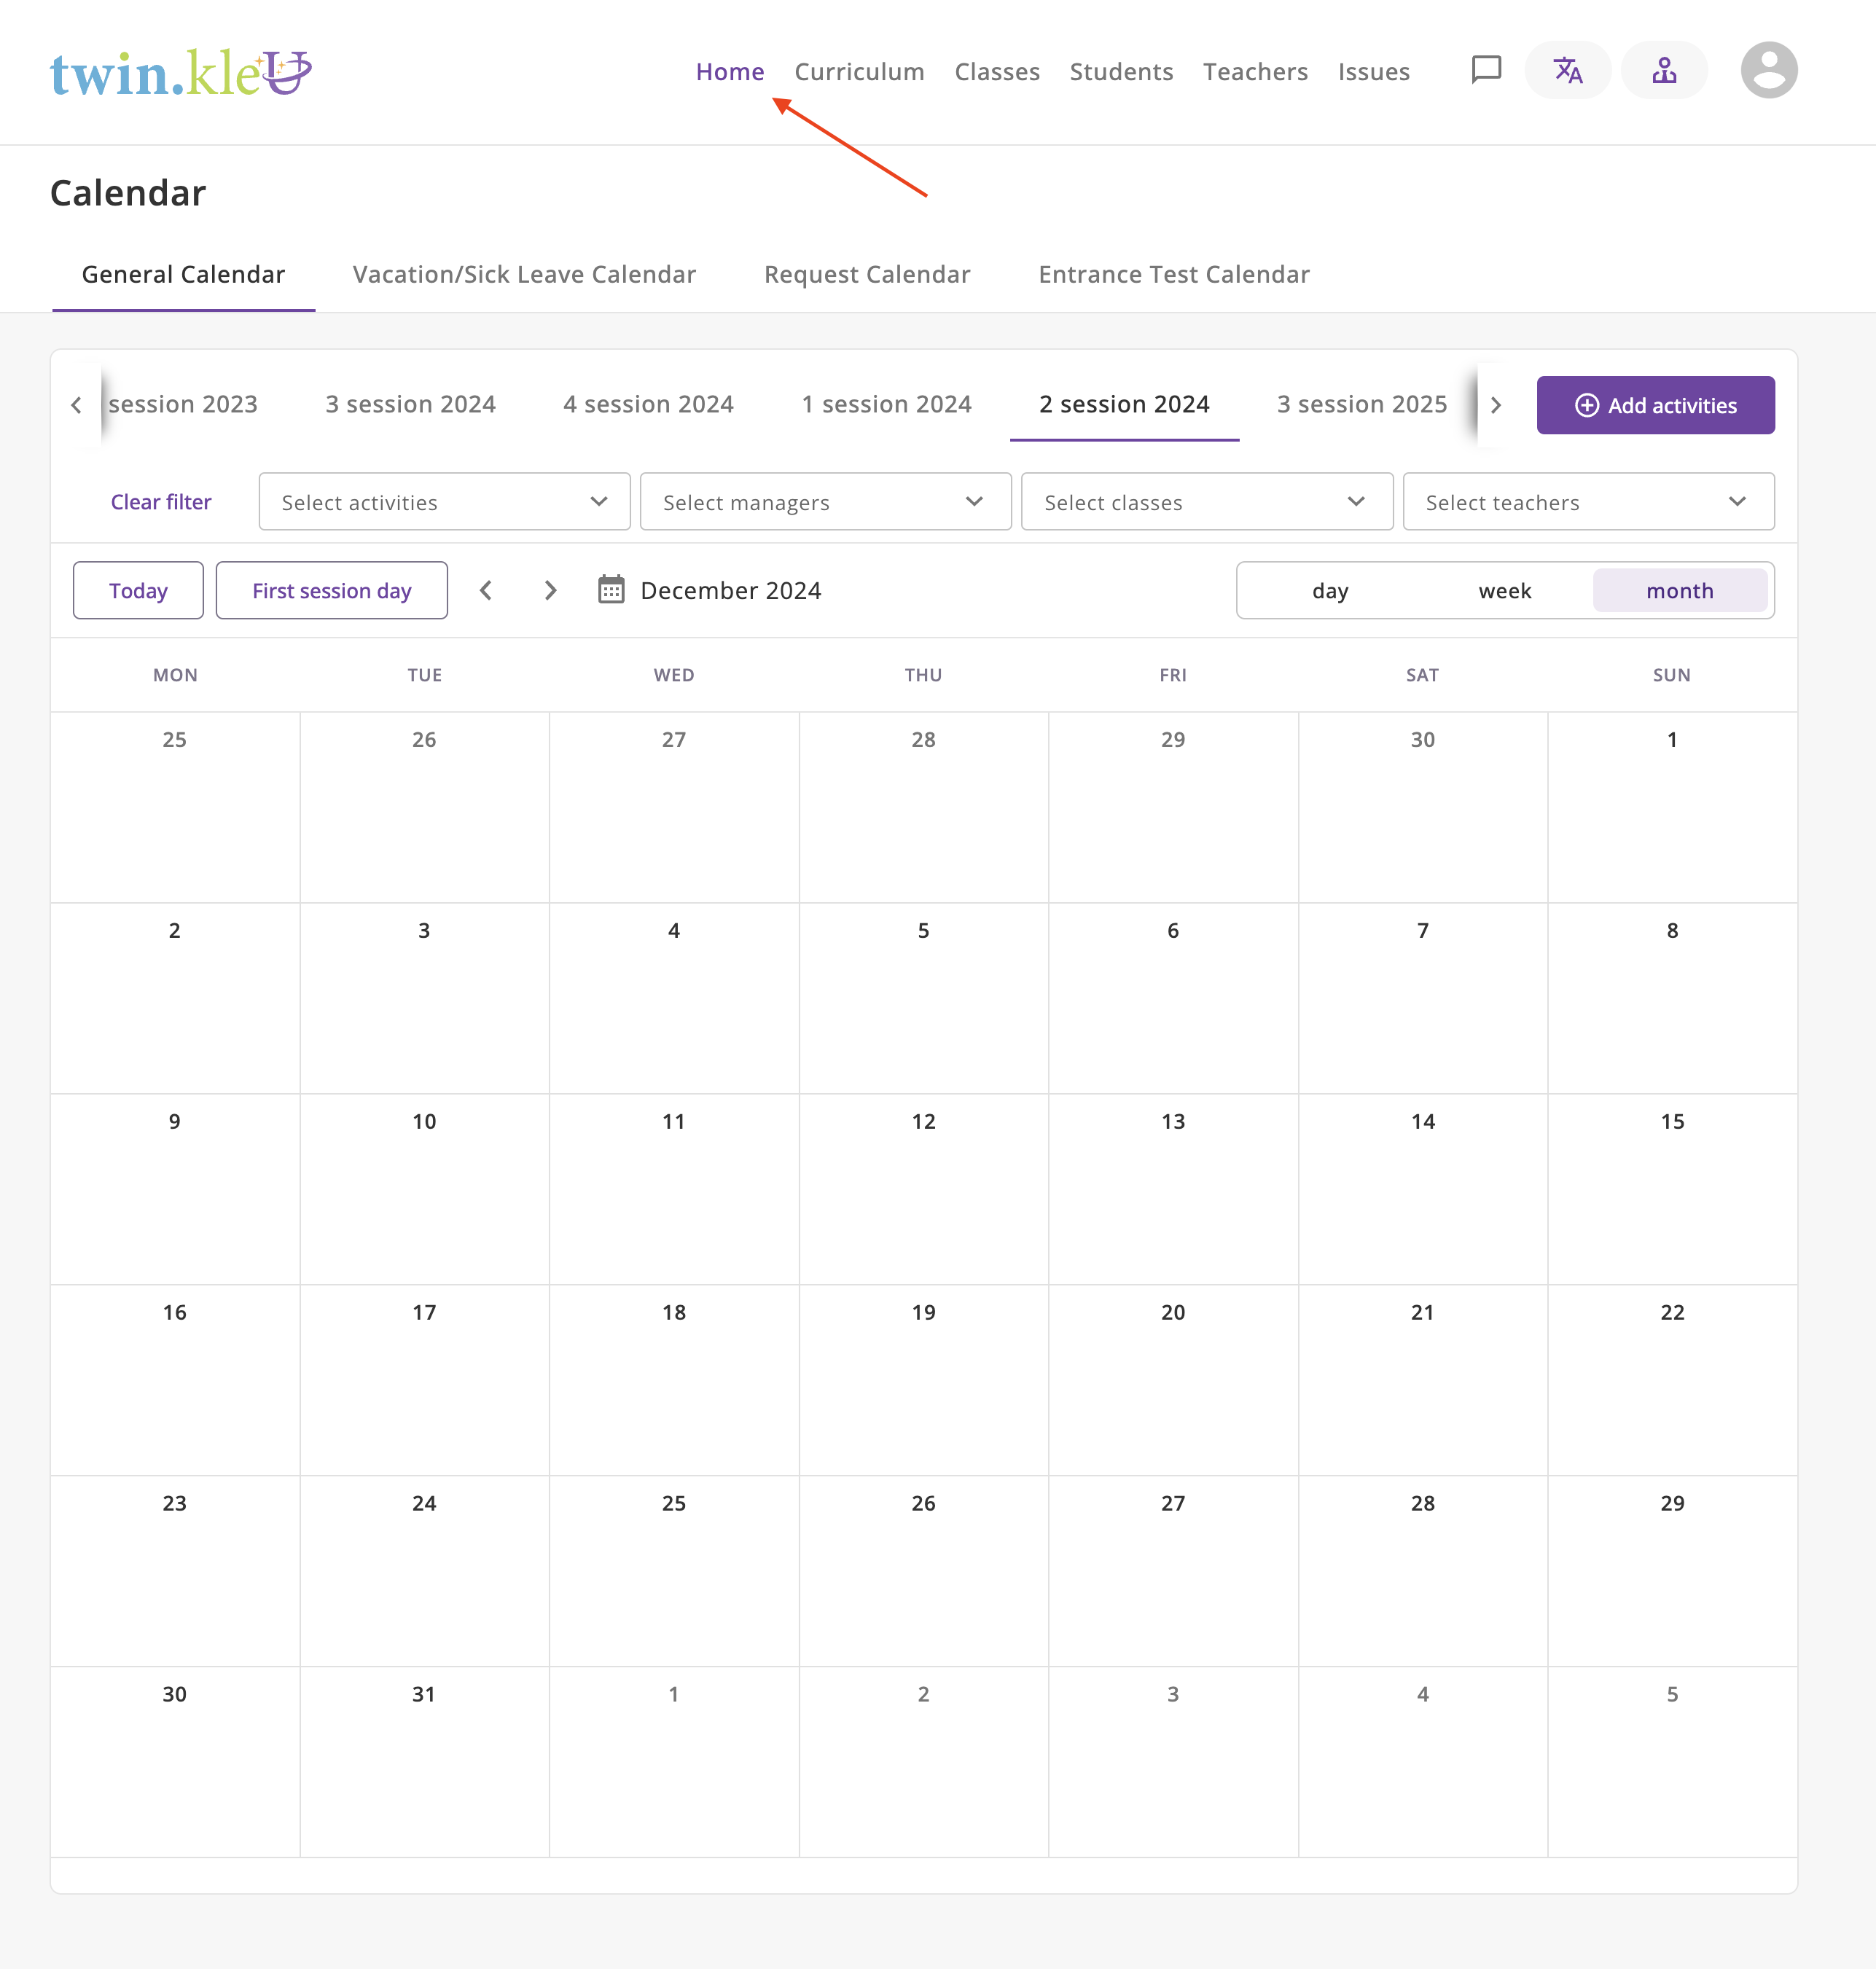
- Navigate to the Calendar.
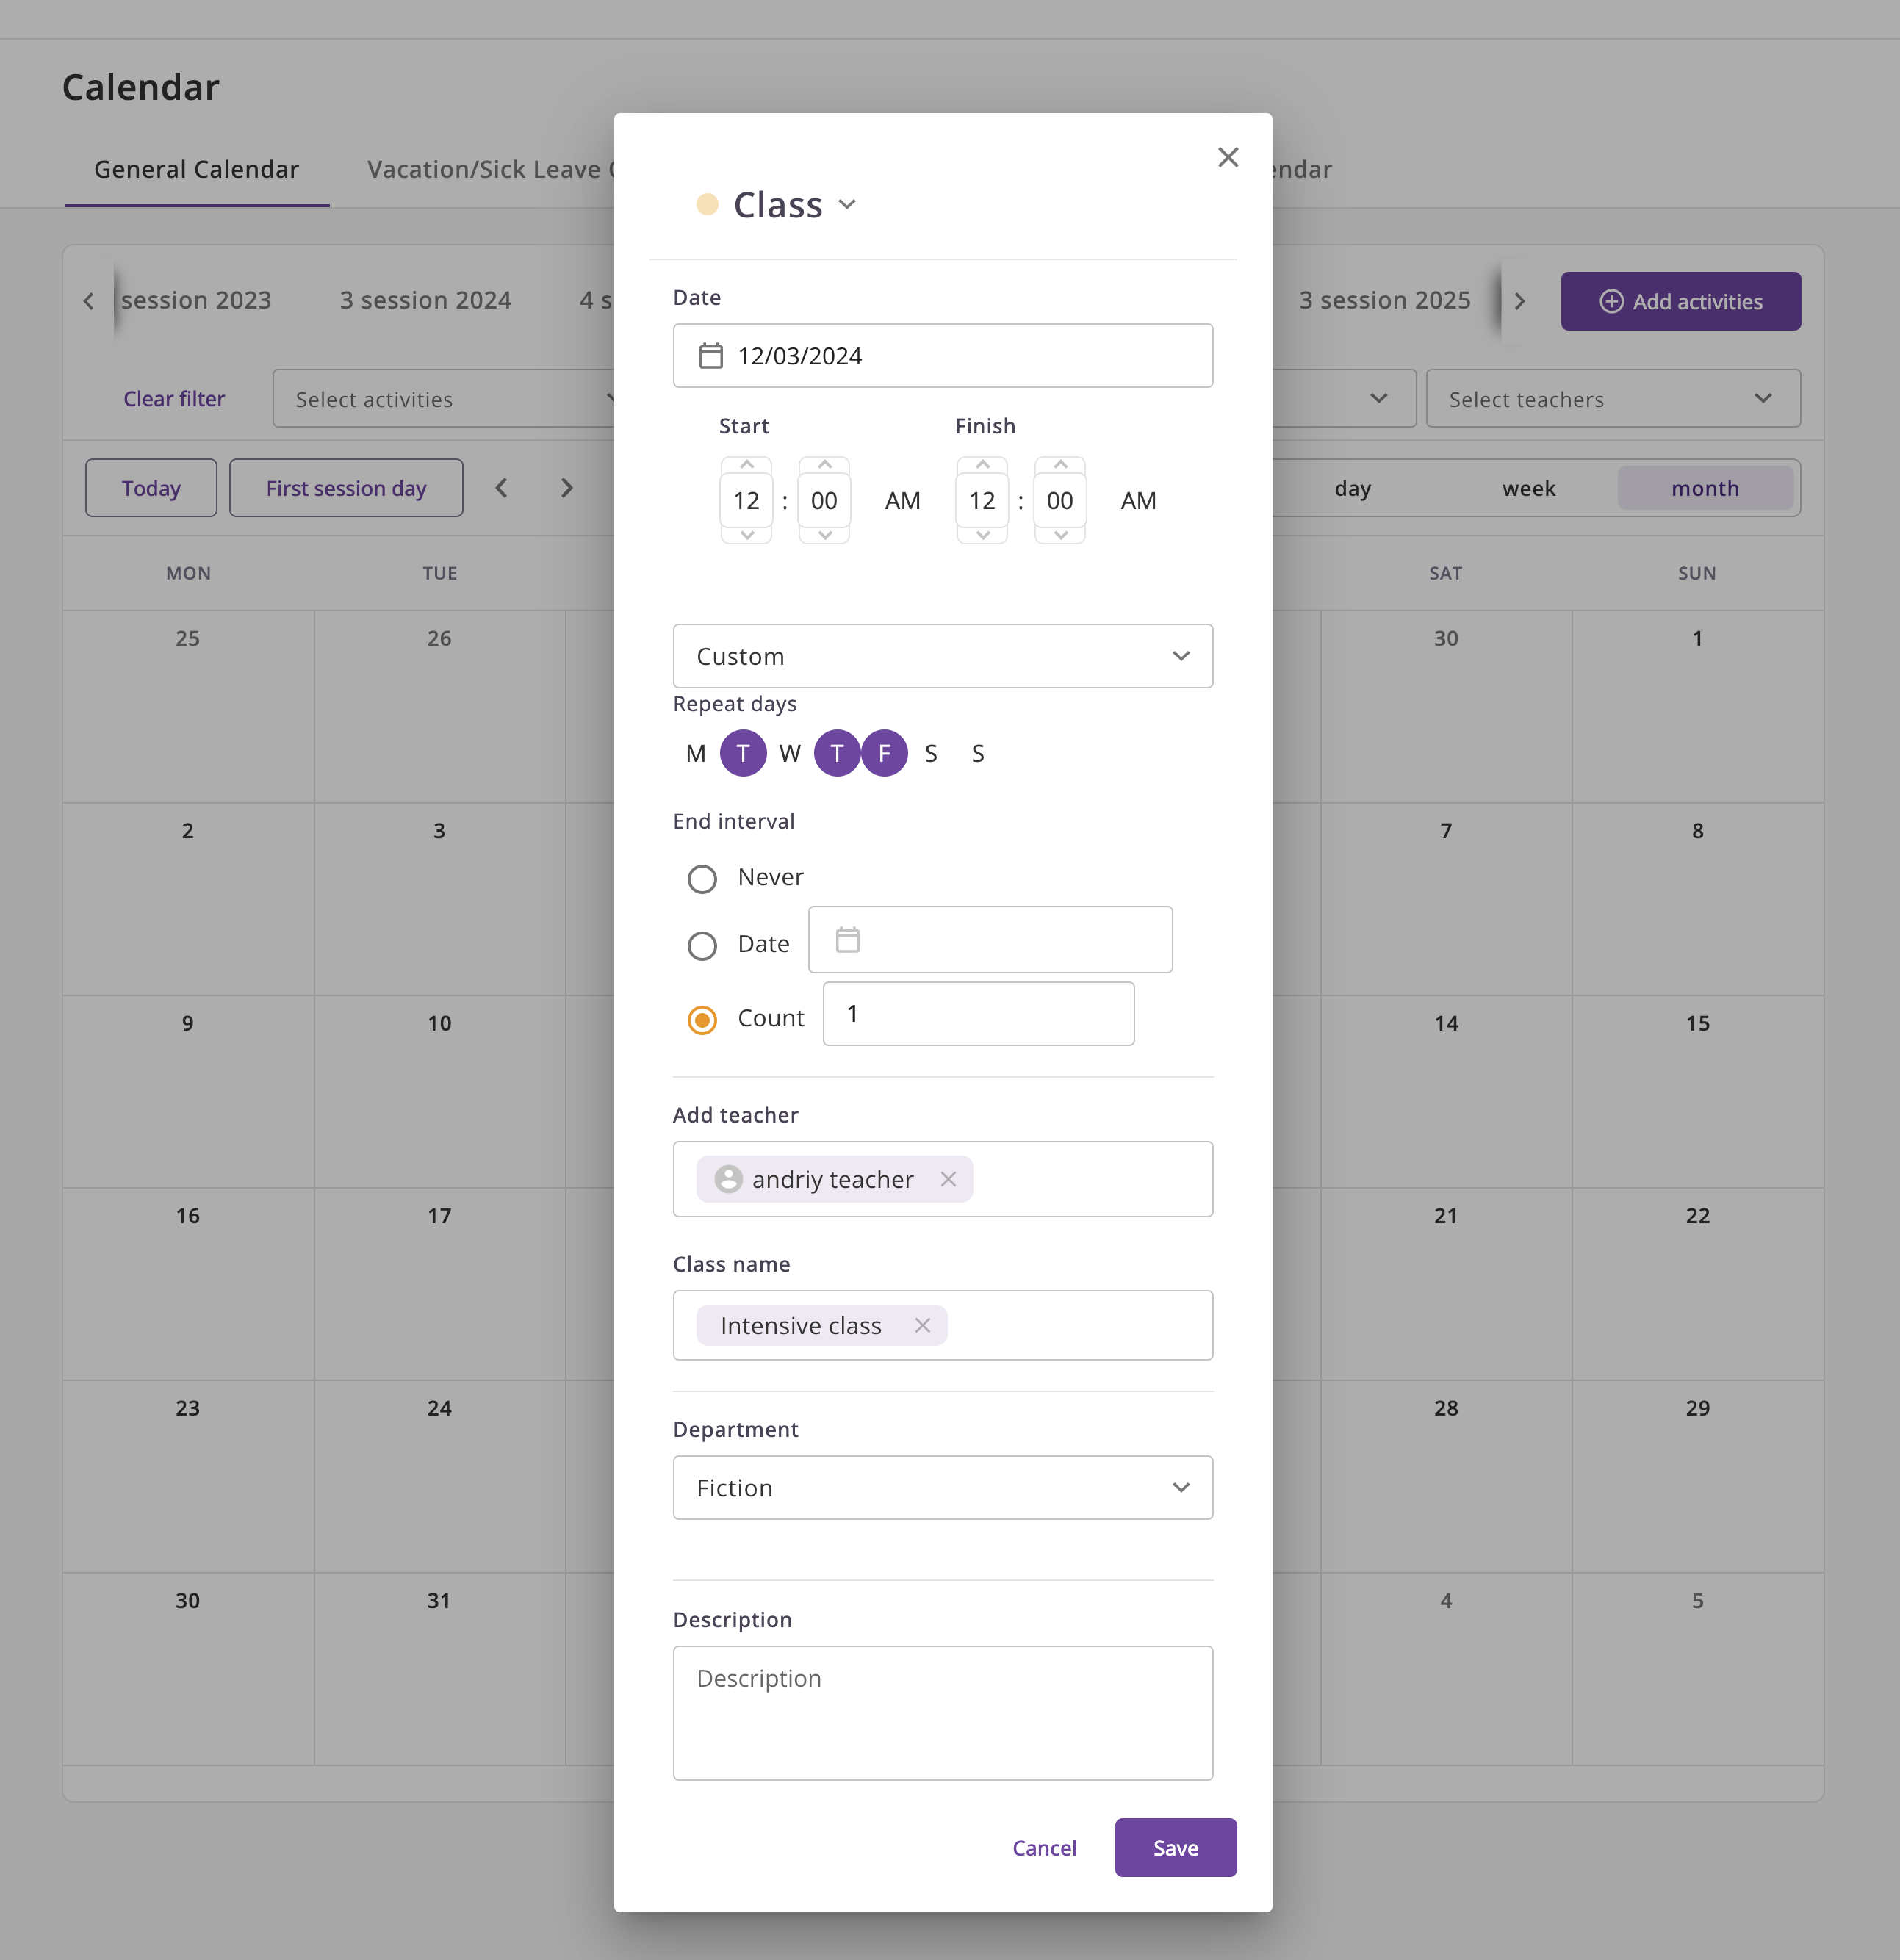
- Importantly. You must create an event in the session range that is specified in the Lesson Plan.
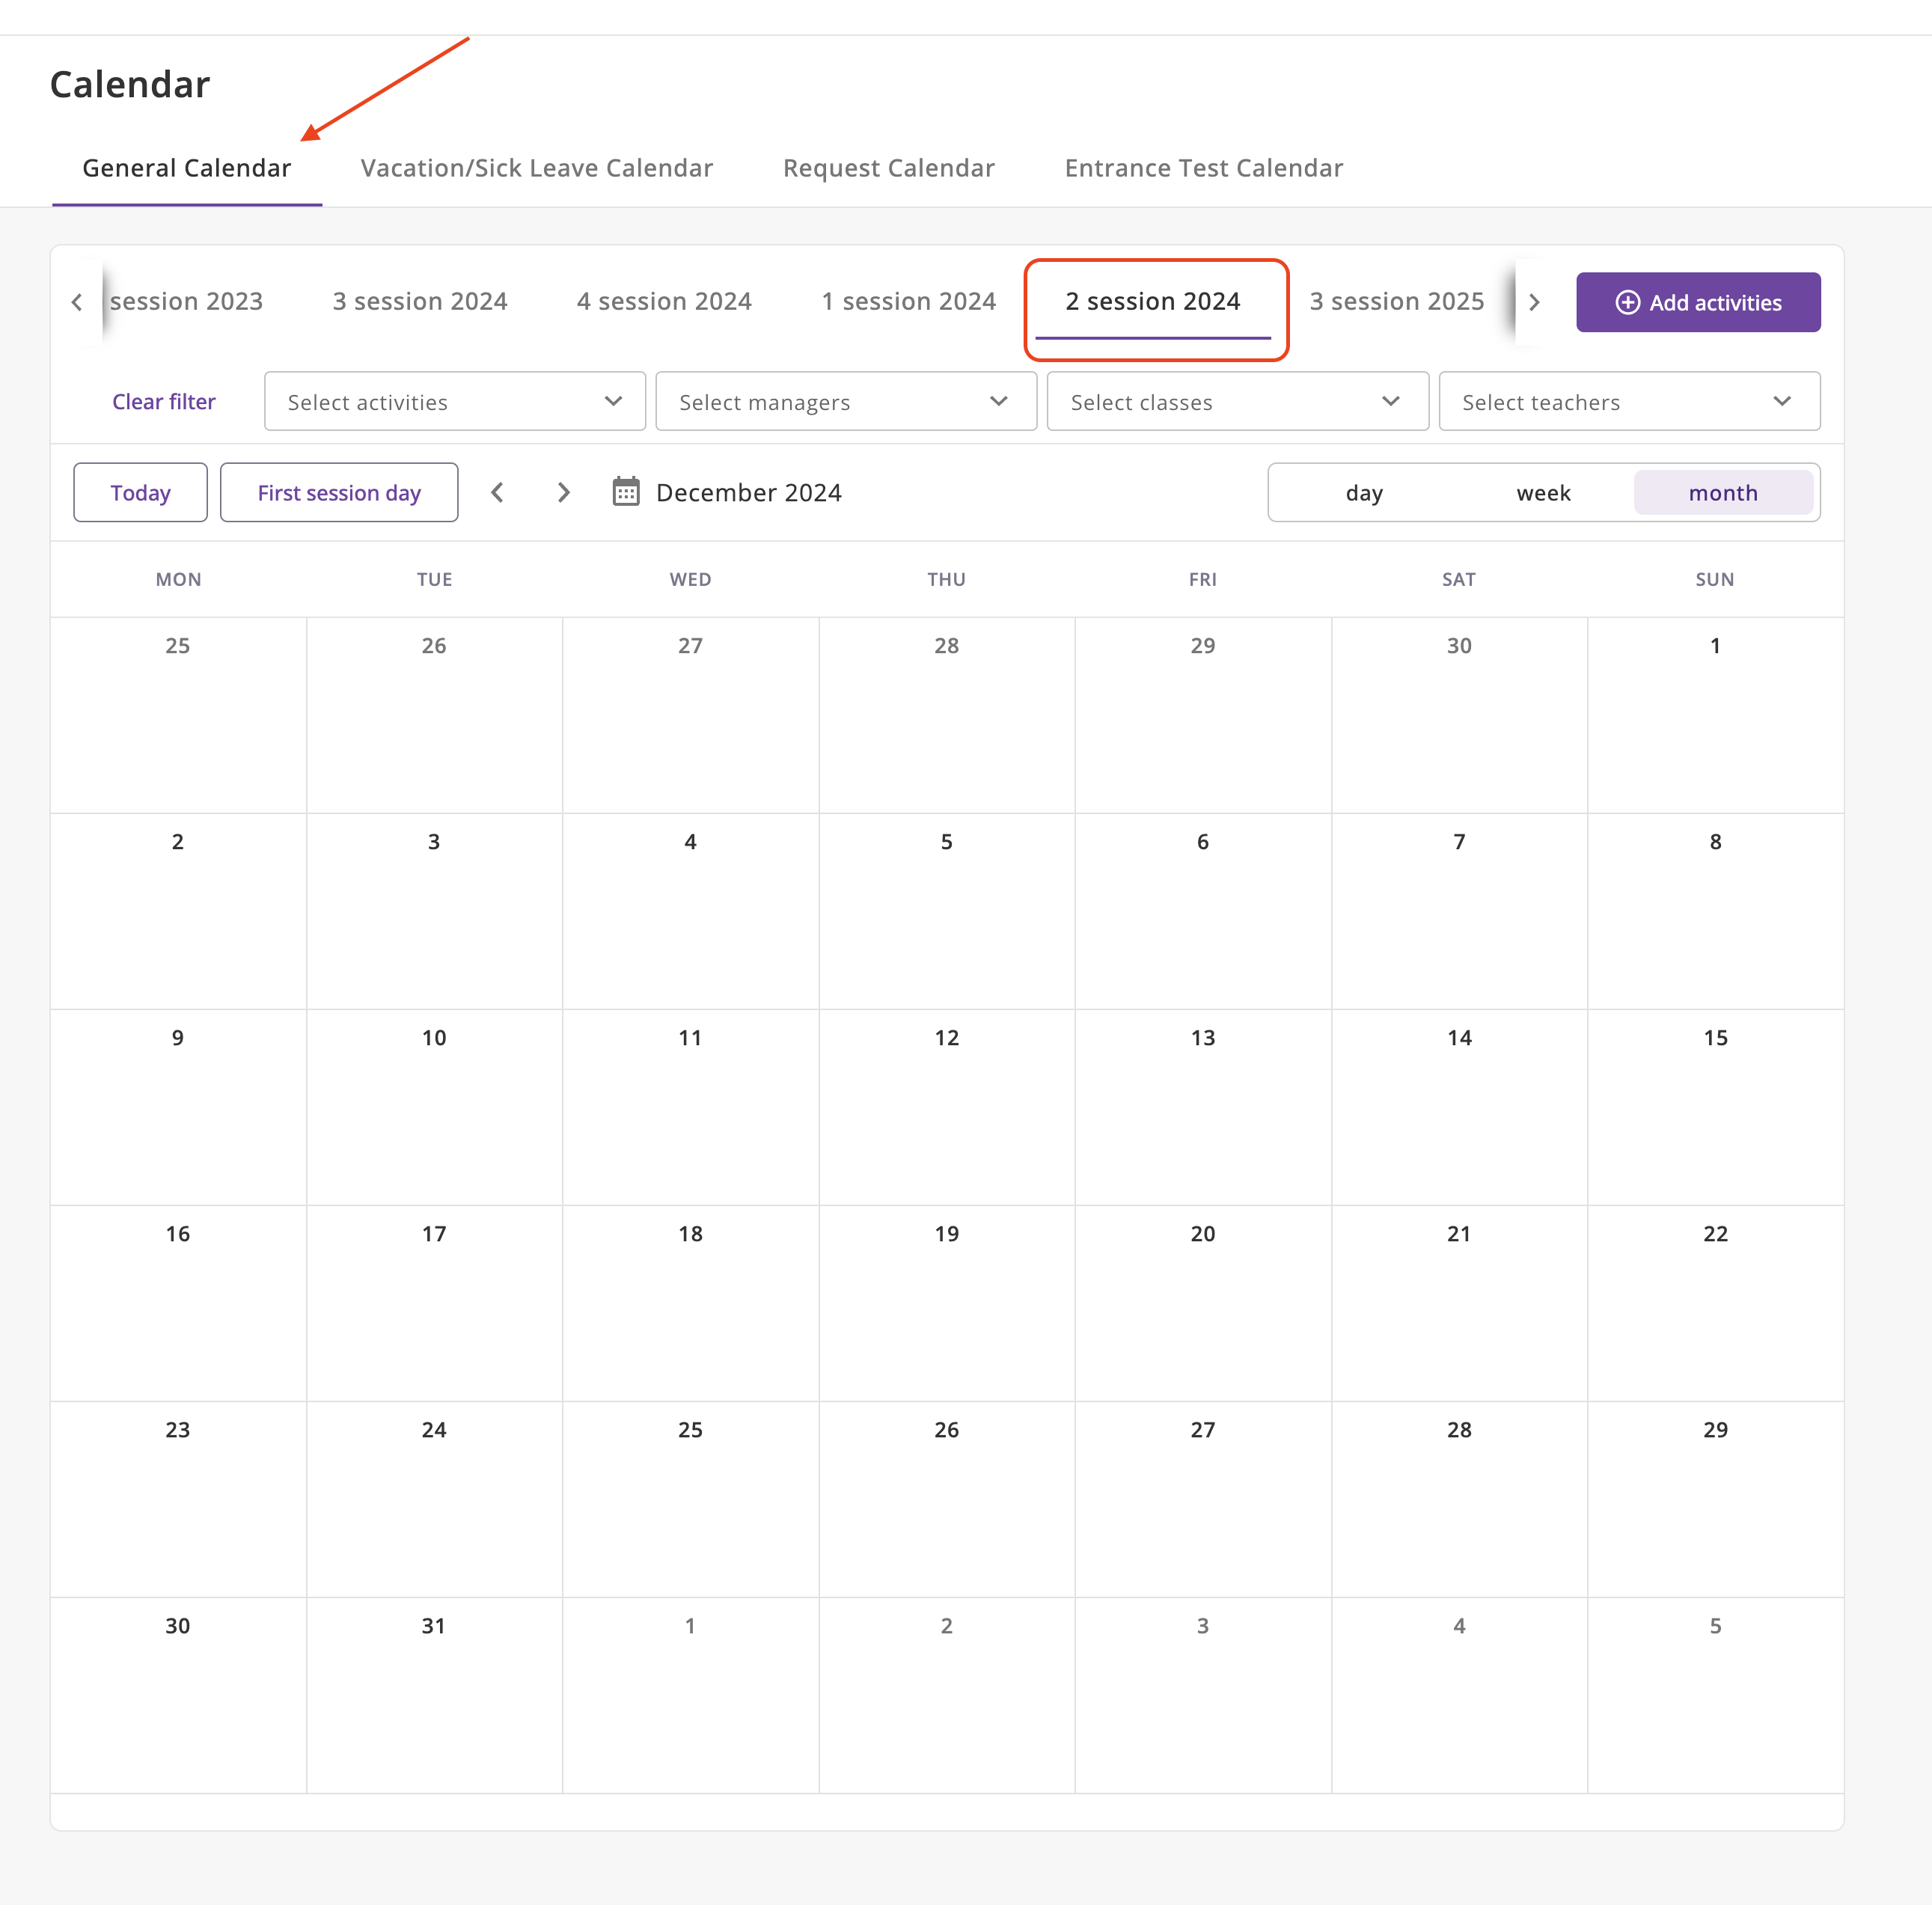
- Click on the Add Event button or click on the day in the calendar.
- Fill in the event form and click on the Save button.
- Please note that the Class must be of the same level and grade as the lesson plan
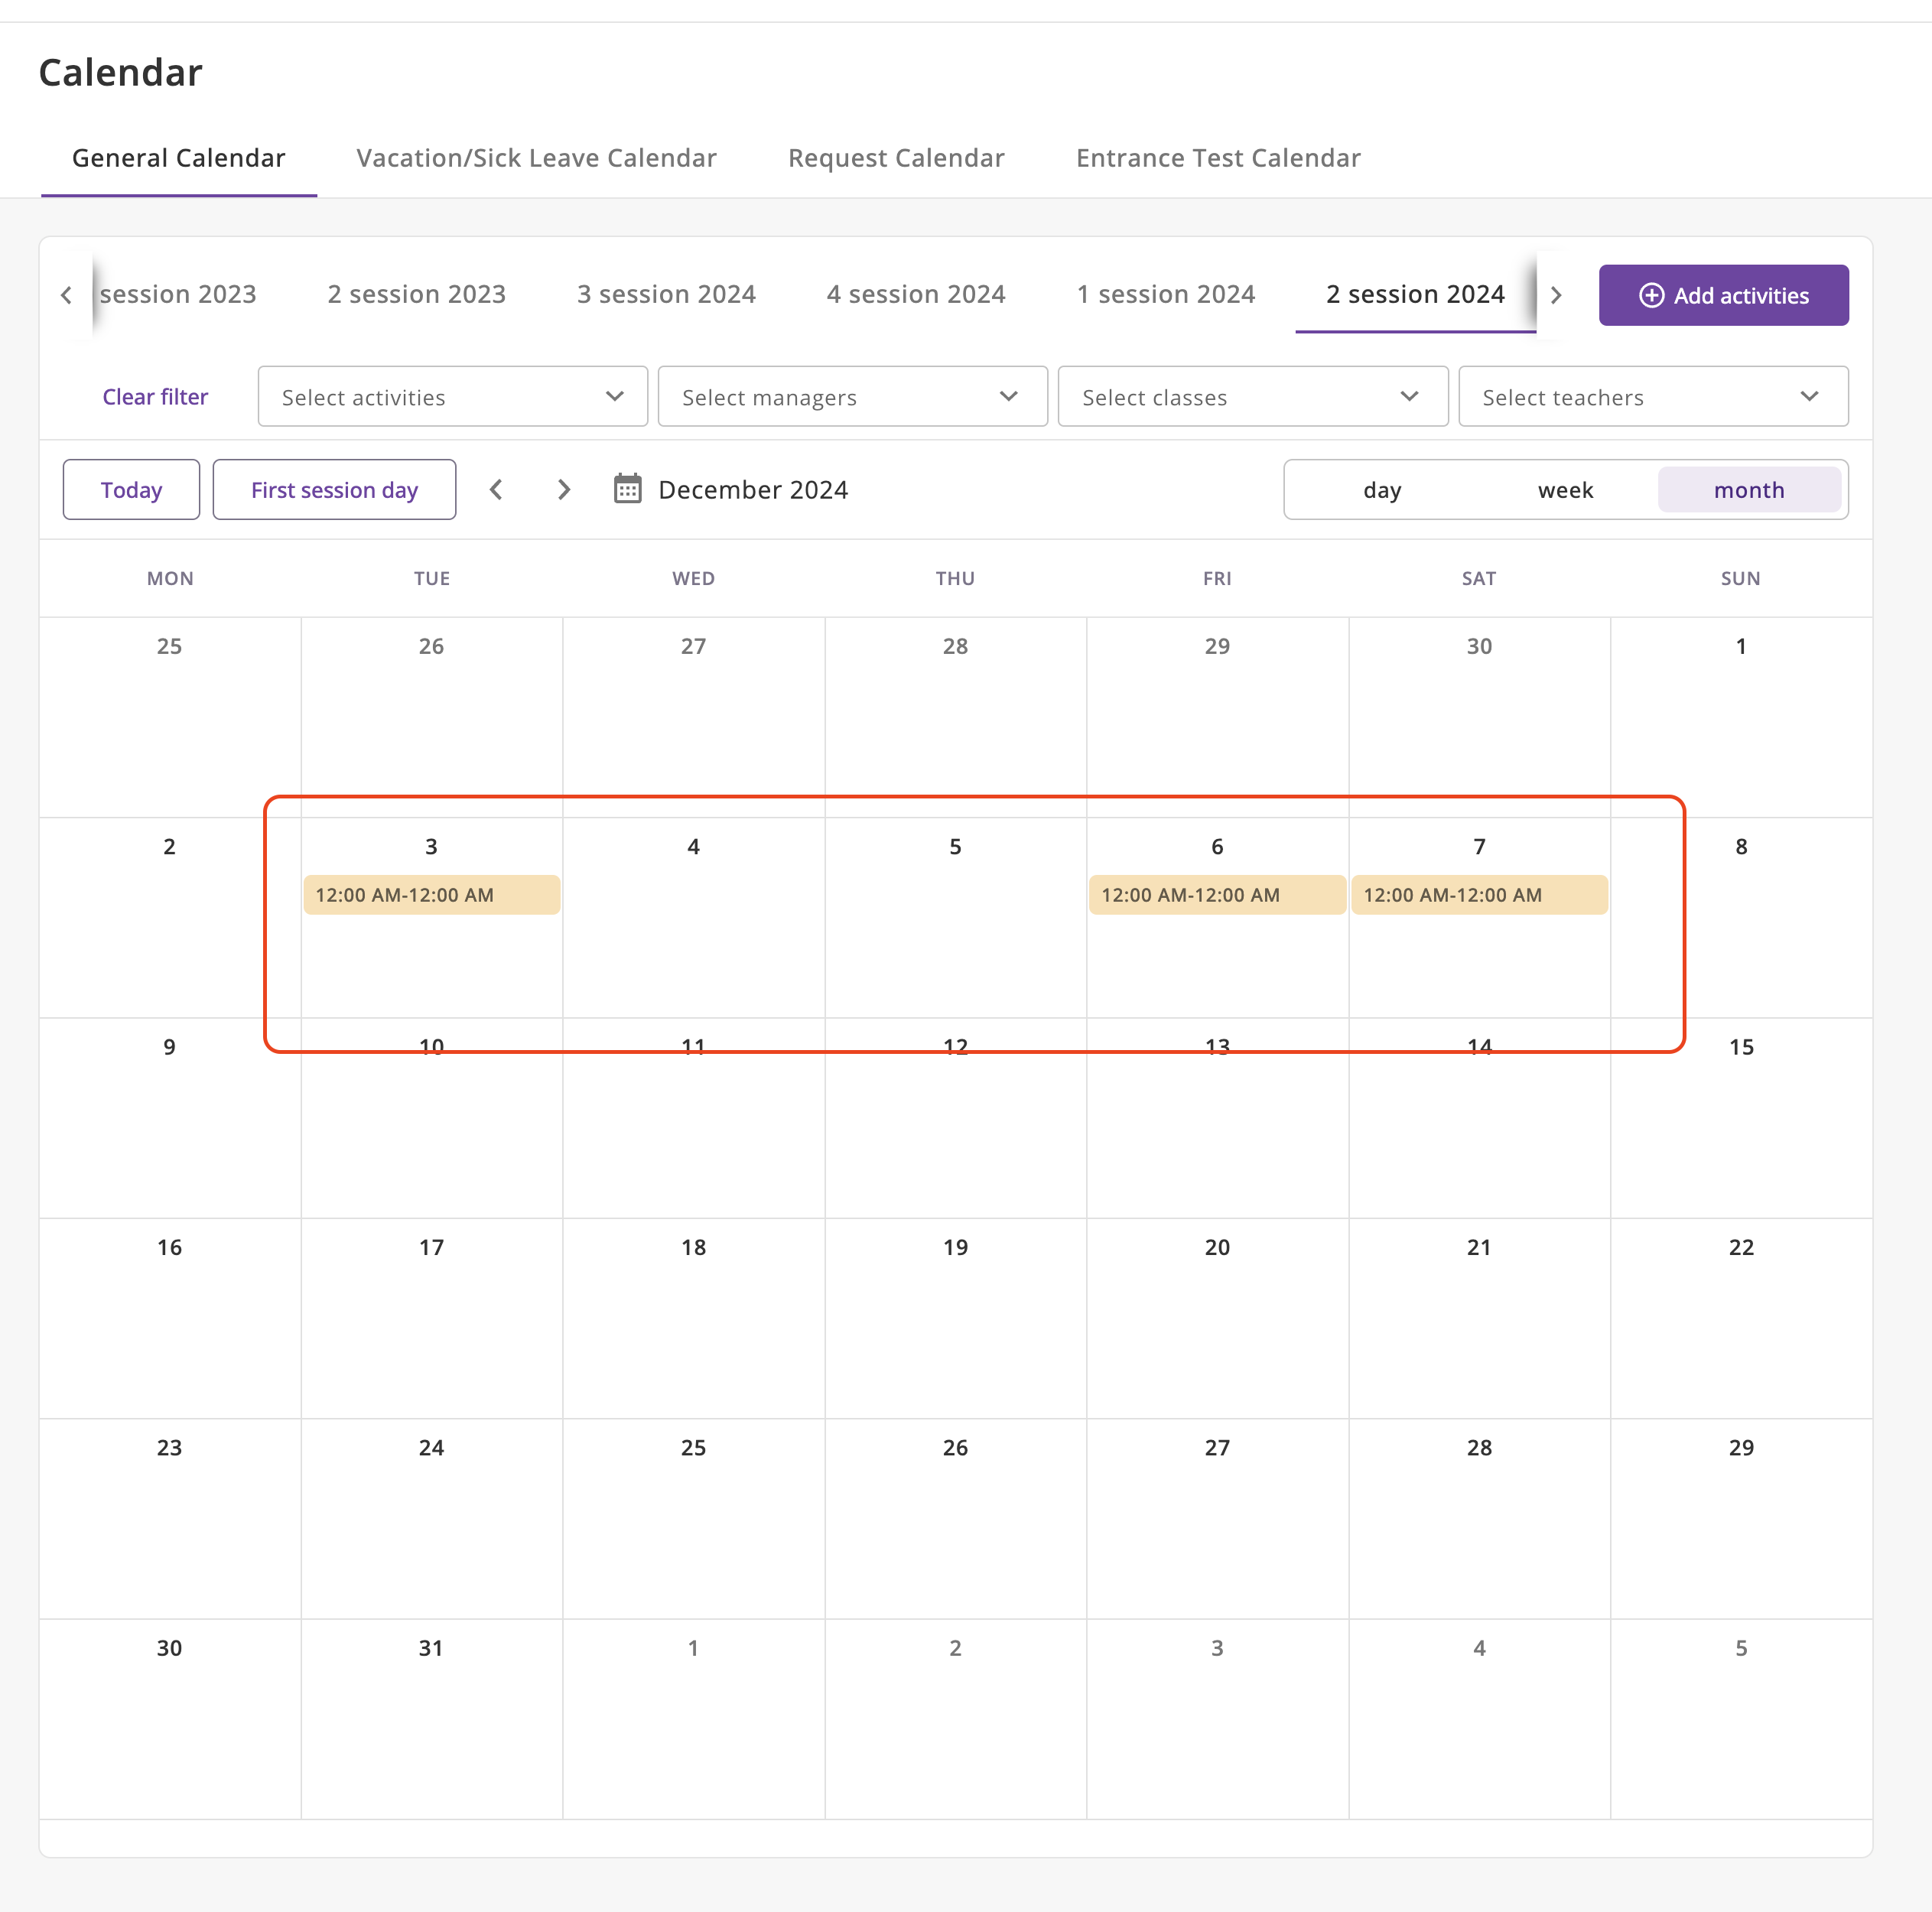
- You will see the created events in the calendar.
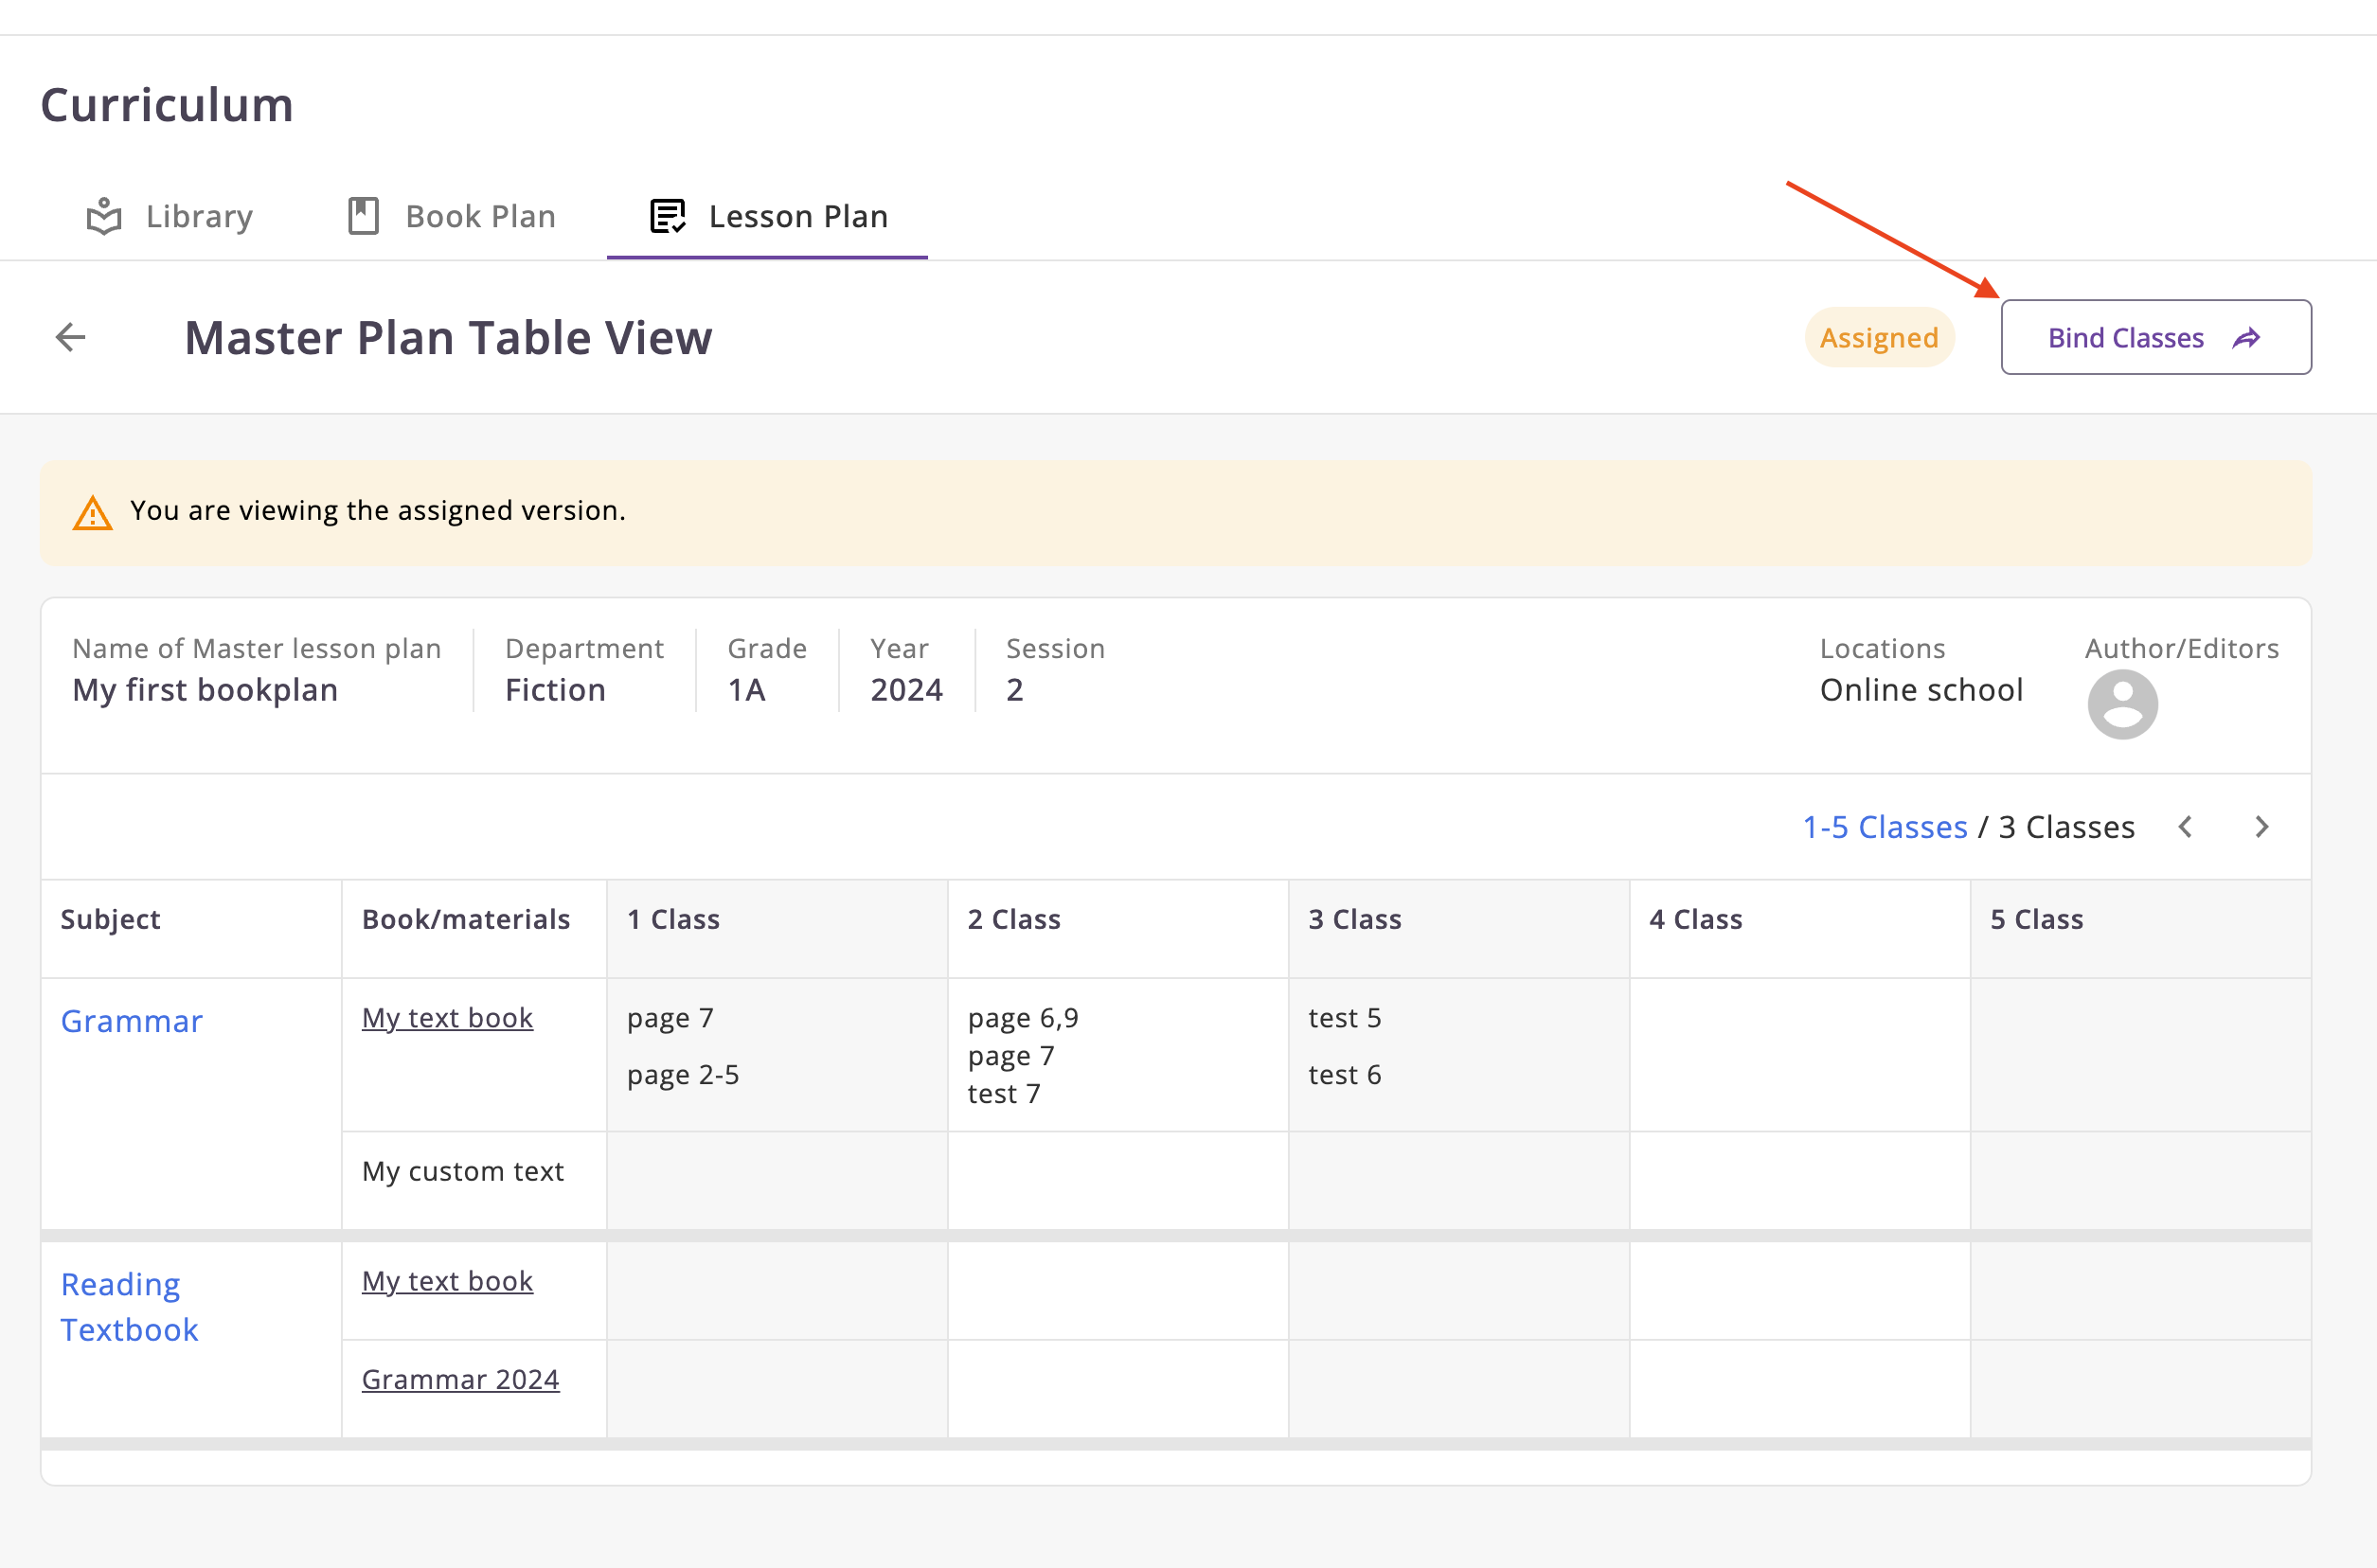
- After that, you should navigate to the Lesson Plan and redirect to the Assigned version.
- Click on the Assigned version button.
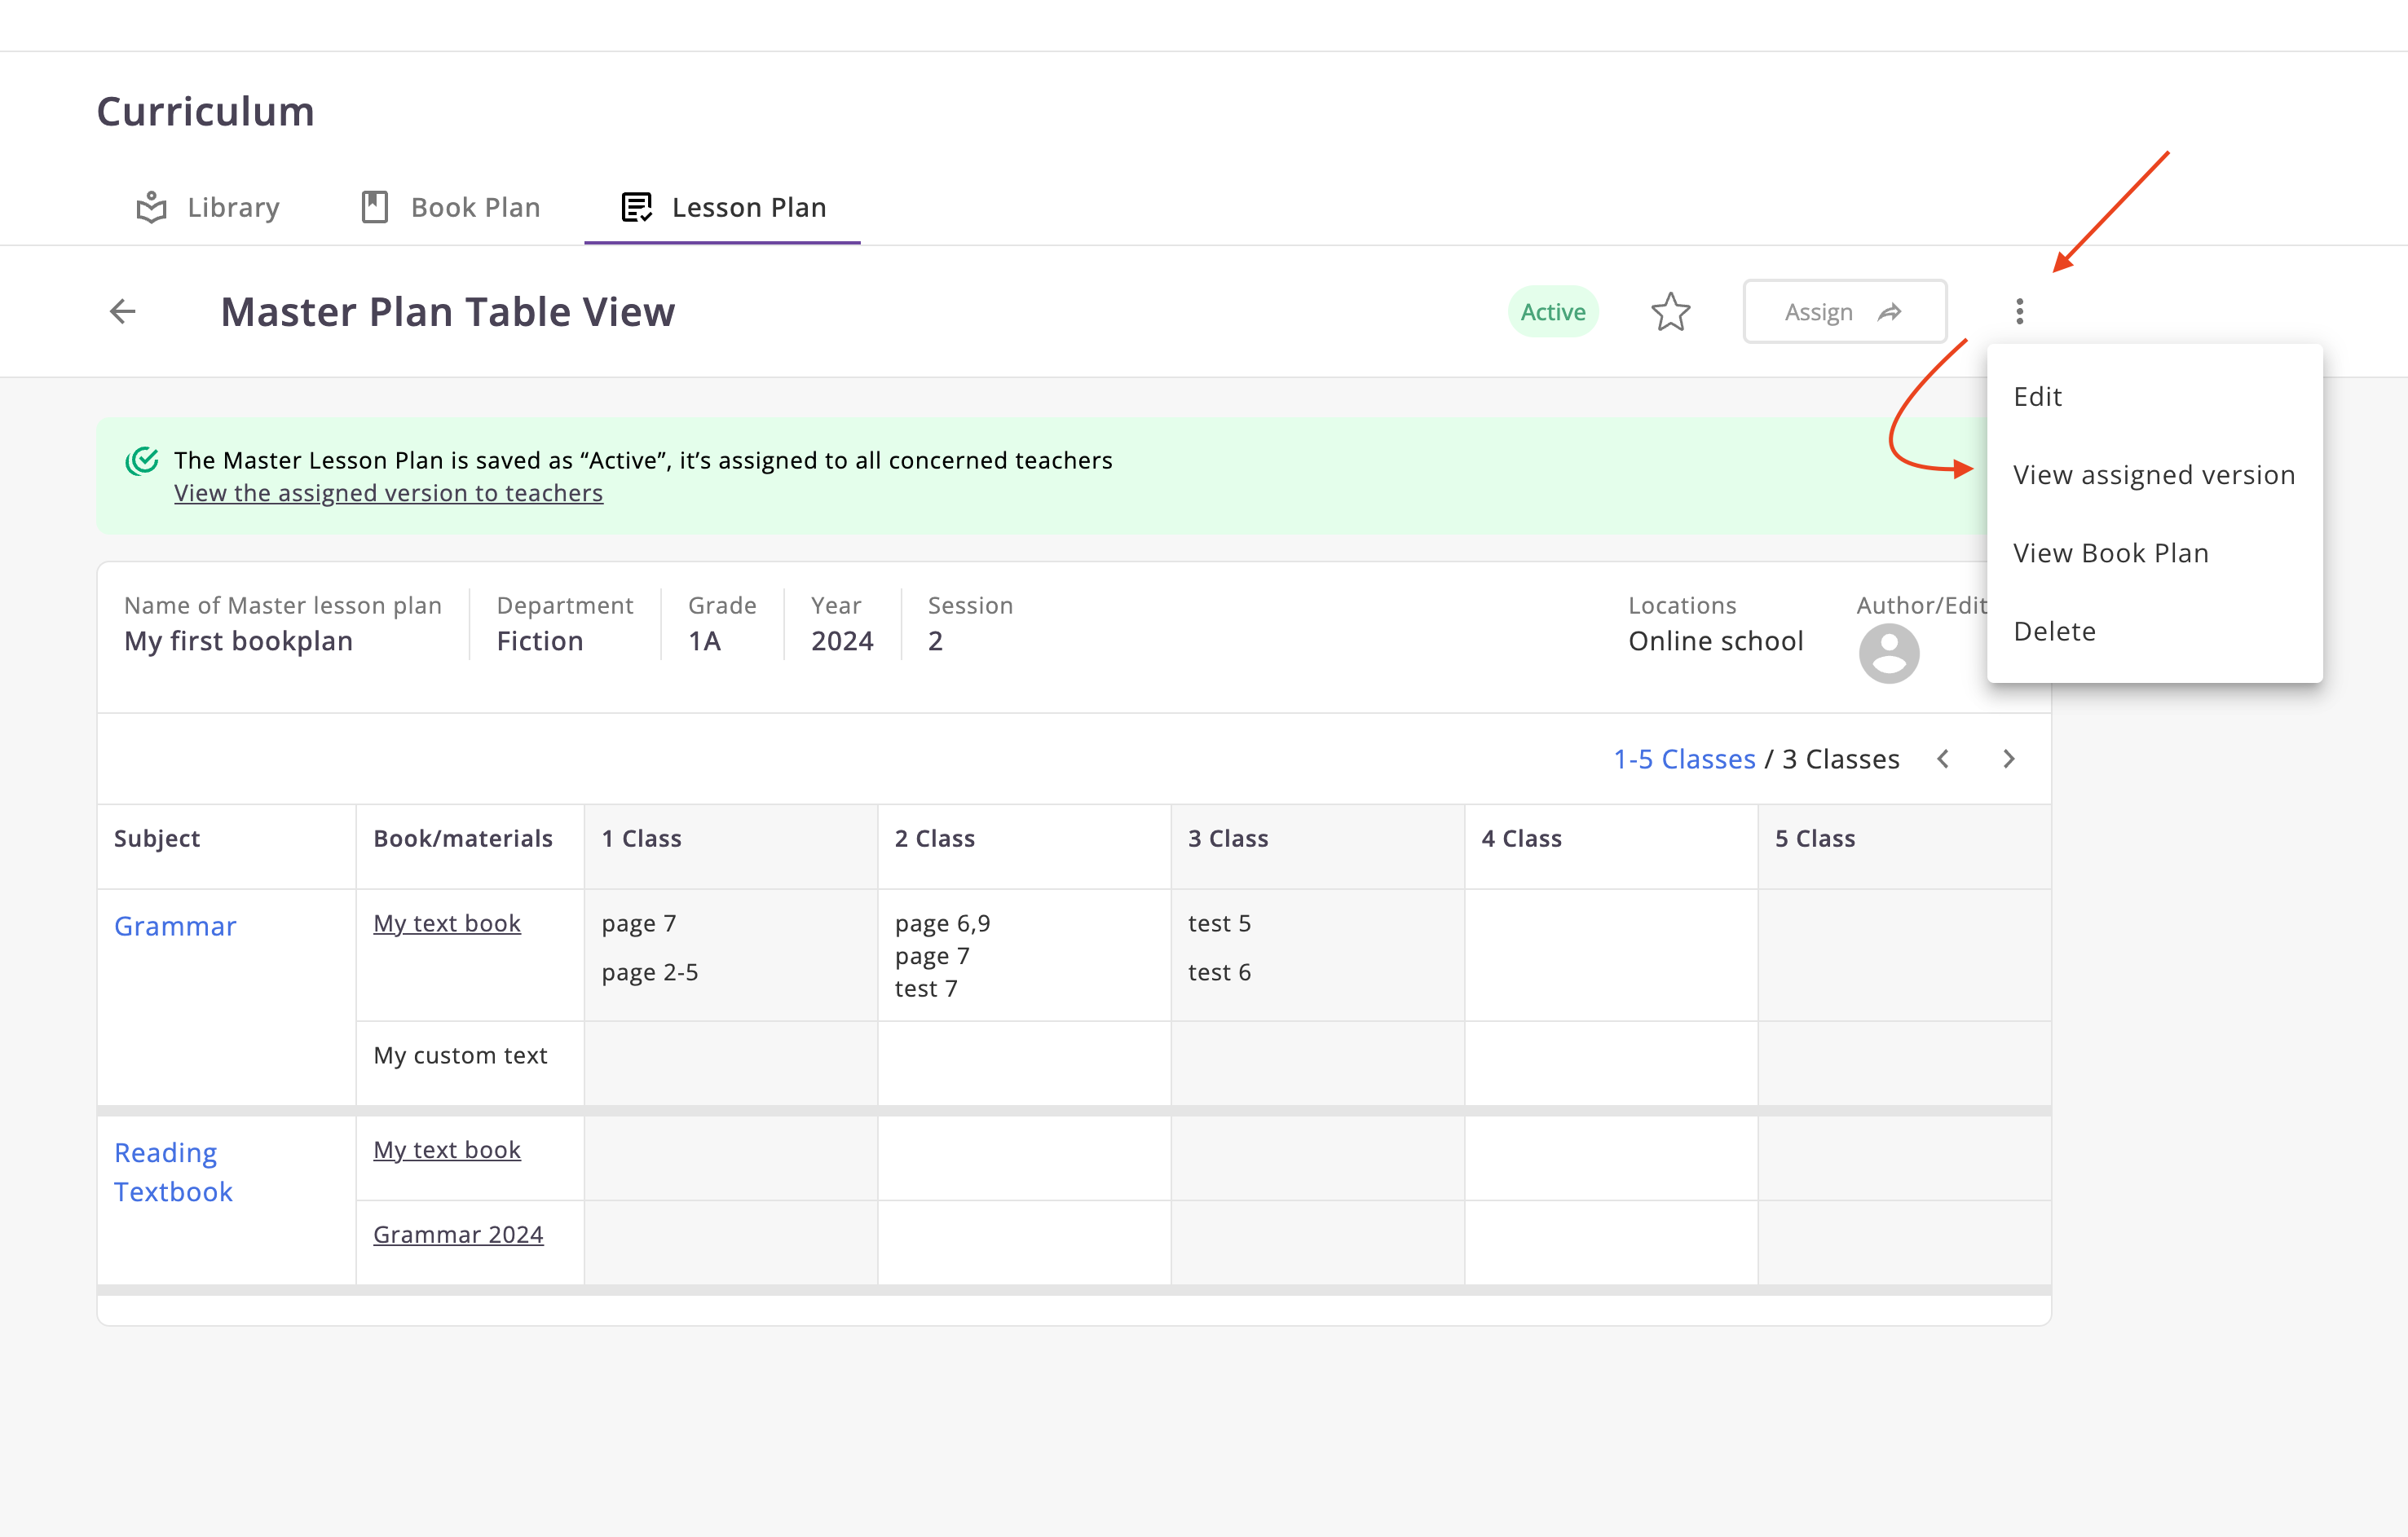
- Also, you can just click on the link
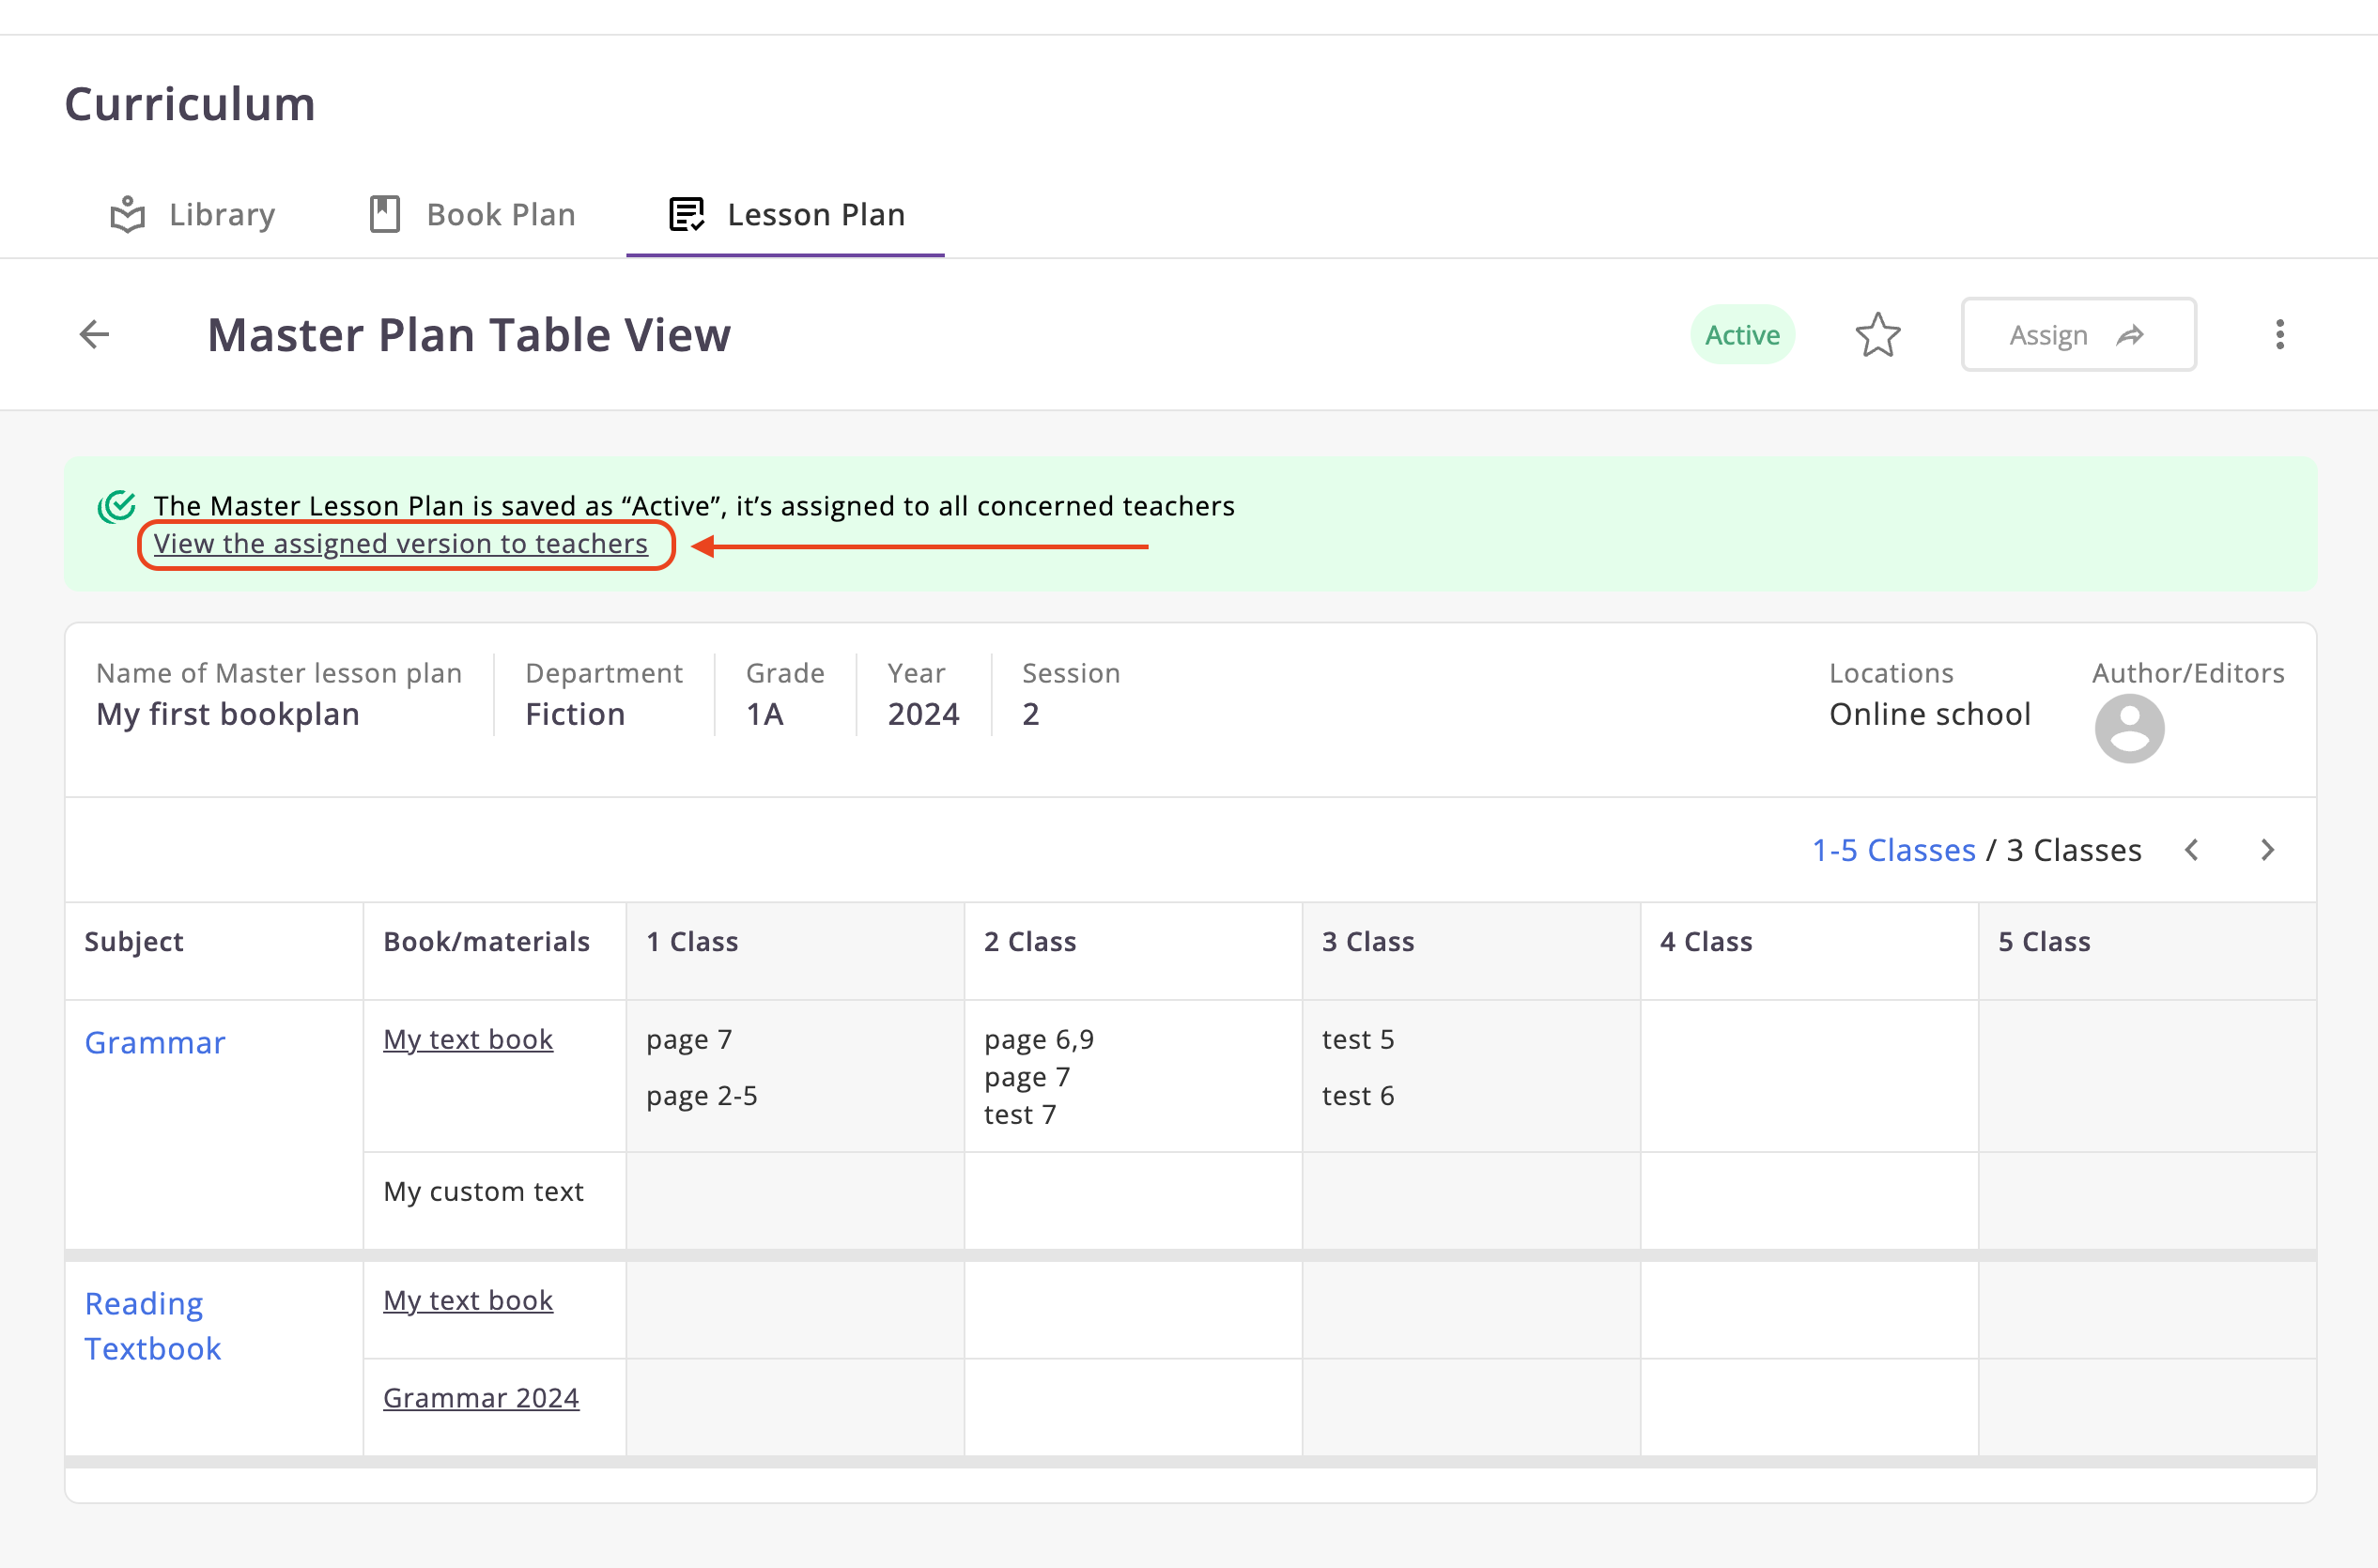
- You will see the Bind classes button. Click on it.
- Select the events that you want to bind to the lesson plan and click on the Save button.